background image

12

13

Bridge B1610

Bridge B1610

4

Adding cameras to Ivideon Bridge

9

In the 

Cameras

 section, select Your

Bridge from the list of connected devices,
and then click the gear icon (Configure
Bridge);

10

The bridge system will automatically scan
your LAN and list all devices available for

connection (cameras and DVRs). Select the
one you’d like to connect, after which the
camera/DVR settings menu will open on the
right side of the screen;

11

If your cameras or DVR weren’t discovered
a

utomatically, you can add them manually

by clicking the + button in the Connected 
devices section;

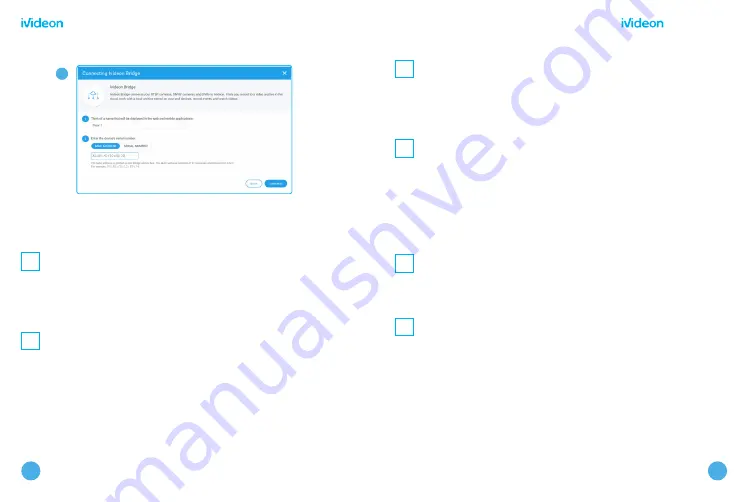
12

Enter the username and password for the
camera or DVR you want to connect. If you
don’t know what they are, you can contact
the

 hardware manufacturer, call your

system administrator, or check the included
instructions or documentation;

13

After entering the correct information, you’ll
s

ee an image preview from the camera and

be a

ble to change its name;

14

Once you’re done connecting your
camera, click Connect camera, after which
it will be listed in the 

Cameras

 section

of the web application.

Содержание Bridge B1610

Страница 1: ...act user technical support at the phone number 1 888 683 8950 United States 44 330 808 0350 United Kingdom 49 3222 109 47 81 Germany 33 9 77 55 06 86 France 39 069 4801515 Italy Please scan QR code to find your country contact number or send us questions about Ivideon Bridge support ivideon com ...

Страница 2: ...evice 4 Technical specifications 6 Important safeguards and warnings 7 Configuring Ivideon Bridge for work 8 Adding cameras to Ivideon Bridge 12 Connecting services 16 Warranty certificate 17 Ivideon Bridge B1610 Items included DC 5V 2A power adapter Ethernet cable Quick start guide The items illustrated may differ from those in the package ...

Страница 3: ...ice Charge indicator Network connection indicator Ethernet port HDMI port for connecting a monitor 1 6 2 7 3 4 5 7 3 4 5 1 2 6 NOTE Pressing and immediately releasing the RESET button restarts the device Jack for DC 5V 2A power adapter USB ports RESET button ...

Страница 4: ...eguards and warnings 1 Follow the requirements and recommendations set out in the instructions 2 Avoid sunlight or other bright light sources shining directly on the device body 3 Don t place the device in water or any other liquid 4 If there is a strange smell or you see smoke coming from the device stop using it If this happens disconnect the device from the power source immediately Continued us...

Страница 5: ... not yet have an Ivideon account register on the website by clicking Create an account 2 In the Cameras section select Connect a device 3 Select Ivideon Bridge Enter a name for your bridge followed by the device s MAC address or serial number both should be listed on the underside of the bridgeor on the packaging 5 Connect the Ivideon Bridge to the internet To do so connect the device to your inte...

Страница 6: ...e the video from your cameras may be unavailable or distorted something that will also affect record ing to the cloud archive if you have recording to the cloud archive turned on To ensure your cameras work correctly with Ivideon Bridge we also recommend using a fixed IP for all the devices in your LAN If it changes video from the cameras will be unavailable and you ll have to change the settings ...

Страница 7: ...11 If your cameras or DVR weren t discovered automatically you can add them manually by clicking the button in the Connected devices section 12 Enter the username and password for the camera or DVR you want to connect If you don t know what they are you can contact the hardware manufacturer call your system administrator or check the included instructions or documentation 13 After entering the cor...

Страница 8: ...14 15 Bridge B1610 Bridge B1610 9 10 11 12 13 ...

Страница 9: ...ns for business section Warranty certificate Thanks for choosing Ivideon Bridge B1610 The warranty period is 12 months from the date of the product s sale to the consumer and covers only items brought by official importers The operational life of the product is 3 years During the warranty period the owner has the right to free repairs to the product in case of malfunctions that result from product...

Страница 10: ...m the warranty certificate The product label is damaged or missing or the serial number or its service code has been changed is illegible or is unclear The device has been used not for its intended purpose or not in accordance with the instruc tions for use The product has been damaged because it has been connected to defective equipment from other companies If faults have arisen as a result of th...

Страница 11: ... in my presence I have no complaints about the quality of the product I am familiar with the conditions of warranty service and agree with them SERIAL NUMBER BUYER S SIGNATURE SELLER S SIGNATURE DATE OF SALE SELLING COMPANY SELLING COMPANY S NOTES SELLING COMPANY S ADDRESS SELLING COMPANY S PHONE NUMBER Place for stamp This is a deliberately clean page ...

Отзывы: