background image

Before using the product

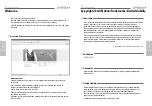
Welcome

iriver web site

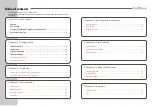
Copyrights/Certification/Trademarks/Limited Liability ………………………………… 1

Precautions and Safety ……………………………………………………………………… 2

Chapter 4 I Useful features

Settings Menu  ……………………………………………………………………………… 50

Settings menu navigation ………………………………………………………………… 51

Menu settings ………………………………………………………………………………… 53

Chapter 5 I Additional information

Firmware upgrade   ………………………………………………………………………… 66

Initializing H10  ……………………………………………………………………………… 67

Troubleshooting  …………………………………………………………………………… 68

Chapter 6 I Appendix

Specifications ………………………………………………………………………………… 72

FCC …………………………………………………………………………………………… 73

Chapter 2 I Quick start

Turning on / off the player and playing music  ………………………………………… 28

Controlling volume and changing modes ……………………………………………… 29

Chapter 3 I Basic operation

Playing music  ……………………………………………………………………………… 32

Playlist function ……………………………………………………………………………… 38

Auto Sync function ………………………………………………………………………… 39

Recording …………………………………………………………………………………… 40

Chapter 3 I Basic operation (continued)

Viewing images ……………………………………………………………………………… 43

Viewing text  ………………………………………………………………………………… 45

Browser function  …………………………………………………………………………… 47

Chapter 1 I Getting started

Features of the H10 …………………………………………………………………………… 8

Components ………………………………………………………………………………… 10

Locating the controls ……………………………………………………………………… 11

LCD screen display  ………………………………………………………………………… 14

Connecting the product  …………………………………………………………………… 16

Installing the software  ……………………………………………………………………… 23

Table of contents

This manual covers the use of the H10 player hardware.
For instructions on related software and instructions for getting music on your player, please see the included iriver plus
user manual.

Содержание H10

Страница 1: ...www iriver com Instruction Manual H10 5GB pure Thank you for your purchase Please read this manual carefully before using your new player ...

Страница 2: ...ying music 28 Controlling volume and changing modes 29 Chapter 3 I Basic operation Playing music 32 Playlist function 38 Auto Sync function 39 Recording 40 Chapter 3 I Basic operation continued Viewing images 43 Viewing text 45 Browser function 47 Chapter 1 I Getting started Features of the H10 8 Components 10 Locating the controls 11 LCD screen display 14 Connecting the product 16 Installing the ...

Страница 3: ...ents through this manual and should not draw inferences Users are responsible for observing the copyrights and intellectual properties 1999 2005 iriver Limited All rights reserved www iriver com Obtain information about your player look for updates and find answers to questions at our web site Use the firmware system software upgrade function of our products from the site to continuously improve t...

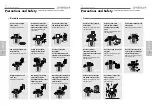
Страница 4: ...d Electrical Shock may result Unplug the AC adapter during electrical storms Electrical Shock may result Electricity Please read the notices before using for your safety Please read the notices before using for your safety Do not place heavy objects on the device Damage to your player may result from improper use Avoid contact with water and other liquids Damage to your player may result Keep away...

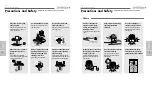
Страница 5: ...aged Data can be damaged because of physical impact lightning and power failure Users are responsible for creating backup data and iriver Limited is not responsible for any damaged data Do not use headphones earphones while cycling driving or operating any motorized vehicle It is dangerous and is illegal in some areas Do not use headphone earphones at high volume Hearing experts advise against lis...

Страница 6: ...ower connecting the adapter player 18 Connecting the power connecting the adapter cradle 19 Connecting earphone remote control 20 Connecting the cradle 21 Connecting the cradle Connecting PC 21 Connecting the cradle Line in connection 22 Connecting the cradle Line out connection 22 Installing the software 23 Installing iriver plus 23 This manual covers the use of the H10 player hardware For instru...

Страница 7: ...ve software iriver plus The intuitive software makes it easy to manage all of your music 5 Faster file transferring Supporting USB 2 0 interface USB 2 0 supports transfer rates up to 480Mbps 6 Firmware upgradeable Firmware upgrades keep your player up to date 7 Photo and text viewer View digital photos or text files on the player s color screen 8 Enhanced 3D sound SRS WOW sound effect technology p...

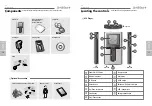
Страница 8: ...uick Start Guide Earphones AC Adaptor Carrying Case Installation CD Cable Optional Accessories H10 Player Power ON OFF button Built in microphone LCD screen Cancel button Up Down scroll button Select button Play Pause button Previous button Next button HOLD switch Earphone Remote control jack USB Adapter jack Battery release button Cradle USB cable and Line In Out cable Remote control Extra batter...

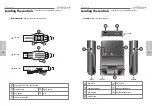
Страница 9: ...n Remote control Remote control is an optional accessory Cradle Cradle is an optional accessory Power ON OFF Play Pause button Previous button Next button Volume control button HOLD switch Clip Line in jack Charging indicator Line Out jack USB 2 0 jack DC 5V jack Battery charging jack Battery release button Front view Back view Bottom view Front view Right view Left view Top view ...

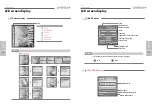
Страница 10: ...SETTINGS Note Note Note The following icons are displayed to indicate the type of file playing MP3 WMA Time Hold indicator Battery indicator Artist File name File number Total file number File type Play mode Progress bar Total play time Play time Menu Examples Recording status Free space Remaining recording time Record elapsed time I RECORDING screen ...

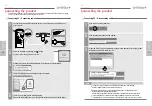
Страница 11: ...ed and working properly Please see the included iriver plus user guide for steps to load music onto the player 5 Connecting PC Disconnecting cable The tray icon may be hidden in some Windows XP operating system settings Click the Display hidden icon to view the hidden icon Hardware safe removal may not be available while using some applications such as Windows Explorer or Windows Media Player Plea...

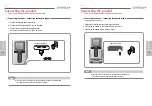
Страница 12: ...er for this product is 100 240V 50 60Hz Bottom of the player Be sure to use the supplied AC adapter to connect the cable to the player Be sure to use the supplied AC adapter to connect the cable to the player 1 Put the player into the connection terminal of the cradle 2 Connect the AC adapter to the cradle s 5 0V DC connector 3 Connect the AC adapter plug to a power socket Connecting the power con...

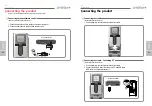
Страница 13: ...e top of the player 2 Connect the earphone to the jack of the remote control Top of the player Connecting the cradle Connecting PC Cradle is an optional accessory 1 Put the player into the connection terminal of the cradle 2 Connect the USB 2 0 jack of the cradle to a PC with USB cable USB cable is an optional accessory MAIN MAIN SUB SUB CHG CHG Back of the cradle Connecting the cradle Cradle is a...

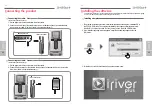
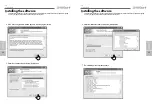
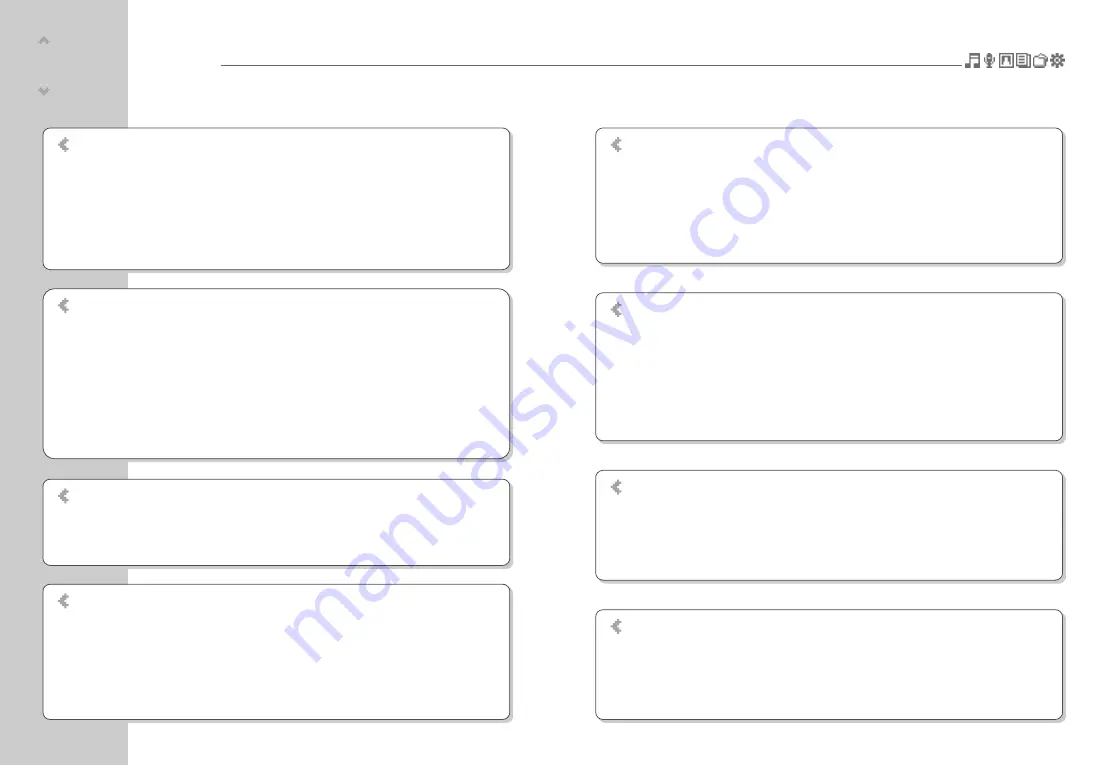
Страница 14: ...or earphone jack of an external device with a Line in out cable Line in out cable is an optional accessory MAIN MAIN SUB SUB CHG CHG External device Side of the cradle This manual covers the use of the H10 player hardware For instructions on related software and instructions for getting music on your player please see the included iriver plus user manual 1 The program installation process will sta...

Страница 15: ...player hardware For instructions on related software and instructions for getting music on your player please see the included iriver plus user manual This manual covers the use of the H10 player hardware For instructions on related software and instructions for getting music on your player please see the included iriver plus user manual 6 Select the installation folder and click the Install butto...

Страница 16: ...ructions for getting music on your player please see the included iriver plus user manual I Getting started Installing the software 26 8 Select the file type and click the Next button 9 Click the Finish button when the installation complete screen is displayed This manual covers the use of the H10 player hardware For instructions on related software and instructions for getting music on your playe...

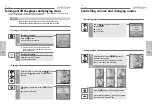
Страница 17: ...ng the music and press the button to play it Plays the selected title 2 Playing music Select the MUSIC mode using the scroll and press the button when the main screen appears 1 Select the mode using the scroll when the main menu appears There are 6 modes including MUSIC RECORDING PHOTO TEXT BROWSER SETTINGS 1 Press the button to enter the desired mode 2 If you press and hold the button in any scre...

Страница 18: ... 42 Playing the recorded file 42 Viewing images 43 Viewing image file 43 Getting images on the player 44 Viewing text 45 Viewing text file 45 Getting text files on the player 46 Browser function 47 Browser function 47 This manual covers the use of the H10 player hardware For instructions on related software and instructions for getting music on your player please see the included iriver plus user ...

Страница 19: ...arch titles In case of selecting Playlists Refer to page 38 Note Use the scroll the select the item Example In case of selecting Titles 4 Press it to move to the desired item Moves to the desired item Press to return to the previous screen Press and hold to return to the main menu Press the button after selecting the title to play it During playback press the button to pause playback Press it agai...

Страница 20: ...utton during playback to display the EQ selection screen 9 Select the EQ using the scroll and press the button 10 11 Select the desired Rating using the scroll and press the button 12 EQ consists of SRS and 30 Preset EQ To customize SRS and Custom EQ use the Sound menu Refer to page 53 SRS uses a combination of Field Width TruBase FOCUS and Freq Boost to enhance sound Custom EQ will be automatical...

Страница 21: ... to display the Sound list screen 4 Move to the Play Mode using the scroll 5 Press the button to display the Play Mode list screen Note The Play mode consists of following options 6 Select the desired Play mode using the scroll and press the button to setup the Play mode Repeat Plays all titles in the selected category repeatedly Repeat 1 Plays a selected title repeatedly Shuffle Randomly plays al...

Страница 22: ...g order My Favorites Plays titles by playback frequencies Recently Played Plays titles in recently played order My Playlists Plays titles with the Playlist you created in iriver plus Quick List User programmable on the fly playlist To load the Quick List Locate a title using the MUSIC menu Press and hold to add it to the Quick List Added Quick List will be displayed Repeat to add more titles to th...

Страница 23: ...g menu Refer to page 56 Note Line in recording is only available using the optional cradle After connecting the player and cradle connect the cradle s Line In jack to the Line Out or earphone jack of an external device using the Line In Out connection cable 1 Line In recording In the Recording Source screen move to Line In using the scroll and confirm it by pressing the button 2 MAIN MAIN SUB SUB ...

Страница 24: ...l from the main menu 1 2 Press the button to display the Image list screen 4 Press the button to display the Image screen 3 Move to the desired image file using the scroll in the Image list screen Loading time for large images may take longer The Progressive JPG is not supported in the Viewing image file function What is Progressive JPG Progressive JPG divides the file into a series of scans The f...

Страница 25: ...s on the player click and drag the image files from your PC to the Photo folder on the H10 6 A progress window will appear while files are copying 7 Disconnect the USB cable once all copying has finished 8 Open My Computer a Windows XP Start My Computer b Windows 2000 Double Click the My Computer icon on your desktop Viewing text file Select the TEXT mode using the scroll when the main screen appe...

Страница 26: ...ck on the Media folder 5 6 A progress window will appear while files are copying 7 Disconnect the USB cable once all copying has finished 8 Open My Computer a Windows XP Start My Computer b Windows 2000 Double Click the My Computer icon on your desktop Browser function The Browser allows you to navigate all the files on the player You can play titles view images or display text files with out swit...

Страница 27: ...for getting music on your player please see the included iriver plus user manual I Chapter 4 I Useful features Settings Menu 50 Settings menu navigation 51 Changing menu 51 Entering the sub menu 51 Customizing the function settings 52 Exit the sub menu 52 Menu settings 53 Sound 53 Record 56 Timer 58 Extra 61 ...

Страница 28: ... Setting Line In Setting Line In Volume Track Separation Power Off Timer Sleep Timer Backlight Timer Date Time Alarm Reset All Settings Language Scan Speed Scroll Speed Tag Information Copyright Changing menu Entering the sub menu Press the button to display the Sub screen 1 Select the SETTINGS mode using the scroll when the main screen appears 1 2 Press the button to display the SETTINGS menu Use...

Страница 29: ...sub menu Press and hold the button to return to the main menu 1 1 Custom EQ Various frequency bands can be selected and customized Each frequency level is from 12dB to 12dB in steps of 2dB Changes frequency band Selects frequency level 2 SRS Settings Sets the level of 3D effect There are 4 types of 3D effect including Field Width TruBass FOCUS and Freq Boost Field Width Sets the Field width value ...

Страница 30: ... the scroll and press the button to confirm it 5 Fade In When activated volume increases gradually at playback mode 4 Play Mode Sets the Play mode For more information about the Play mode refer to page 36 The Play mode can be changed only in the SETTINGS Sound Play Mode Select the Play mode using the scroll and press the button to confirm it ...

Страница 31: ... an individual file Select On or Off using the scroll and press the button to confirm it 1 Voice Setting Sets the quality of voice recording Select Low Medium High using the scroll and press the button to confirm it The available recording times depending on the recording qualities are as follows Low 338 hours Medium 169 hours High 84 hours and 30 minutes 2 Line In Setting Sets the quality for rec...

Страница 32: ...y turns the power off after fixed time The available time settings are Off 10 Min 30 Min 1 Hour 2 Hours 5 Hours and if it is set to Off the power will not be turned off Select the time using the scroll and press the button to confirm it Timer 3 Backlight Timer Sets the time that the backlight stays on The available time settings are Always On 5 Sec 30 Sec 1 Min 5 Min 30 Min Select the time using t...

Страница 33: ... the language to match the language of your music ID3 tags for proper display 40 languages are supported in this function Select the language using the scroll and press the button to confirm it Extra Useful features Menu settings 60 5 Alarm Sets the alarm time Select the time using the scroll and press the button to confirm it Then select Yes using the scroll and press the button to activate the a...

Страница 34: ...croll speed Title or Artist Name of the song displayed on the LCD The available speed range are 1X 2X 4X Select the speed using the scroll and press the button to confirm it 5 Tag Information Displays file information with ID3 Tag information and changes the configuration of Tag information Off only the file name will display Select On or Off using the scroll and press the button to confirm it 6 C...

Страница 35: ...re upgrade 66 Initializing H10 67 Troubleshooting 68 This manual covers the use of the H10 player hardware For instructions on related software and instructions for getting music on your player please see the included iriver plus user manual I ...

Страница 36: ... Do not disconnect H10 during firmware upgrade Internet must be connected for the Firmware Update function Change to Player must be connected to the PC for Firmware Upgrade function Note Please initialize H10 player in the following cases All music pictures text and data will be erased from the player during this initialization if there appears to be corruption on the internal hard drive if an err...

Страница 37: ...e HOLD switch on the player is ON Switch it to OFF position Check whether the battery is discharged Check it again after connecting the AC adapter Check whether the battery is connected correctly If the power is still turned on after charging please contact iriver customer support No sound during playback Check whether volume is set to 0 Connect the earphones plug firmly Buttons do not work Check ...

Страница 38: ...Chapter 6 I Appendix Specifications 72 FCC 73 ...

Страница 39: ...from the radio or TV If necessary consult your dealer or an experienced radio or television technician You may find this booklet helpful How to Identify and Resolve Radio and TV Interference Problems Stock No 004 000 00345 4 prepared by the FCC and available from the U S Government Printing Office Washington DC 20402 See individual devices FCC ID and registration numbers The CE mark on the CD play...

Страница 40: ......
Отзывы: