background image


(c)2015 Iris Innovations Limited. All Rights Reserved. v01.00 24/09/15. E&OE 

Procedure (Continued…): 
 
13) 

Disconnect the cable from the camera. 

 
14) 

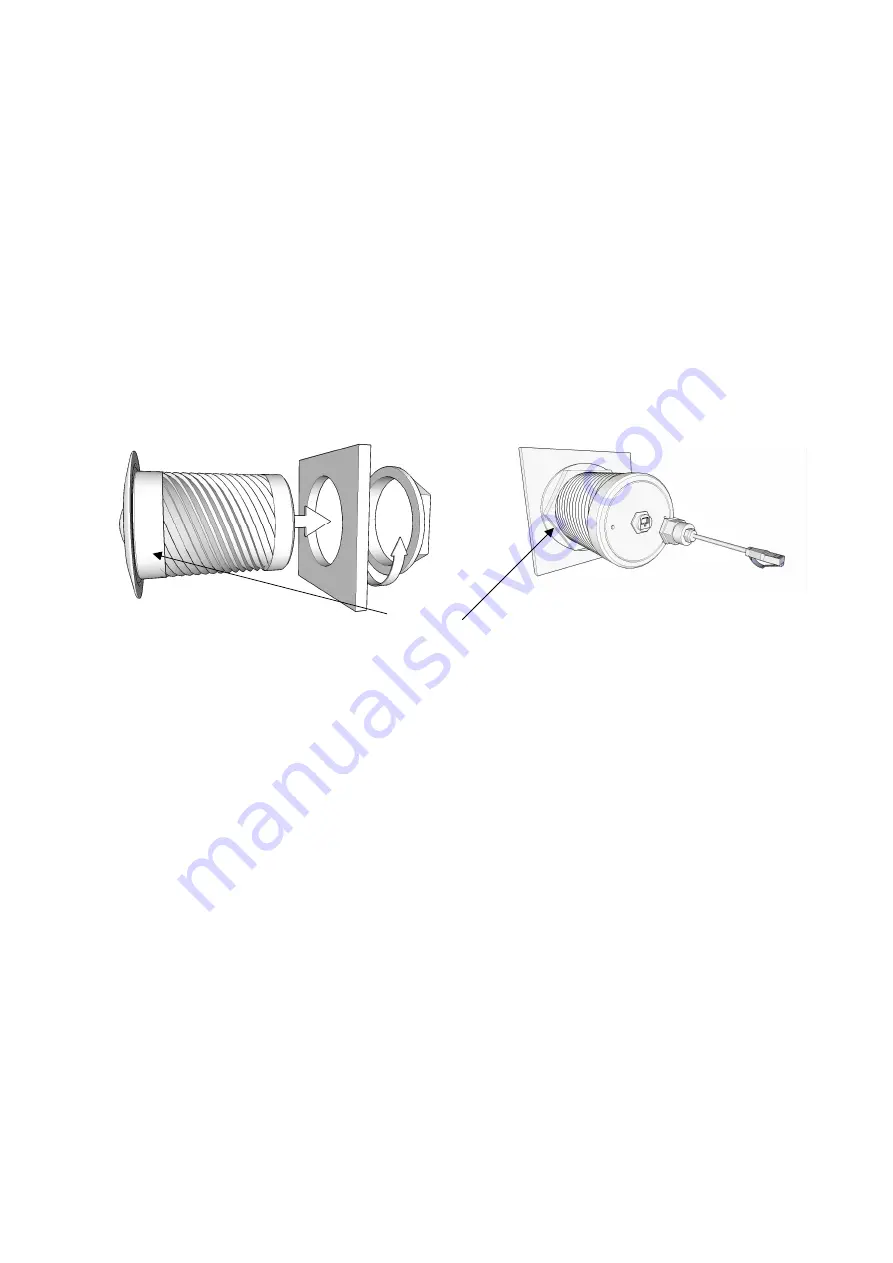
Follow the sealant manufacturers instructions on curing time before fully tightening the camera lock 


nut. 

 
15) 

From inside the vessel, apply another bead of sealant fully around the circumference of the camera 


shaft. 

 
16) 

Allow the sealant to fully cure before putting the boat back into the water. 

 
17) 

Connect the waterproof CAT5 cable to the camera connector, ensuring the connector sits true in the 


receptacle and the connector lock-nut is fully tightened without cross threading. 

 
18) 

Now connect the cable to your network and follow the setup instructions below. 

 
DO NOT LAUNCH THE VESSEL UNLESS THE SEALANT IS FULLY CURED IN ACCORDANCE WITH 
THE SEALANT MANUFACTURERS INSTRUCTIONS AND YOU ARE SATISFIED THERE ARE NO LEAKS. 


Setup 
 

1.  Connect the camera to a powered Ethernet source so that the unit is connected directly or indirectly to a 

DHCP server.  

 
2.  The camera will adopt an I.P. address provided by the DHCP server (Please refer to Router/DHCP server 

manual for relevant instructions). 


3. Once this is connected, new I.P and network details can be viewed via the Setup then System Information 

page. 

 
4. In the event of there being problems connecting the camera to your network, please contact your network 

administrator or IP specialist quoting the cameras individual MAC address which can be found printed on 
the carton label. 


By default the camera is set to DHCP. Once connected directly or via your network to a DHCP router or 
server, the camera should automatically assume the address it has been assigned. 
 
A software discovery tool is provided with the camera to assist camera discovery and assigning addresses if 
necessary. Once installed, the tool can be set to SCAN the network for any connected IRIS710 cameras. It 
does this by broadcasting specific information across the network which only an Iris camera will respond to. 
In doing so, the camera will return its current IP address. 

Apply Sealant (See Guidelines Above)


Содержание 710

Страница 1: ... c 2015 Iris Innovations Limited All Rights Reserved v01 00 24 09 15 E OE IRIS710 Marine Network IP Camera 5MP INSTALLATION OPERATION GUIDE ...

Страница 2: ... c 2015 Iris Innovations Limited All Rights Reserved v01 00 24 09 15 E OE ...

Страница 3: ...imited to the implied warranties of merchantability and fitness for a particular purpose The user should verify the relevant information is current and complete before placing orders All products are sold subject to Iris terms and conditions of sale at the time of order acknowledgement Iris shall not be liable nor responsible for the applications and resale of its products or bundled software with...

Страница 4: ...nition 5 Mega Pixel Image Resolution 360 degree Hemi Spherical Panoramic video Compression Motion JPEG MPEG 4 H 264 Streaming Multiple Stream Supports up to 2 independent streams controllable framerate and bandwidth CBR VBR Built in Micro SD card slot for local storage PoE 802 3af compliant and DC 12V Power optional Aluminium Bronze Bezel Hard Anodized Aluminium IP68 Waterproof Design Waterproof R...

Страница 5: ...TV type camera with additional circuitry and software to convert the signal from and communications to the camera into a digital format that can be accessed via the internet or an ethernet based network The circuitry within the camera literally hosts it s own website IP cameras are simply CCTV cameras with integrated video web servers ...

Страница 6: ... 09 15 E OE Package Contents Contents may vary depending on model and specific OEM applications 1 Marine Network Camera IRIS710 2 Waterproof CAT5e Ethernet Cable 3 User Guide Please Note PoE injectors are not supplied with the camera and must be ordered separately ...

Страница 7: ...ra should be positioned on a flat surface Ensure the external surface of the hull or transom are even and parallel It may be necessary to sand or grind the surface 3 Once the installation area is prepared drill a 90mm 3 54 hole using a suitable pilot hole and hole saw 4 Ensure the inner hull surface is sealed to prevent water intrusion into the hull before the camera is secured in place 5 Ensure t...

Страница 8: ...unit is connected directly or indirectly to a DHCP server 2 The camera will adopt an I P address provided by the DHCP server Please refer to Router DHCP server manual for relevant instructions 3 Once this is connected new I P and network details can be viewed via the Setup then System Information page 4 In the event of there being problems connecting the camera to your network please contact your ...

Страница 9: ...password is pass Please ensure these are both entered in lowercase letters Web Browser software Once you have the IP address of the newly connected camera either from your DHCP server or from using the IRIS Centre Software you can just type this address directly into your Web Browser to access the video from the camera and its features The default video display is a four way quad split screen and ...

Страница 10: ...e View from the Panorama Mode selector you can also view the raw 360 degree image captured by the camera From the Setup Menu at the top it is possible to adjust all IP settings to suit your specific network installation but please contact your network administrator if these need to be changed ...

Страница 11: ... with firstly a login prompt which is root as pass in lower case and then a welcome page and a camera setup wizard To add your new camera to the system you must select the Add Manage camera button and then Scan from the following Add New Device prompt Any connected IRIS 710 camera should now be visible in a displayed list By selecting this camera from the list then following the on screen prompts ...

Страница 12: ...le camera connected To view only the selected camera then the 1x1 option from the Live View list on the right of the screen can be selected to achieve this You can move each of these images to the desired positions by clicking and dragging within each section Using the mouse wheel you can also zoom in and out of the image Please note that when zoomed all the way out there will be less movement ava...

Страница 13: ...or 5MP 1 2 5 Lens 1 05mm Fisheye 180 HFOV F2 8 Power PoE IEEE 802 3af Max 4 5W Approvals CE EN55022 Class A EN55024 LVD RoHS FCC Part15 B IP Resolution 2592 x 1920 Compression Motion JPEG MPEG 4 H 264 Streaming Multiple Stream Supports up to 2 independent streams controllable framerate and bandwidth CBR VBR Local Storage microSD SDHC Browser Support Microsoft IE Firefox Chrome Network Protocols TC...

Страница 14: ...uite A133 Fort Lauderdale 33316 Florida United States of America Tel 1 954 533 9381 email info boat cameras com www iris innovations com Iris Innovations Limited UK Units 8 9 Swanwick Business Centre Bridge Road Swanwick Hampshire SO31 7GB United Kingdom Tel 44 0 1489 570797 email info boat cameras com www boat cameras com ...

Отзывы: