


IPLINK Technology Corp.
IP-WDL-RT1T1R-B 150M Wireless N ADSL2+ Router
30
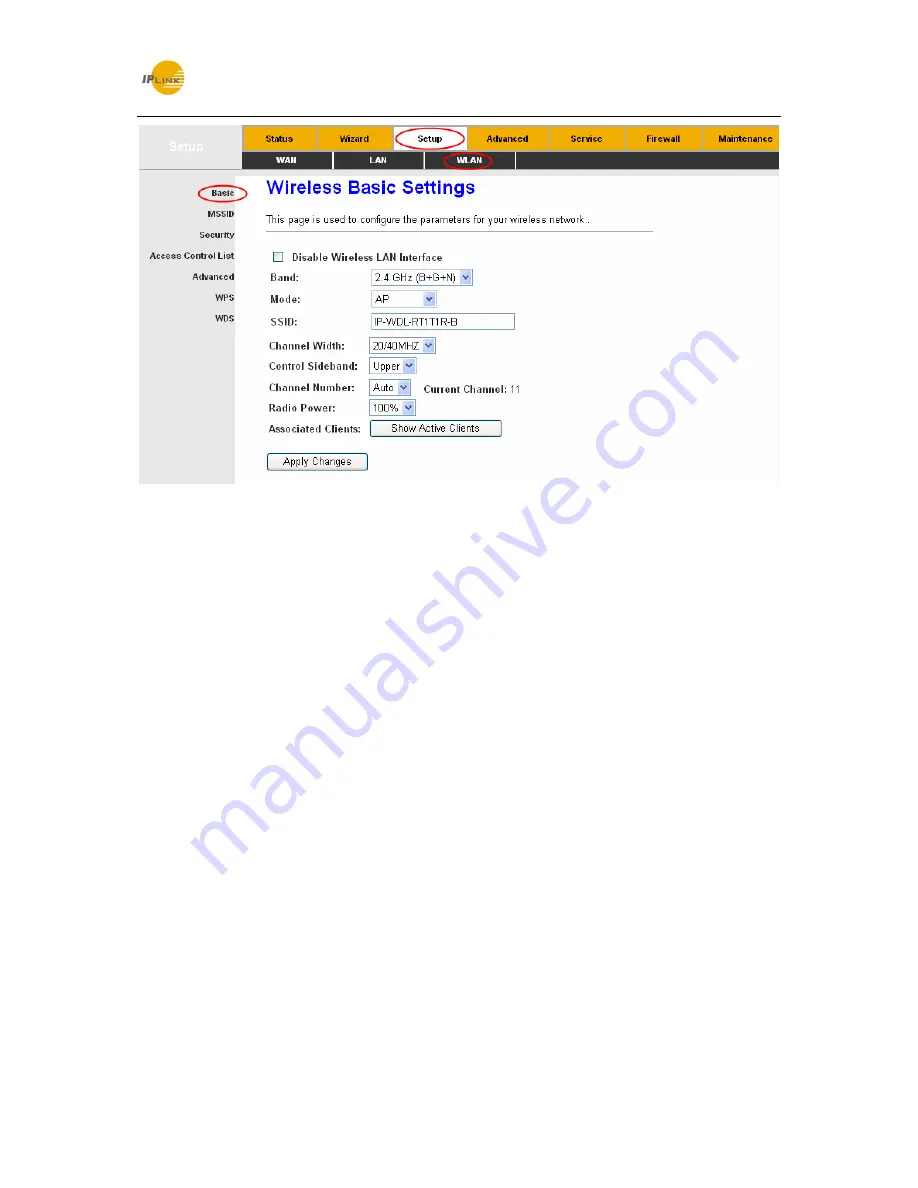
Figure 4-15
Disable Wireless LAN Interface:
Choose to disable the Wireless function of the ADSL
Router.
Band:
Options available are 2.4 GHz (B), 2.4 GHz (G), 2.4 GHz (B+G), 2.4 GHz (N), 2.4 GHz
(G+N), and 2.4 GHz (B+G+N).
Mode:
Options are AP and AP+WDS. If AP+WDS is selected, then the Router can bridge two
or more WLANs.
SSID:
Wireless network name shared among all points in a wireless network. The SSID must
be identical for all devices in the wireless network. It is case-sensitive and must not exceed 32
characters (use any of the characters on the keyboard). Make sure this setting is the same for
all stations in your wireless network. Type the desired SSID in the space provided.
Channel Width:
Select the width you want to use from the drop-down List. There are three
options, 20MHz, 40MHZ and 20/40MHz. If bigger bandwidth is selected, device could transmit
and receive data with higher speed.
Control Sideband:
Options are Upper and Lower.
Channel Number:
This field determines which operating frequency will be used. Select the
channel to use from the drop-down list. It is not necessary to change the default channel
unless you notice interference problems with another nearby access point.
Radio Power (Percent):
Here you can specify the Radio Power of Router. You can select
High, Middle or Low which you would like. High is the default setting and is recommended.
Содержание IP-WDL-RT1T1R-B
Страница 1: ...Rev 2 0 0 1910020564...


