Advanced 2/4-Port DVI-I Secure KVM Switch
10
CAC (COMMON ACCESS CARD, SMART CARD READER) INSTALLATION
The following steps are intended for the system administrator or IT manager only.
If you have the optional CAC ports there will be 2 ports on a 2 host ports KVM and 4 ports on a 4 host
ports KVM.
CAC connection to the computer requires a USB cable connection separate from the keyboard and
mouse. This allows the CAC to be connected and controlled independently from the keyboard and mouse.
It also allows the user to select whether CAC for a certain computer is supported or not.
1. Ensure that power is turned off or disconnected from the unit and the computer.
2. Use a USB cable (Type-A to Type-B) to connect a USB port on a computer to its respective CAC USB
ports on the KVM. Do not connect the USB cable if CAC functionality is not needed for that computer.
3. Connect a CAC (smart card reader) to the CAC port in the user console interface.
4. Power on the KVM by connecting a 12VDC power supply to the power connector, and then turn on all
the computers.
5. To disable CAC for any channel (all CAC ports are enabled as default), use the front panel buttons to
switch the KVM to the channel whose CAC mode you wish to change. Once the channel is selected,
the button LED for this specific channel should be on (CAC port enabled). Press and hold the button
for 3 seconds until the button LED turns off. The CAC port is now disabled for this channel.
6. To enable CAC for any channel, use the front panel buttons to switch the KVM to the channel whose
CAC mode you wish to change. Once the channel is selected, the button LED for this specific channel
should be off (CAC port disabled). Press and hold the button for 3 seconds until the button LED turns
on. The CAC port is now enabled for this channel.
CAC PORT CONFIGURATION
The following steps are intended for the system administrator and operators (users).
Note: Only one computer connected to port 1 is required for this operation
CAC port Configuration is an optional feature, allowing registration of any USB peripheral to operate with
the KVM. Only one peripheral can be registered and only the registered peripheral will operate with the
KVM. By default, when no peripheral is registered, the KVM will operate with any Smart Card Reader.
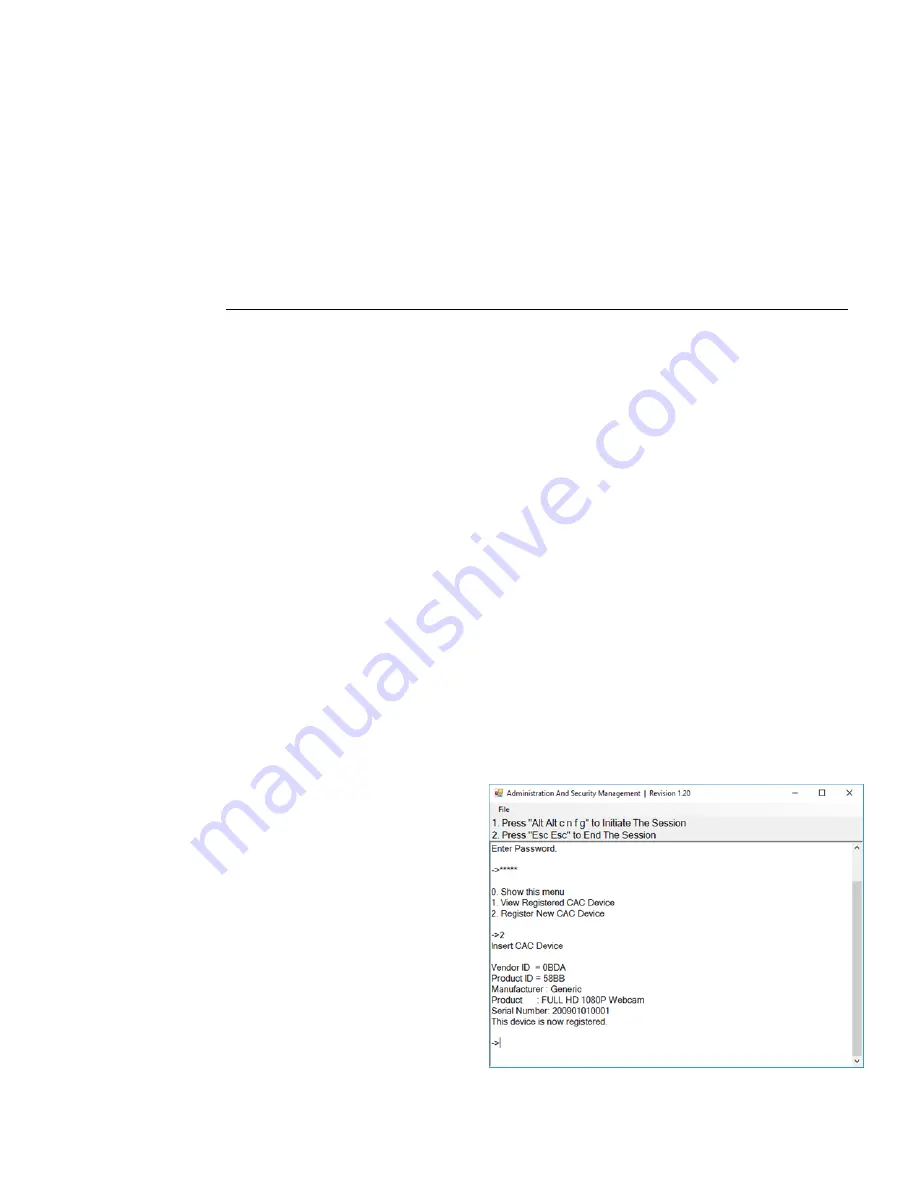
Configure the CAC Port via User Menu Options
1. Open the Administration and Security Management Program.
2. Using the keyboard, press the Alt key twice and type “cnfg”.
3. At this stage the mouse connected to the KVM/KM
will stop functioning.
4. Enter the default username “user” and press Enter.
5. Enter the default password “12345” and press En-
ter.
6. Select option 2 from the menu on your screen and
press Enter.
7. Connect the peripheral device to be registered to
the CAC USB port in the console side of the KVM/
KM and wait until the KVM /KM is reading the new
peripheral information.
8. The KVM/KM will list the information of the con-
nected peripheral on the screen and buzz 3 times
when registration is completed.
Figure 10-1 User Menu


