background image

(ENGLISH) QUICK START GUIDE 


o


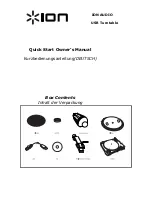
Make sure all items listed on the front of this guide are included in the 
box. 

o


READ SAFETY INSTRUCTION BOOKLET BEFORE USING THE 
PRODUCT 

o


Go to http://www.ion-audio.com for product registration. 


GENERAL CONTROLS
 
1.


Power Cable: This power cable should be plugged into a wall 
receptacle AFTER all audio connections are made. 

2.


RCA Audio Output Cables: These cables should be plugged into a 
CD or Auxiliary input on your computer. 


IMPORTANT: There is a switch on the bottom panel, next to the RCA 
cables that selects between PHONO/LINE.  Use PHONO level for 
plugging into a turntable input on a home stereo.  Use the LINE level 
for plugging into CD/AUX/TAPE inputs.  WARNING: You may 
damage your receiver if you plug in a LINE level into a PHONO 
input.
 

3.


USB Audio Output:  Use the included USB Cable to connect your 
turntable to your computer.  Refer to the software instruction guide 
before plugging in your turntable. 

4.


Power Button: This ring around the power button illuminates red 
when the turntable is switched on. 

5.


Platter: This platter must be securely fastened to the turntable prior 
to operation. The Motor Drive Belt can be found on the drive ring 

Содержание USB Turntable

Страница 1: ...ION AUDIO USB Turntable Quick Start Owner s Manual Kurzbedienungsanleitung DEUTSCH Box Contents Inhalt der Verpackung...

Страница 2: ...the bottom panel next to the RCA cables that selects between PHONO LINE Use PHONO level for plugging into a turntable input on a home stereo Use the LINE level for plugging into CD AUX TAPE inputs WA...

Страница 3: ...o the LED illuminates red 10 Pitch Slider This slide control allows the pitch to be increased or decreased by 10 In the center position the pitch is at 0 When moved away from the center and towards th...

Страница 4: ...r spindle and press it down firmly Check to make sure that it rotates uniformly and does not wobble excessively 3 Rotate the platter so that the one of the holes is aligned with the Start Stop button...

Страница 5: ...t with very little resistance back and forth indicating that there is exactly 0 grams of stylus pressure 3 With the counterweight in its new position further away from tone arm pivot point grasp the s...

Страница 6: ...damage to your media as well as damage to the turntable Remove the plastic cartridge cover needle cover before operating the turntable BEFORE RETURNING THE PRODUCT please contact Ion Audio or your re...

Страница 7: ...l sse erfolgt sind 2 RCA Audioausgabekabel Diese Kabel dienen zum Anschlu des Plattenspielers an z B ein DJ Mischpult einen Verst rker oder analoge Soundkartenanschl sse eines PCs WICHTIGER HINWEIS Ei...

Страница 8: ...falls ber den USB Audioausgang des USB Turntables an den Computer gef hrt werden 8 33 und 45 RPM Tasten Diese Tasten steuern die Umdrehungsgeschwindigkeit des Plattentellers Eine rote Leuchtdiode gibt...

Страница 9: ...lenswert das Headshell mit dem Tonabnehmer System zu entfernen und den Arm Clip zu verschliessen um den Tonarm oder den Plattenspieler vor Besch digung zu sch tzen 14 Tonarm Verschluss Diese Aluminium...

Страница 10: ...nicht eiert 3 Drehen Sie den Teller so dass eines der L cher mit der Start Stop Taste an der vorderen Ecke des Plattenspielers in einer Linie steht Die Messingmotorspindel sollte durch das Loch sicht...

Страница 11: ...chtung der Skala von vorne gegen den Uhrzeigersinn bis das gew nschte Gewicht erreicht ist Falls die Skala sich mehr als 360 Grad ber den Nullpunkt hinaus dreht sollte der angezeigte neue Wert des Ska...

Страница 12: ...shell vorinstalliert o RCA Kabel angeschlossen o USB Kabel o 45 RPM Adapter o Software CD MAC PC o Software Bedienungsanleitung o Hardware Kurzanleitung Gewicht mit Verpackung 5 44 kg Gewicht des Turn...

Отзывы: