background image


                   21

• If you copy from Main to Fill (or vice-versa) within a particular numbered Pattern, the 
destination will be erased and replaced with the source Pattern since Main and Fill Patterns 
must have the same length. This is useful if you want the Fill to contain variations on the Main 
Pattern—just copy the Main to Fill and make your additions/changes.
• Copying a Fill to a Fill follows the same rules as copying a Main Pattern to a Fill.
• The only copy technique that appends a Pattern to another Pattern is copying a Main Pattern 
to another Main Pattern. 

3.3A

  Copy, Append, and Double Patterns 

1.

The IED04 should be in Pattern mode and stopped.

2.

 Select the Pattern to be copied. 

3.

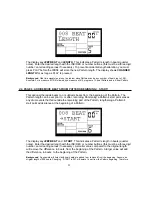
 Press and hold the COPY button, and keep holding it down until step (6). The display says 

COPY TO PATT

.

4.

 Enter the destination Pattern number into which the current Pattern will be copied with the 

INC/DEC or number buttons. 

• Copying a Pattern to a blank destination Pattern replaces the blank Pattern with the original 
Pattern data. 
• Copying to a Pattern that already contains data appends the original data to the end of the 
data in the destination Pattern. If this would result in a Pattern with more than 128 beats, the 
display will say 

TOO MANY BEATS

.

• Copying a Pattern to itself doubles the length.
• The Drum Set assignment and Pattern name are copied along with the drum data only if the 
destination Pattern is empty.

5.

 Press PLAY. The display says 

COPY DONE

.

6.

Release the COPY and PLAY buttons. 

3.3B

  Copy One Drum Pad's Part to Another Drum Pad 

Merge:

 When the destination drum pad 

already has a pattern

, the source pattern will be 

merged with the destination pattern. Note that if the two parts contain events for the same pad 
on the same beat, only one event will prevail and it will take the level of the source Pattern 
event.

Sound Stacking™: 

When the destination drum pad is 

empty

 (no recorded pattern), the source 

pattern will be copied and any drum sound assigned to the destination drum pad will play the 
exact same pattern as the source drum pad. This technique lets you stack multiple drum sounds 
together to create monster composite sounds. See section 8.3: Sound Stacking. 

1.

The IED04 should be in Pattern mode and stopped.

2.

 Select the Pattern containing the drum part to be copied. 

3.

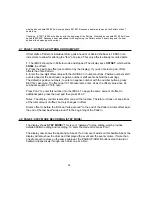
 Press and hold the COPY button, and keep holding it down until step (7). The display says 

COPY TO PATT

.

4.

 Strike the pad to be copied. The display shows the pad number 

(e.g.,

D8

 if you hit pad 8). 

5.

 Strike the destination pad that should hold the copied part. As long as COPY is held down, 

the destination pad can still be changed by selecting another drum pad. 

Содержание iED004

Страница 1: ...Reference Manual iED04 Digital Drum Station...

Страница 2: ......

Страница 3: ...that these sounds when hit loudly have a different timbre than when they re hit softly An internal computer to control and trigger the sounds This computer simulates an advanced easily editable tape r...

Страница 4: ...iated Fill Patterns A Fill and B Fill selected by pressing the FILL button when either A or B is selected The Fills primarily provide transitional Patterns between Main Patterns which makes for more r...

Страница 5: ...tain level and pan settings The default drum sound assignments are explained However you can change these defaults and come up with any type of drum set you d like Defaults save time by giving you a s...

Страница 6: ...n number with Patterns the A B Fill Preset or User designators are also shown If you have edited a Drum Set to which a particular Pattern was assigned the display also shows DRUMSET EDITED In operatio...

Страница 7: ...04 1 3A The INC DEC Buttons The two small buttons with the up arrow and down arrow symbols next to the number keys are called the INC DEC buttons respectively Pressing the INC button once increases th...

Страница 8: ...f it shows SONG press the PATTERN SONG button and the display will show PATTERN PRESS PLAY TEMPO PERFORM EMPTY PATT PATTERN A USER 6 Start striking the pads with the drumsticks Adjust the volume contr...

Страница 9: ...attern Press the B button to select the B variation of the selected Pattern Press the A button to select the A variation of the selected Pattern Press FILL briefly while a Main A or B Pattern is playi...

Страница 10: ...1 PAGE 1 SELECT THE QUANTIZATION VALUE QUANTIZE SELECT The display shows QUANTIZE SELECT and a note icon in the lower left Quantize window PAGE QUANTIZE SELECT SETUP RECORD QUANTIZE The note icon dis...

Страница 11: ...sounds happening within a few milliseconds of each other A good way to simulate this effect yet still have a rock solid rhythm is to record a quantized hand claps part then turn off quantization and...

Страница 12: ...play shows CLICK VOL and a two digit number representing click volume 00 inaudible 99 maximum volume Enter the desired click level with the INC DEC or number buttons 2 5 PAGE 5 ADD REMOVE BEATS FROM P...

Страница 13: ...ts from the beginning of the Pattern The Pattern length can be set prior to or after recording Shortening a Pattern s start point erases any drum events that fall outside the remaining part of the Pat...

Страница 14: ...lag The default is positive numbers to enter a negative number with the number buttons press DEC first Example To offset a part 1 16th note later enter 24 as the offset value since 24 sub beats equal...

Страница 15: ...nt add an event or change an event s volume While occasionally somewhat tedious Step Edit mode allows editing drum parts to your exact specifications Each step also called a sub beat is 1 96th of a be...

Страница 16: ...Drum Sound s Volume in a Given Step Use the PAGE buttons to select the step containing the drum whose volume needs to be changed Either press a number button from 1 8 1 softest 8 loudest use the INC...

Страница 17: ...e desired quantization rate as described in section 3 1K 3 1B Perform Compose Modes The IED04 doesn t have a record button Instead press PLAY to start the Pattern then select either Perform or Compose...

Страница 18: ...hapter 5 and the programmed Song tempo is different the IED04 will assume the Song s tempo even if you switch back into Pattern mode until the tempo is changed again either manually or by selecting a...

Страница 19: ...laying the next Pattern 3 1H Select Fill Patterns in Perform Playback Mode Fill Patterns are the key to creating expressive drum parts However Fill is a sophisticated feature that requires some explan...

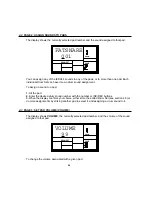
Страница 20: ...he solo is about to end at which point you select the Fill that leads out of the A Main Pattern 3 1I Record a Pattern An empty Pattern defaults to an 8 beat length with 16th note quantization and swin...

Страница 21: ...ve already covered how to use the FILL button for Pattern selection however it can also trigger a drum sound at the current quantization rate e g eighth notes 16th notes etc if quantization is off th...

Страница 22: ...ATTERN ERASED followed by FILL ERASE 5 While continuing to hold the ERASE button press PLAY again The display will read FILL ERASED 6 Release both buttons Note To retain the Drum Set assignment length...

Страница 23: ...ay TOO MANY BEATS Copying a Pattern to itself doubles the length The Drum Set assignment and Pattern name are copied along with the drum data only if the destination Pattern is empty 5 Press PLAY The...

Страница 24: ...the drum part to be copied 3 Press and hold the COPY button and keep holding it down until step 8 The display says COPY TO PATT 4 Enter the destination Pattern number to which the drum part should be...

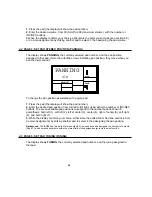
Страница 25: ...are 1 Press the DRUM SET button 2 Use the Page up and down buttons to select different pages of functions the display s lower right window shows the page number These pages are described below 3 Adjus...

Страница 26: ...ign a sound to a pad 1 Hit the pad 2 Enter the desired drum sound number with the number or INC DEC buttons 3 When the display confirms your choice either store the edited Drum Set see section 4 8 or...

Страница 27: ...Press the pad the display will show the pad number 2 Enter the desired pan position from full left to full right using either the number or INC DEC buttons The seven available pan positions correspond...

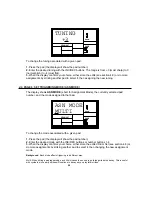
Страница 28: ...he currently selected pad number and the mode assigned to that pad PAGE ASN MODE MULTI DRUM SET DRUM To change the mode associated with a given pad 1 Press the pad the display will show the pad number...

Страница 29: ...usually not artistically desirable to create drum parts so complex that voice stealing becomes a problem However if this is a problem try assigning all the toms to a group so that they only require on...

Страница 30: ...Patterns doesn t call up different Drum Sets this parameter is probably set to MANUAL instead of PATT Background Each Pattern has an associated assigned Drum Set However you can tell the IED04 to ign...

Страница 31: ...always include two digits enter a leading zero if necessary 4 Press PLAY to begin playback Press STOP to stop playback 5 To exit Song mode and return to Pattern mode first stop the Song with the STOP...

Страница 32: ...Start from the Middle of a Song You need not start a Song from the beginning each time in Compose mode a Song can start at any Song step 1 Make sure the IED04 is in Compose mode even if you don t pla...

Страница 33: ...omatically transition to the B Pattern if the A Pattern is currently playing and vice versa or will continue playing the same Pattern if the FILL button is held past the end of the Fill A Fill can tra...

Страница 34: ...ess and hold the FILL button and press ERASE 5 3D Insert a New Step Between Two Existing Song Steps 1 The IED04 should be in Song and Compose modes 2 Use the INC DEC buttons to select the step number...

Страница 35: ...e selected in step 2 and press PLAY The copy is complete and the display says COPY DONE 5 Release the COPY and PLAY buttons 5 4I Copy a Song to Another Song or to the End of Another Song If That Song...

Страница 36: ...another page All the parameters on the following pages remain as set even if you turn off power until changed 6 1 PAGE 1 TRANSMIT PATTERN DATA VIA MIDI The display shows PAT OUT To have the IED04 out...

Страница 37: ...nerate timing signals to which other devices can synchronize if The external device sequencer drum machine etc can respond to MIDI timing signals These signals go from the IED04 s MIDI out to the exte...

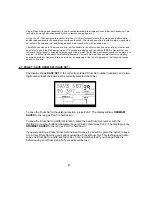
Страница 38: ...her device s MIDI in or a system exclusive data storage device such as the Alesis DataDisk The IED04 data can take up to 35K allowing it to be captured by most system exclusive storage devices After t...

Страница 39: ...emory falls below 15 or so immediately save the IED04 s data as previously described in this chapter Some operations may not be possible even if a small amount of memory is left This is because the IE...

Страница 40: ...Alesis HR 16 and MMT 8 3 Press PLAY on the IED04 The slave units should start at the same time and progress at the same tempo If the slaves respond to Song Position Pointer you can start an IED04 Son...

Страница 41: ...t group once 8 2D Odd Time Signatures For time signatures based on quarter notes changing the number of beats in a Pattern can also change the time signature Example Programming a Pattern length seven...

Страница 42: ...h note by three results in 16th note triplets Dividing a 16th note by three results in 32nd note triplets Rests You can also specify where notes should not be played this is indicated by a rest which...

Отзывы: