


2
Quick Install
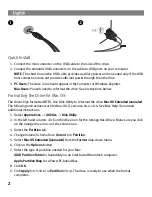
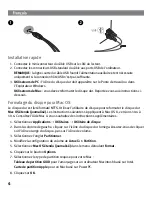
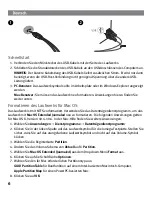
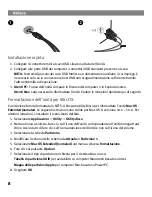
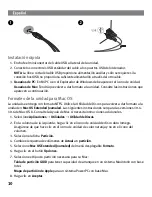
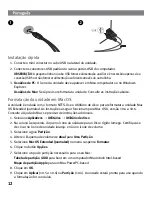
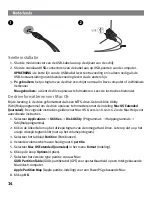
1. Connect the mini connector on the USB cable to the side of the drive.
2. Connect the standard USB connectors on the cable to USB ports on your computer.
NOTE:
The short line on the USB cable provides auxiliary power and is needed only if the USB
host connection does not provide sufficient power through the other line.
3.
PC Users:
The drive icon should appear in My Computer or Windows Explorer.
Mac Users:
You will need to reformat the drive. See instructions below.
Formatting the Drive for Mac OS
The drive ships formatted NTFS. Use Disk Utility to reformat the drive
Mac OS Extended Journaled
.
The following instructions work for Mac OS X, versions 10.4-10.6. See Mac Help if you need
additional instructions.
1. Select
Applications
→
Utilities
→
Disk Utility
2. In the left hand column, click on the drive icon for the Iomega Hard Drive. Make sure you click
on the orange drive icon, not the volume icon.
3. Select the
Partition
tab.
4. Change Volume Scheme from
Current
to
1 Partition
.
5. Select
Mac OS Extended (Journaled)
from the
Format
drop-down menu.
6. Click on the
Options
button.
7. Select the type of partition needed for your Mac:
GUID Partition Table
for bootability on an Intel-based Macintosh computer.
Apple Partition Map
for a PowerPC-based Mac.
8. Click
OK
.
9. Click
Apply
(10.5-10.6) or
Partition
(10.4). The drive is ready to use when the format
completes.
���
���