background image

3

Users need to identify the power supply current they need 

for their devices. It usually can be found in the mobile 

device manual.

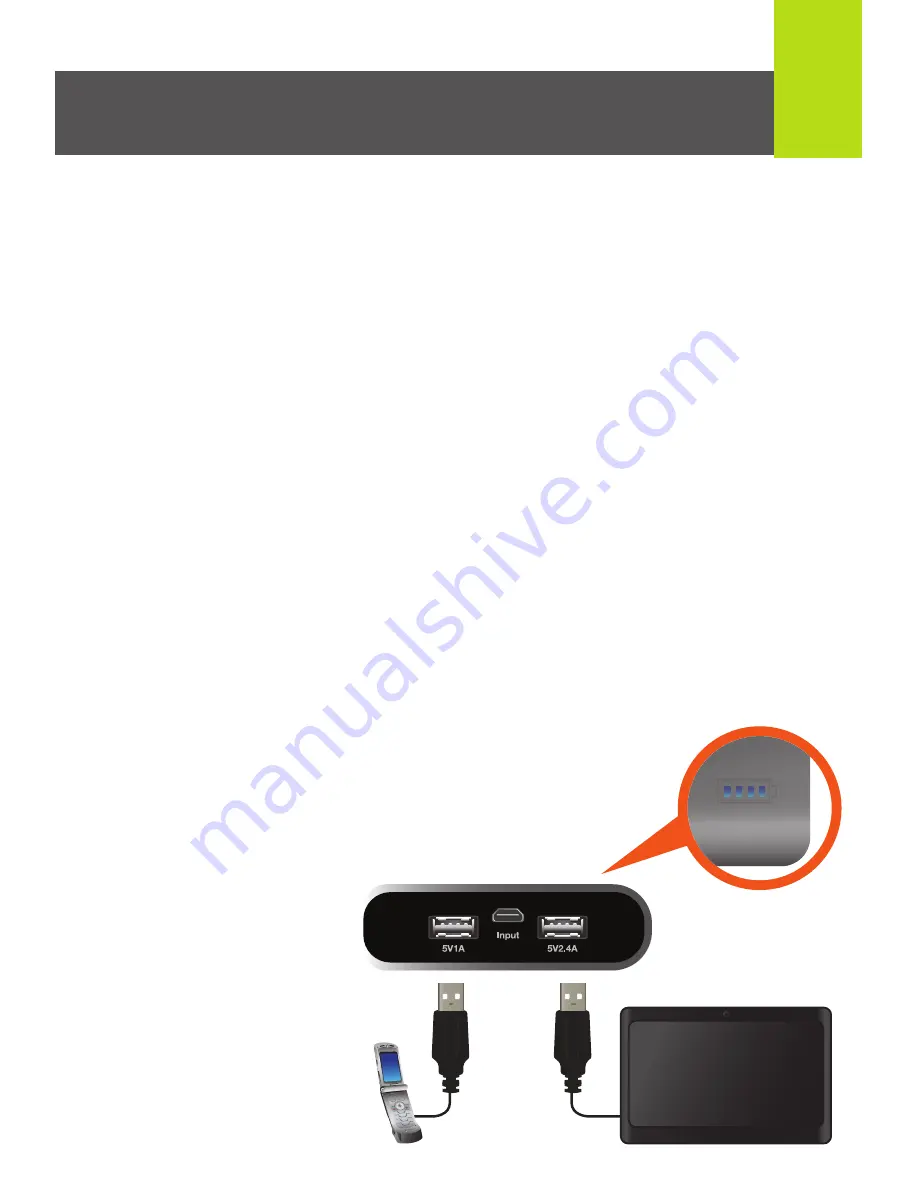
• 1A output port supports: cell phones, smartphones,  


  iPhones, iPods, Windows phones, digital cameras and    

  most MP3 players and other devices which require 1A    

  power supply (This port will not support devices requiring  

  2.1A power source).

• 2.4A output port supports: iPads, tablets and other devices  

  which require 2.4A as well as cell phones, smartphones,   

  iPhones, iPods, BlackBerry phones, digital cameras and   

  most MP3 players.
  1. Connect the USB Type A connection end of the charging  

    cable to the desired power output port (1A or 2.4A).

  2. Connect the other end to your mobile device.


3. 

Once connected to the device, charging  


    will begin automatically. If charging does    

    not begin, simply press the battery  

    check button once to 

    wake the Mobile 

    Power Station.


Charging Mobile Devices

or

Содержание GMP16K

Страница 1: ...GearPower 8000mAh 16 000mAh Capacity Mobile Power Station Quick Start Guide GMP8K GMP16K PART NO Q1343 Q1344 www iogear com...

Страница 2: ...ch 1 x Quick Start Guide 1 x Warranty Card Overview 1 USB Type A Female Port Output 5V 1A 2 Micro USB Female Port Input 5V 2A 3 USB Type A Female Port Output 5V 2 4A 4 LED Charging Capacity Indicator...

Страница 3: ...pter into power outlet 2 Insert the Micro USB connector into the Micro USB port of the Mobile Power Station 3 The LED charging indicator will light up Blue and blink Once the Mobile Power Station is f...

Страница 4: ...power source 2 4A output port supports iPads tablets and other devices which require 2 4A as well as cell phones smartphones iPhones iPods BlackBerry phones digital cameras and most MP3 players 1 Con...

Страница 5: ...Station and its LED charging indicators will automatically turn off To stop the charging process at any point during device charging simply long press the battery check button for 2 seconds to turn o...

Страница 6: ...f off off bright bright bright bright bright bright bright bright bright bright bright bright bright bright bright bright bright bright bright bright flash flash flash flash LED1 LED2 LED3 LED4 Level...

Страница 7: ...hot weather Do not drop or puncture the battery Do not open the battery or short circuit its contacts Use the battery only for its intended use and according to the instructions in the product documen...

Страница 8: ...njury or damage Do not charge or use the battery if it appears to be damaged or leaking Discontinue charging a battery that gives off extreme heat or a burning odor Use the battery only in the equipme...

Страница 9: ...cations Although this product complies with the limits for a Class B digital device there is no guarantee that interference will not occur in a particular installation CE Compliance This device has be...

Страница 10: ...you 1 Visit www iogear com for more product information 2 Visit www iogear com support for live help and product support Warranty Information This product carries a 1 Year Limited Warranty For the ter...

Страница 11: ......

Отзывы: