www.invertekdrives.com
82-OPT-2-ENCOD-IN User Manual Iss1.00
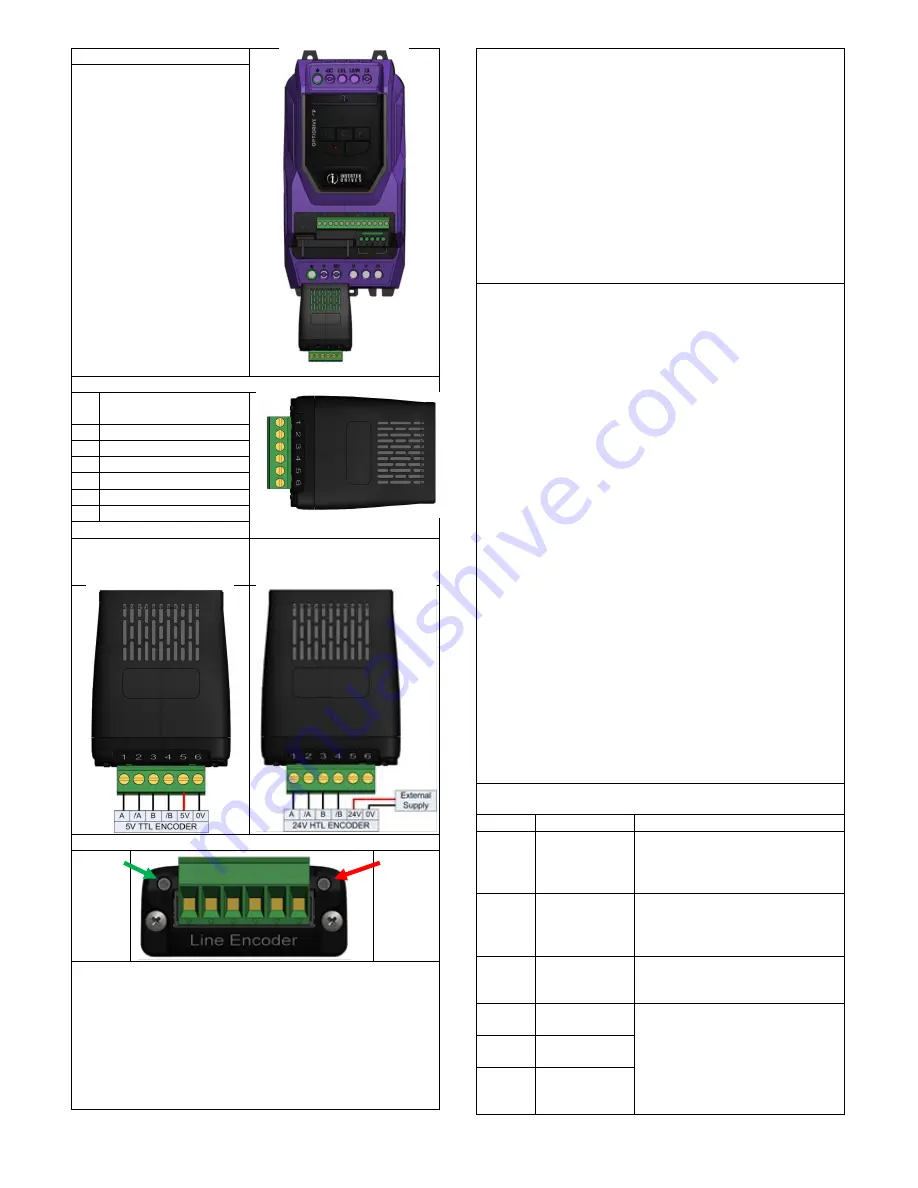
MECHANICAL INSTALLATION
1) Option Module inserted into
Optidrive Option Module Port
2) DO NOT use undue force in
inserting the option module
into the options port.
3) Ensure the option module is
fitted securely before powering
on the Optidrive.
4) Remove terminal block
header from option module
prior to tightening
connections. Replace when
wiring is completed. Tighten to
Torque setting provided in
Specifications.
OPTION MODULE CONNECTION TERMINALS
Pi
n
Function
1
A Channel (A)
2
A Channel Inverse (/A)
3
B Channel (B)
4
B Channel Inverse (/B)
5
+5V DC Output
6
0 Volt
Connection Example – 5V TTL
Encoder
OPT-2-ENCOD-IN
Connection Example – 24V HTL
Encoder
OPT-2-ENCHT-IN
LED A
(Green)
LED B
(Red)
LED STATUS INDICATION
The encoder module has 2 LEDs – LED A (Green) and LED B (Red).
LED A indicates power
LED B indicates a wiring fault condition.
The fault code is indicated on the drive display as noted above. For
transient faults, the LED will remain illuminated for 50ms to ensure
that fast transient faults can be observed.
OPERATION
Parameter Settings
When operating with an encoder, the following parameter settings
are required as a minimum:
P1-09: Motor rated frequency (found on the motor nameplate).
P1-10: Motor rated speed (found on the motor nameplate).
P6-06: Encoder PPR value (enter value for the connected
encoder).
Closed Loop Vector speed provides full torque holding capability at
zero speed and enhanced operation at frequencies below 1Hz. The
drive, encoder module and encoder should be connected according
to the voltage rating of the encoder as shown in the wiring
diagrams.
The encoder cable should be an overall shielded type, with the
shield bonded to earth at both ends.
COMMISSIONING
When commissioning, the Optidrive should firstly be commissioned
in Encoderless Vector Speed Control (P6-05 = 0), and a speed /
polarity check should then be made to ensure that the sign of the
feedback signal matches that of the speed reference in the drive.
The steps below show the suggested commissioning sequence,
assuming the encoder is correctly connected to the Optidrive.
1) Enter the following parameters from the motor nameplate:-
P1-07 – Motor Rated Voltage
P1-08 – Motor Rated Current
P1-09 – Motor Rated Frequency
P1-10 – Motor Rated Speed
2) To enable access to the advanced parameters required, set P1-14
= 201
3) Select Vector Speed Control Mode by setting P4-01 = 0
4) Carry out an Auto-tune by setting P4-02 = 1
5) Once the Auto-tune is completed, the Optidrive should be run in
the forward direction with a low speed reference (e.g. 2 – 5Hz).
Ensure the motor operates correctly and smoothly.
6) Check the Encoder Feedback value in P0-58. With the Optidrive
running in the forward direction, the value should be positive, and
stable with variation of + / - 5% maximum. If the value in this
parameter is positive, the encoder wiring is correct. If the value is
negative, the speed feedback is inverted. To correct this, reverse
the A and B signal channels from the encoder.
7) Varying the drive output speed should then result in the value of
P0-58 changing to reflect the change of the actual motor speed. If
this is not the case, check the wiring of the whole system.
8) If the above check is passed, the feedback control function can be
enabled by setting P6-05 to 1.
An application note, detailing full use of the Encoder interface
module, is available from your local Invertek distributor.
ERROR CODE DEFINITIONS
The following error codes are related to the encoder operation:
Code
Description
S
ol
ution
Communication
loss
No communication between the
encoder module and the drive.
Please check the module is properly
fitted into the slot.
Speed feedback
error exceeds
level set in P6-
07
The estimated motor speed differs
from the measured motor speed.
Check encoder connection, wire
shielding, and values set in P6-07.
Encoder PPR
motor speed
mismatch
The encoder used must have a PPR
value of at least 60. Motor nameplate
RPM must be entered in P1-10
Encoder
Channel A Fault
Error normally caused by encoder
wiring error.
Check encoder wiring and
commissioning guidelines.
Encoder
Channel B Fault
Encoder
Channels A & B
Faults


