background image

PAGE 

28

Towing Loads

2˝ rear receiver hitch

Towing improperly can alter vehicle handling and may 

cause loss of control or brake instability.

Always follow these precautions when towing:

1. 

Never load more than 200 lbs. tongue weight 

on the rear towing bracket.

2. 

Never load more than 300 lbs. tongue weight 

on the front towing bracket. 

3. 

Do not operate the vehicle faster than 10 

MPH when hauling or towing loads on a level 

surface.

4. 

Vehicle speed should never exceed 5 MPH 

when hauling or towing loads on uneven 

surfaces, rough terrain, cornering, or while 

ascending or descending a hill.

5. 

Do not tow more than the recommended 

weight for the vehicle.

6. 

Attach a trailer to the rear trailer hitch bracket 

only. Do not attach a trailer to any other 

location or you may lose control of the vehicle.

7. 

Never tow a trailer on a grade steeper than 15 

degrees.

8. 

Always operate in low range when hauling or 

towing in excess of 200lbs.

Содержание 2500 EV

Страница 1: ...OWNER S MANUAL 2500 EV Electric Vehicle UTVRevised 6 17 2013 ...

Страница 2: ...___________________ Purchasing Date _____________________________ Type ______________________________________ Pin Number ________________________________ Special Notice ______________________________ Key Number ________________________________ ...

Страница 3: ... 10 General Safety Page 11 14 Safe Riding Gear Page 15 Features Controls and Operation Page 16 30 Service and Maintenance Page 31 46 Storing and Maintaining Appearance Page 47 48 Transporting your Intimidator Page 48 Accessories Page 48 Specifications Page 49 Troubleshooting Page 50 51 Warranties Page 52 53 Service Record Page 54 55 Registration Page 56 57 ...

Страница 4: ...on that if not avoided may result in serious injury or death WARNING A Warning indicates a situation that if not avoided may result in property damage Notice A Notice indicates a situation that could result in property damage SAFETY LABELS For your protection warning labels have been placed on the vehicle Read and follow the instructions of the labels on the vehicle carefully If any label becomes ...

Страница 5: ... Avoid paved surfaces Avoid side hilling riding across slopes Require Proper Use of Your Vehicle Do your part to prevent Injuries Do not allow careless or reckless driving Make sure operators are 16 or older with a valid drivers license Do not let people drive or ride after using alcohol or drugs Do not allow operation on public roads unless designated for off highway vehicle access collisions wit...

Страница 6: ...t seat feet flat on floor and foot rests and have hands on steering wheel or handhold s where equipped Stay completely inside the vehicle Be Sure Riders Pay Attention and Plan Ahead If you think or feel the vehicle may tip or roll reduce your risk of injury Keep a firm grip on the steering wheel or hand holds and brace yourself Do not put any part of your body outside of the vehicle for any reason...

Страница 7: ... on tire pressure label if cargo load is over 200 lb Secure cargo so that it will not shift affecting handling or cause the cargo to strike occupants Keep cargo weight centered in the bed and low as possible to reduce the chance of rollover Do not tow or pull objects from any other point on the vehicle other than the trailer hitch to winch if installed Reduce speed when making turns Avoid steel in...

Страница 8: ...losing bed Tire Pressure Chart TIRE PRESSURE AND SIZE CHART ROHVA and ISO certification sticker Located on the ROPS Vehicle Size Load Air Top Speed Rating Max Position Rating lb Pressure psi mph Max Load Payload Front 26x9R14 750 18 10 Loaded Rear 26x11R14 1275 22 10 Front 26x9R14 680 12 25 Unloaded Rear 26x11R14 1000 12 25 ...

Страница 9: ...sential rule if in doubt remove the machine from service and contact the ROPS FOPS manufacturer for assistance Certain conditions will absolutely render the ROPS FOPS unusable examples are Permanent deformation or twisting Missing damaged or loose mounting hardware Mounting hardware that is of a grade lesser than specified Any cracks in the structure structural members and or welds Significant cor...

Страница 10: ...rdware must be examined for signs of over stressing Damaged mounting hardware must be replaced with proper specification hardware before placing the ROPS FOPS back in service Properly maintained seatbelts are essential to compliment the operator crush protection designed into the ROPS All seatbelt and or seatbelt anchorage systems that show evidence of cuts fraying or wear significant discoloratio...

Страница 11: ...ed and use extra caution while carrying passengers Avoid sharp turns or turns while applying heavy throttle Operate slowly in reverse avoid sharp turns or sudden braking Make sure passengers read and understand all safety labels Operator Safety Operator and passengers must fasten seatbelt while the vehicle is in use Never operate your vehicle in fast flowing water or in water deeper than the floor...

Страница 12: ...s Always keep combustible materials away from the engine Use caution when traveling through tall grass especially dry grass Do not carry a passenger until you have at least two hours of driving experience with the Intimidator Always keep hands and feet inside the vehicle at all times Always inspect the vehicle before each use to make sure it s in safe operating condition Follow inspection procedur...

Страница 13: ...es jumps and other stunts increase the risk of an accident or overturn Never attempt wheelies jumps or other stunts Avoid exhibition driving Improper Hill Climbing Climbing hills improperly can cause loss of control or vehicle overturn Do not climb a hill or drive down a hill over 15 degrees Stalling While Climbing a Hill Stalling or rolling backwards while climbing a hill could cause an overturn ...

Страница 14: ... increase the speed or power of the vehicle or to make any other modifications to the vehicle for these purposes Any modifications to the original equipment of the vehicle create a substantial safety hazard and increase the risk of bodily injury The warranty of the Intimidator will be terminated if any unauthorized equipment has been added to the vehicle or if any modifications have been made to t...

Страница 15: ...always wear a helmet that meets or exceeds established DOT U S Department of Transportation safety standards Eye Protection Do not depend on eyeglasses or sunglasses for eye protection Always wear shatterproof goggles or use a shatterproof helmet face shield Gloves Wear gloves for comfort and for protection from sun cold weather and other elements Boots Wear sturdy footwear Do not drive or ride ve...

Страница 16: ...EV is equipped with a battery meter and an analog speedometer with a digital LCD screen High pressure water or soap may damage components The Battery meter or BDI displays the percentage of battery life remaining an hour meter and any error code if one should exist NOTICE If the vehicle batteries are low and vehicle is only allowed to charge for a short period of time the battery meter may display...

Страница 17: ...ed by the vehicle if reset before each trip To reset the Trip press and hold the MODE button to select Trip A or Trip B on the Trip Date menu Press the down key until Reset Date is highlighted then press and hold MODE to select Season Miles and engine hours Menu Adjust LCD screen brightness To adjust the LCD backlight brightness Press the down arrow button until Menu appears Once menu is highlight...

Страница 18: ...n the steering column On the rocker switch the middle position of the switch is off Press the left side of the rocker switch to turn on the low beam lights Press the right side of the rocker switch to turn on the low and high beam lights Standard Intimidator models are equipped with low beam headlights Press the left side of the rocker switch to turn on the low beam lights The right side of the ro...

Страница 19: ...t is off In some situations the front differential may remain locked after turning the 4wd switch off If this occurs you may continue to notice increased steering effort and some vehicle speed restrictions Perform the following procedure to unlock the front differential 1 Stop the vehicle 2 Operate in reverse for at least 10 feet 3 Shift into a forward gear and drive Locking Rear Differential The ...

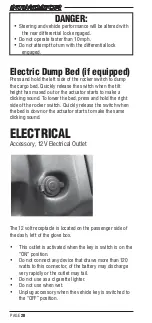
Страница 20: ...ed press and hold the right side of the rocker switch Quickly release the switch when the bed is down or the actuator starts to make the same clicking sound Electrical Accessory 12V Electrical Outlet The 12 volt receptacle is located on the passenger side of the dash left of the glove box This outlet is activated when the key is switch is on the ON position Do not connect any device that draws mor...

Страница 21: ...g heavy loads always Park on level ground WARNING The vehicle s gear shift lever comes properly adjusted from the factory so that the Park gear is fully engaged and will not slip out of Park During every pre ride inspection inspect that the gear shift lever is fully engaged into Park and will not slip out of Park Have your authorized dealer annually inspect lubricate adjust or replace the shifter ...

Страница 22: ...ry or death Always avoid operating in a manner that could result in vehicle rollover Do not grab or hold ROPS while vehicle is moving If a rollover occurs holding to the roll cage could crush your hand Modifying or cutting the ROPS can cause serious injury or death Do not add any unauthorized accessory that bolts into the ROPS mounting points Seat Removal Pull up on the front of the seat and slide...

Страница 23: ...Falling from a moving vehicle could result in serious injury or death Always fasten your seatbelt DANGER This vehicle is equipped with 3 point seat belts for occupants Always make sure the seat belts are secured for all riders before operating ...

Страница 24: ...ing wheel Shifting Gears The Intimidator is equipped with a gear selection icon shown on the instrument clusters digital display The brake pedal must be applied in order to start the vehicle and should be applied while shifting WARNING The vehicles gear shifter comes properly adjusted from the factory so that the Park gear is fully engaged and does not slip out of Park Have your authorized dealer ...

Страница 25: ... passenger accessories cargo loads and the load on the trailer tongue The combined weight of these items must not exceed the maximum weight capacity Reduce speed and allow greater distances for braking when hauling cargo Always load the cargo box with the load as far forward and as low as possible When operating over rough or hilly terrain reduce speed and cargo to maintain stable driving conditio...

Страница 26: ...dump box 1 Select a level site to dump the cargo box Do not attempt to dump or unload the vehicle while parked on an incline 2 Apply the brakes Place the gearbox in Park 3 Dismount the vehicle 4 Ensure that the cargo is positioned evenly DANGER If the weight distribution on the box is located towards the rear of the box when the release lever is lifted the box may dump unexpectedly and cause serio...

Страница 27: ...open the tailgate twist the latch on the middle of the tailgate then pull The tailgate is supported by a lever on each side of the cargo bed Do not remove the levers WARNING To avoid personal injury do not sit or stand on the tailgate Do not place fingers or hands between the tailgate and the arm latch when closing or fingers or hands may be pinched ...

Страница 28: ...e faster than 10 MPH when hauling or towing loads on a level surface 4 Vehicle speed should never exceed 5 MPH when hauling or towing loads on uneven surfaces rough terrain cornering or while ascending or descending a hill 5 Do not tow more than the recommended weight for the vehicle 6 Attach a trailer to the rear trailer hitch bracket only Do not attach a trailer to any other location or you may ...

Страница 29: ...mum Towing Maximum Towing Weight on Load Weight Tongue Weight Tongue Weight Speed on level Speed on level ground on 15 degree grade ground 15 degree grade Intimidator EV 1 500 lbs 500 lbs 200 lbs 300 lbs 10 mph 16 kph 5 mph 8 kph Intimidator EV XD4 1 500 lbs 500 lbs 200 lbs 300 lbs 10 mph 16 kph 5 mph 8 kph In low range ...

Страница 30: ...have multiple mounting positions to further adjust the stiffness of the ride by changing the angle in which the shocks are mounted With heavy loads the shocks can be mounted in a near vertical position If you haul light to medium size loads and want a smoother ride the shocks can be mounted in more of an angle which also will increase wheel travel DANGER To avoid personal injury be sure to work on...

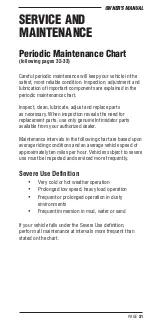
Страница 31: ...only genuine Intimidator parts available from your authorized dealer Maintenance intervals in the following chart are based upon average riding conditions and an average vehicle speed of approximately ten miles per hour Vehicles subject to severe use must be inspected and serviced more frequently Severe Use Definition Very cold or hot weather operation Prolonged low speed heavy load operation Freq...

Страница 32: ...lights Pre Ride Axle and steering joint boots Pre Ride Check battery water level Monthly Torque battery terminals Monthly Place dielectric grease on batteries Monthly Brake pad wear 50 hr 3 Months Transmission gearbox oil 50 hr 3 Months Rear differential oil 50 hr 3 Months Front differential oil 50 hr 3 Months Lubricate front suspension 100 hr 12 Months Lubricate rear suspension 100 hr 12 Months S...

Страница 33: ...spect lubricate reapply as needed Inspect periodically Inspect level change yearly Inspect lubricate change yearly Inspect level change yearly Lubricate polyurethane joints Lubricate polyurethane joints Inspect lubricate Inspect adjust lubricate replace if needed Inspect for wear Apply dielectric grease to connectors subject to water mud etc Change every two years or 500 hours Inspect replace as n...

Страница 34: ...es Front differential oil Hydraulic Oil 18 ml Rear differential oil 80w 90 gear oil 550 ml Transmission gearbox oil Dexron VI 700 ml Fuses and Relays Fuses can be found in two location a fuse block under the hood and two single fuses below the block Fuse Block 1 Differential Lock 10 amp 2 Headlights Low 15 amp 3 Headlights High if equipped 15 amp 4 Electric Actuator if equipped 20 amp 5 12 volt Ac...

Страница 35: ...PAGE 35 OWNER S MANUAL Method above metal plates in battery Maintain level between fill lines Power Converter Fuses Located under fuse block both are 30 amp ...

Страница 36: ...ers If a fault occurs the controller will display error codes on the small digital display right of the speedometer The control has two status lights on the casing Below is a troubleshooting chart explaining the lights TYPES OF LED DISPLAY DISPLAY STATUS Neither LED illuminated Controller is not powered on has a dead battery or is severely damaged Yellow LED flashing Controller is operating normal...

Страница 37: ...ly When needed fill the batteries with distilled water to maintain a fluid level of inch above the metal plates in each battery cell If you allow the water level in the battery to fall below the metal plates the battery may self discharge and would need to be replaced If the battery terminal becomes loose it could cause a short or melt the battery terminal Check the terminal bolt torque monthly It...

Страница 38: ...and off as needed It will take around 8 10 hours to charge your batter from 0 to 100 When the charging is complete the meter on the battery charger pictured above will illuminate a steady green LED light See the Charging Indication Lights chart below To charge your vehicle 1 Park the vehicle in a well ventilated indoor area 2 Locate an outlet on a circuit with a 15 amp circuit breaker and no other...

Страница 39: ...s underneath the hood to run all the 12 volt electronics Some additional accessories like lights can be added To run large accessories like a winch you would need to purchase an Intimidator winch battery kit from Bad Dawg Accessories Jump Starting DANGER Do not attempt to jump start the Intimidator EV ...

Страница 40: ...ith the bottom of the level check fill plug hole threads 1 Position the vehicle on a level surface 2 Remove the level check fill plug Check the oil level 3 Add the recommended oil as needed 4 Reinstall both fill plugs Oil Change The drain plug is located on the lower front driver side of the gear case 1 Position the vehicle on a level surface 2 Place a drain pan under the gear case 3 Remove the dr...

Страница 41: ...cate the shift linkage bracket on top of the skid plate on the passenger side of the gearbox 2 Depending on which way the shifter needs to be adjusted loosen one of the jam nuts and then tighten the other jam nut until they both are snug against the shifter bracket Adjust in 1 8 intervals until the shifting is correct 3 If needed further adjustment can be made under the hood on the linkage picture...

Страница 42: ...earbox in Park 3 Remove the fill plug Check the oil level 4 Add the recommended oil as needed 5 Reinstall the fill plug Differential Oil Change On the front differential the drain plug is located on the bottom center On the rear differential the drain plug is located on the passenger side 1 Position the vehicle on a level surface 2 Place gearbox in Park 3 Remove the fill plug 4 Place a drain pan u...

Страница 43: ...two way or three way switch in the dash The outside headlights are driving lights The inside set of lights are high beam lights if equipped The height and angle of the headlights can be adjusted by Tightening or loosening the 5 16 jam nuts up and down the studs Sliding the 5 16 bolts that fasten the adjustment brackets to the frame CV Joint Boots In accordance with the Periodic Maintenance Chart i...

Страница 44: ... in P Park 2 View the brake fluid level at the reservoir in the driver s side wheel well The level should be between the upper MAX and lower MIN level lines 3 If the fluid level is lower than the upper level line remove cap and add brake fluid to the upper MAX line 4 Reinstall the cap 5 Apply the brake forcefully for a few seconds and check for fluid leakage around the fittings Brake Inspection 1 ...

Страница 45: ...rranty Guideline for details Tire Tread Depth Always replace your tires when tread depth is worn to 1 8 3 mm or less TIRE PRESSURE AND SIZE CHART Vehicle Size Load Rating Air Pressure Top Speed Rating Position lb psi mph Max Load Max Payload Front 26x9R14 750 18 10 Loaded Rear 26x11R14 1275 22 10 Front 26x9R14 680 12 25 Unloaded Rear 26x11R14 1000 12 25 Steering Wheel Inspection Check the steering...

Страница 46: ...he steering wheel may become damaged or forcefully come off Do not turn the steering wheel or allow the tires to turn 6 Reinstall Steering Wheel to center position 7 Reinstall the steering wheel nut 8 Reinstall the steering wheel cap Alignment To adjust front tire alignment 1 Make sure the steering wheel alignment is correct 2 Stop the vehicle on a level surface with the tires straight forward 3 P...

Страница 47: ... the vehicle Clean vehicle with automotive soap and water NOTICE Mud can stain the vehicles seat and plastic Immediately wash mud off vehicle with mild soap and water Tips Avoid the use of harsh cleaners as they can scratch the finish Do not use a power washer to clean the vehicle Do not use medium to heavy duty compounds on the finish Always use clean microfiber cloths towels and pads for cleanin...

Страница 48: ...t boards under all tires to keep dampness away from the rubber 7 Put a cover over the vehicle to keep dust and dirt from collecting on it TRANSPORTING YOUR INTIMIDATOR DANGER When trailering your vehicle ALWAYS put the transmission being in Park AND secure the vehicle to the trailer by tying the frame of the Intimidator to the trailer with suitable straps or chains Do not attach a strap or chain t...

Страница 49: ...0 Peak HP 48 Volt AC Electric Battery System Eight 6 Volt 2300 Series Liquid Acid with 2 Gauge Cables On Board Charger Smart Charge System shuts off when charged Torque Peak 119 ft lbs Electronic Speed Control 650 AMP MAX Horsepower 30HP Speed Up to 23 MPH varies due to terrain and weight Measurements Weight 2 069 lbs Length 113 Width 63 Height 78 Turning Radius 103 Wheelbase 77 Frame Clearance 12...

Страница 50: ...le battery problem exists and the charge cycle has been terminated at this point Problem The charge status indicator changes rapidly back and forth from red to green or the green LED will not illuminate after excessive charging time 24 or more hours Answer Disconnect AC power from the charging system This indication may signify a possible battery or charger problem TROUBLESHOOTING Trouble Cause No...

Страница 51: ...ed at this point Please call technical support for assistance Problem A green LED was illuminated before disconnecting the power from the charger but upon reconnection red LEDs appear and remain on Answer This is the normal operating procedure for the system It indicates that a reanalysis of the battery status was initiated and after a series of steps the green LED was illuminated Countermeasure M...

Страница 52: ...tery manufacturer Interstate Battery Intimidator 4x4 does not assume any warranty obligation liability or modification for this item WARRANTY LIMITATIONS AND EXCLUSIONS This warranty excludes any failures that are not caused by a defect in material or workmanship This warranty does not cover defects caused by normal wear accidents improper maintenance improper use or abuse of the product or failur...

Страница 53: ...e responsibility of the customer to register his her machine for warranty by promptly returning a completed warranty registration card within 30 days from the date of purchase The registration process can also be completed online at www intimidator4x4 com by clicking the owners tab then selecting the warranty registration option Also the customer must operate and maintain his her machine within th...

Страница 54: ...Meter Reading ______________________________ Dealer Stamp ___________________________________ 2nd Service Date __________________________________________ Hour Meter Reading ______________________________ Dealer Stamp ___________________________________ 3rd Service Date __________________________________________ Hour Meter Reading ______________________________ Dealer Stamp ________________________...

Страница 55: ...________________________________ 6th Service Date __________________________________________ Hour Meter Reading ______________________________ Dealer Stamp ___________________________________ 7th Service Date __________________________________________ Hour Meter Reading ______________________________ Dealer Stamp ___________________________________ 8th Service Date ________________________________...

Страница 56: ... OF PURCHASE_________________________ DEALER__________________________________ PURCHASER LAST NAME_______________________________ FIRST NAME______________________________ ADDRESS________________________________ CITY____________________________________ STATE___________________________________ POSTAL CODE_____________________________ DAY PHONE_______________________________ EVENING PHONE____________...

Страница 57: ...ways be extra careful when riding on unfamiliar terrain steep slopes or when encountering obstacles _____ I have read the above warnings and I understand that SEVERE INJURY OR DEATH can result from ignoring these warnings or from improper use _____ I will watch the safety training video provided by Intimidator Inc before operating this vehicle ____________________________________________________ P...

Страница 58: ...______________ ___________________________________________________________ ___________________________________________________________ ___________________________________________________________ ___________________________________________________________ ___________________________________________________________ ___________________________________________________________ _________________________...

Страница 59: ...______________________ ___________________________________________________________ ___________________________________________________________ ___________________________________________________________ ___________________________________________________________ ___________________________________________________________ ___________________________________________________________ _________________...

Страница 60: ...For additional information please see us at www intimidator4x4 com Intimidator Inc 1 Bad Boy Blvd Batesville Arkansas 72501 855 307 0933 OWNER S MANUAL 2500 EV Electric Vehicle ...

Отзывы: