


IS-1500 User Guide
Thales Visionix, Inc.
MNL- 0024 (D)
Page 43 of 59
5.3.2
Image Resolution in the Configuration Utility
The Configuration Utility mode of sfHub allows a user to access some of the hardware settings on the InertiaCam. Most of these
should not be changed without the assistance of Thales Visionix technical support. One important setting for tracker performance
can easily be changed here by a user, though- the resolution of the InertiaCam images. By default, InertiaCam’s are now shipped
with 640x480 resolution, which uses less CPU while maintaining tracking performance. This makes it more efficient for tracking on
host computers with lower processing power and decreases the size of log files to a reasonable size. Some applications may require
the output or use of higher resolution images, however.
Use the following steps to change the output resolution of the InertiaCam.
1.
If they are currently running, close the sfHub and sfStudio programs.
2.
Open the sfHub.info file.
3.
Under the General section, set appMode
3
.
General
{
appMode
3
; (1) Tracking (2) Playback (3) Configuration Utility
numSensors 1
; (1) Min (4) Max
verbosity 0
; (0) Low (1) Med (2) High
replaySpeed 1.0
; Playback speed multiplier
4.
Save and close sfHub.info.
5.
Run the sfHub program manually from the same folder sfHub.info was found in.
6.
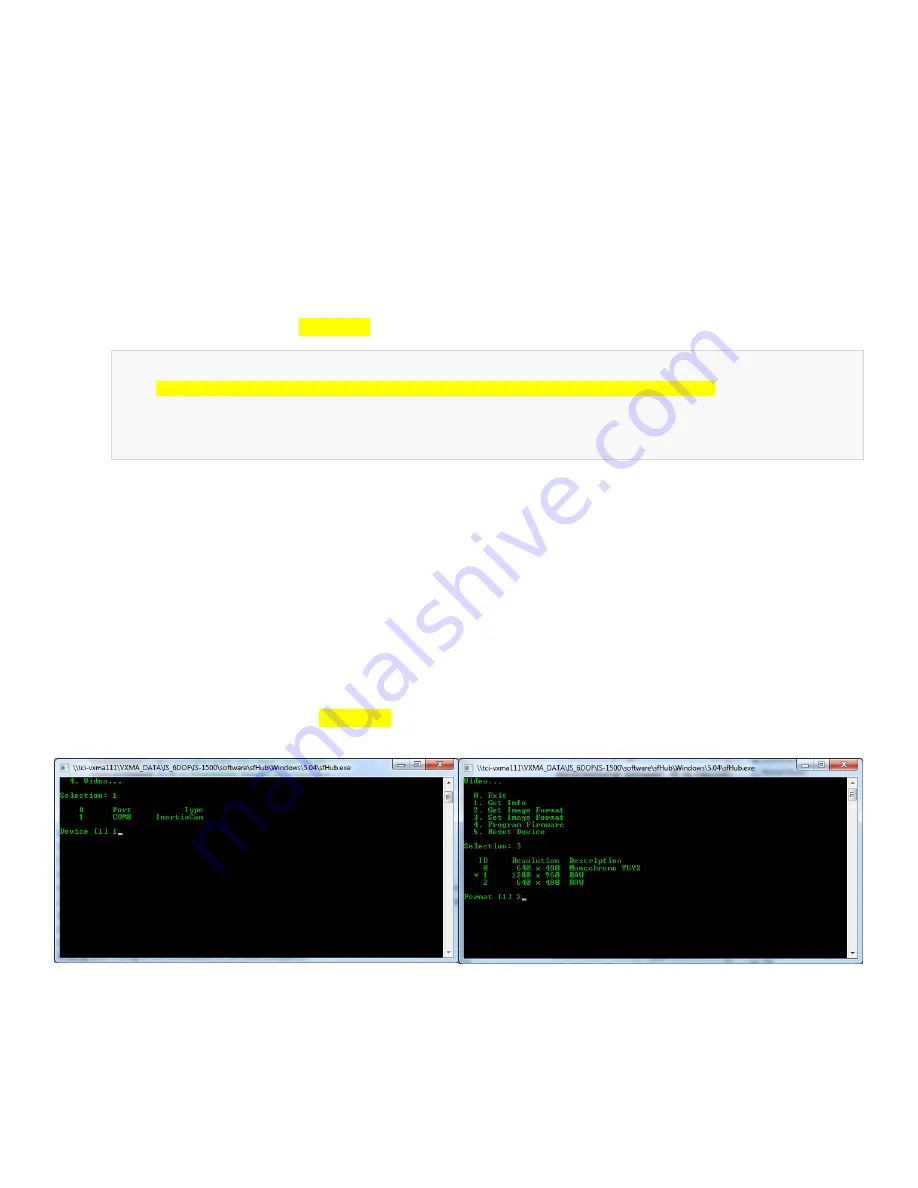
When sfHub opens, it will be awaiting user input. Enter 1 to connect to the InertiaCam.
7.
Select which InertiaCam port to use by entering the line number it appears on.
8.
Enter 4 to view the Video menu, then 3 to select Set Image Format.
9.
Enter 1 to set the InertiaCam to use 1280x960 resolution, or enter 2 to use the default 640x480 resolution. The line with the
asterisk and the number in brackets indicate the current setting. In Figure 36, the current setting is 1280x960, and entering
2 will change it to 640x480 resolution.
10.
Back at the Video menu, select 5 to reset the device and apply the changes.
11.
Close sfHub.
12.
Unplug and re-plug in the InertiaCam to the host computer.
13.
Repeat steps 1-4, this time setting appMode
1
to return sfHub back to tracking mode.
Figure 36 – Setting InertiaCam Image Resolution