background image


EN : 6  

TVN 21P Quick Start Guide 

Item Name 

Description 

Time to set up. 

7. All-day 

playback 

Playback the recorded video 
of the selected day from the 
selected camera. The current 
day is selected by default.  

8. 

Monitor B 

Switch between monitors A 
(main) and B (spot). 

9. Advanced 

search 

Enter the advanced video 
search menu.  

10. Output 

mode 

Select VGA, HDMI, or BNC. 

11. Close 

timebar 

Open/close the time bar. 

Configuring the TVN 21 

The NVR has an icon-driven menu structure 
that allows you to configure the unit’s 
parameters. Each command icon displays a 
screen that lets you edit a group of settings. 
Most menus are available only to system 
administrators. 
Refer to the NVR user manual for detailed 
information on configuring the unit. 

To access the main menu from live view: 

 Press 

the 

Menu

 button on the remote 

control or front panel 
- Or - 

  Right-click the mouse and select 

Menu


from the pop-up menu.  

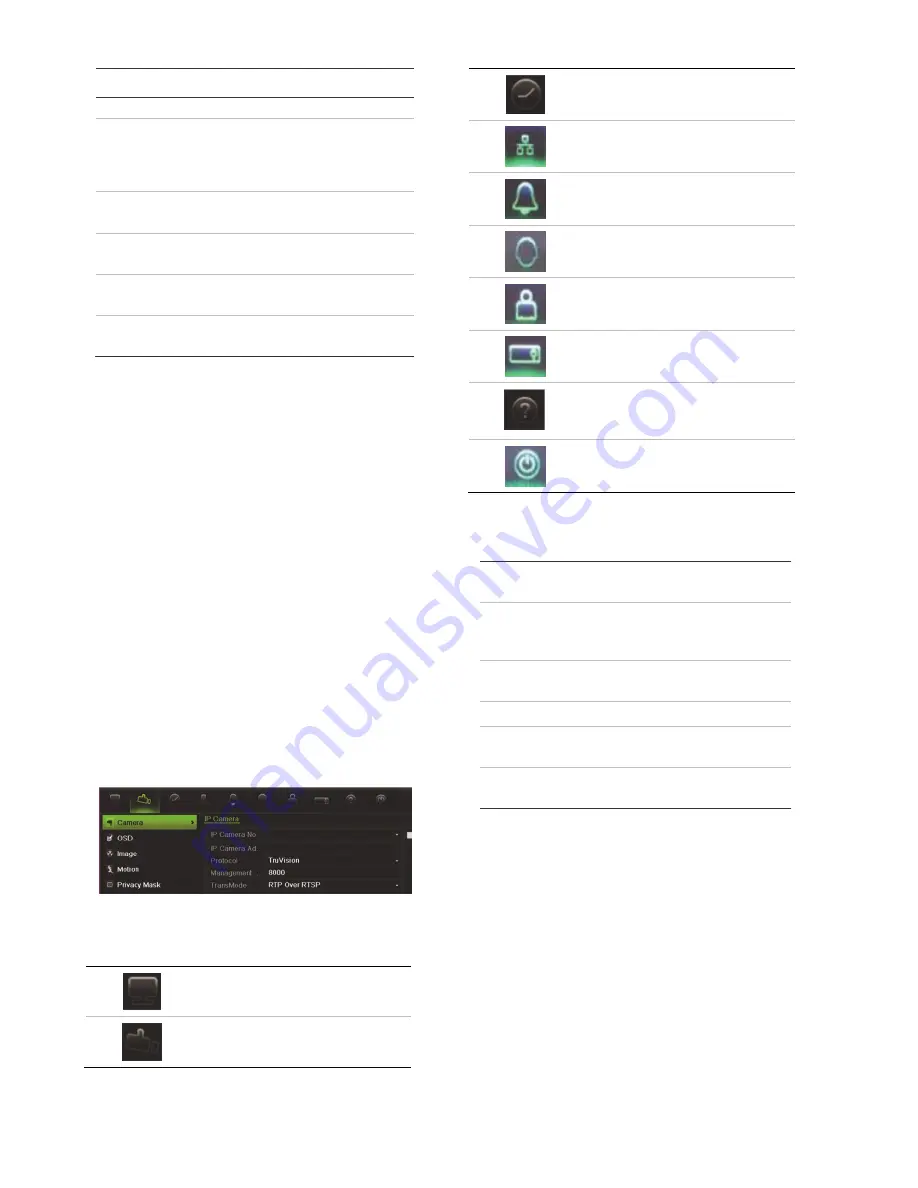
The main menu screen appears. Move the 
mouse over a command icon in the menu 
toolbar and click to select it. 


Description of the command icons in the 
menu toolbar: 


Configures display settings. 


Configures camera settings. 


Configures recording settings. 


Configures standard network 
settings. 


Configures alarm settings. 


Configures PTZ settings. 


Configures user settings. 


Configures system settings. 


Provides reference information 
to the various toolbars and 
menus within the interface. 


Provides access to logout, 
reboot and shutdown options. 

 Specifications 


Power supply 

100 to 240 VAC,  
6.3 A, 50 to 60 Hz 

Power 
consumption 
(without HDD) 


<= 45 W 

Operating 
temperature 

-10 to +55 ºC 
(50 to 131 °F) 

Relative humidity 

10 to 90% 

Dimensions  
(W x D x H) 

445 × 470 × 90 mm 
(17.5 × 18.5 × 3.5 in.) 

Weight 

 8 kg (

 17.6 lb.) 

(without HDD) 


Contact information 

For contact information, see 
www.interlogix.com, or 
www.utcfssecurityproducts.eu 


Содержание TruVision NVR 21P

Страница 1: ...TruVision NVR 21P Quick Start Guide P N 1072756A EN REV 1 0 ISS 04DEC13...

Страница 2: ...All rights reserved Trademarks and patents The TruVision and Interlogix names and logos are trademarks of United Technologies Other trade names used in this document may be trademarks or registered t...

Страница 3: ...t to speakers for audio output 8 Connect to a VGA monitor 9 Connect to a HDTV The HDMI connection supports both digital audio and video 10 Universal Serial Bus USB Connect to an additional device such...

Страница 4: ...n or error Ready Green indicates the device is functioning properly Archive Blinking green indicates archiving is in progress 4 Archive button Press once to enter quick archive mode Press twice to sta...

Страница 5: ...ted file Default time is 1 minute Live Switch to live view mode Replay Replay the current file in playback Starts at the beginning of the file 10 Front panel lock You can lock or unlock the front pane...

Страница 6: ...to use Recording starts automatically Operating the TVN 21 There are several ways to control the unit Front panel IR remote control Mouse Web browser Front panel The buttons on the front panel control...

Страница 7: ...is the normal operating mode of the unit where you watch live pictures from the cameras Regularly used functions in live view can be quickly accessed by clicking the right button of the mouse on the c...

Страница 8: ...n the remote control or front panel Or Right click the mouse and select Menu from the pop up menu The main menu screen appears Move the mouse over a command icon in the menu toolbar and click to selec...

Отзывы: