P/N 1073538-EN • REV A • ISS 05SEP18
3 / 4
192.168.0.x (where x is a number between 1 and 254, except
100), and the default subnet mask is 255.255.255.0.
Figure 7: IP management diagram
Logging in to the managed switch
1. Use the Internet Explorer 11.0 or later web browser and
type the IP address http://192.168.0.100
(the factory-
default IP address) to access the web interface.
2. When the following dialog box appears, type the default
user name “admin” and password “admin” (or the
password you have changed before) as shown in Figure 8
below.
Default IP Address:
192.168.0.100
Default User Name:
admin
Default Password:
admin
Figure 8: Login screen
3. After typing the password, the main screen appears as
shown in Figure 9 below.
Figure 9: Main web interface screen
4. The switch menu on the left side of the web page permits
access to all the functions and status provided by the
managed switch.
Figure 10: Main menu
Refer to the User Manual or click the
Help
button for further
information about using the web management interface.
Note
: For security purposes, change and memorize the new
password after this first setup.
Saving the configuration
The running configuration file is stored in the RAM of the
managed switch. In the current version, the running
configuration sequence of running-config can be saved from
the RAM to FLASH by executing the Save Startup Config
command. After doing this, the running configuration sequence
becomes the startup configuration file (i.e., the saved
configuration).
To save all applied changes and set the current configuration
as a startup configuration, the startup-configuration file is
loaded automatically across a system reboot.
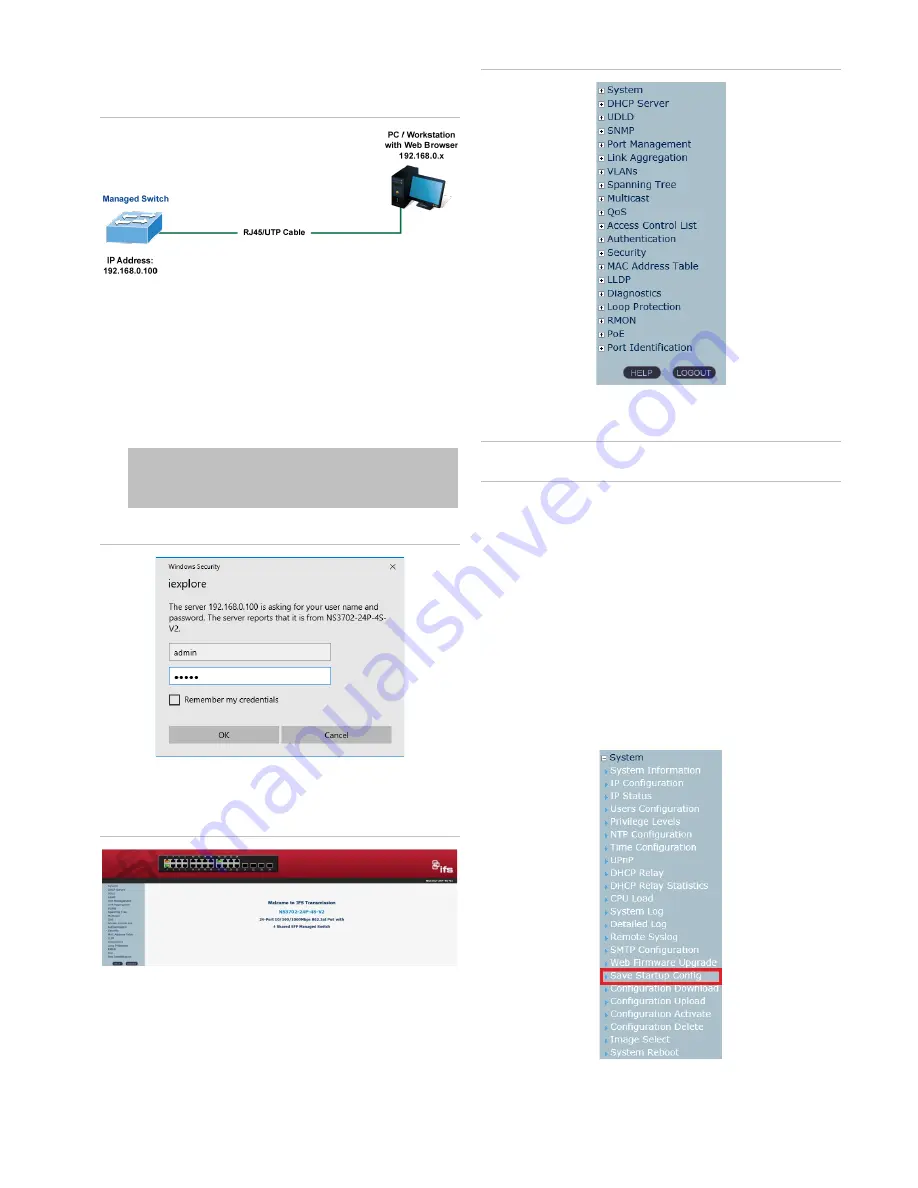
1. Click
System
>
Save Startup Config
.
2. Click the
Save Configuration
button.


