Intel® Server System S9200WK Product Family Setup and Service Guide
20
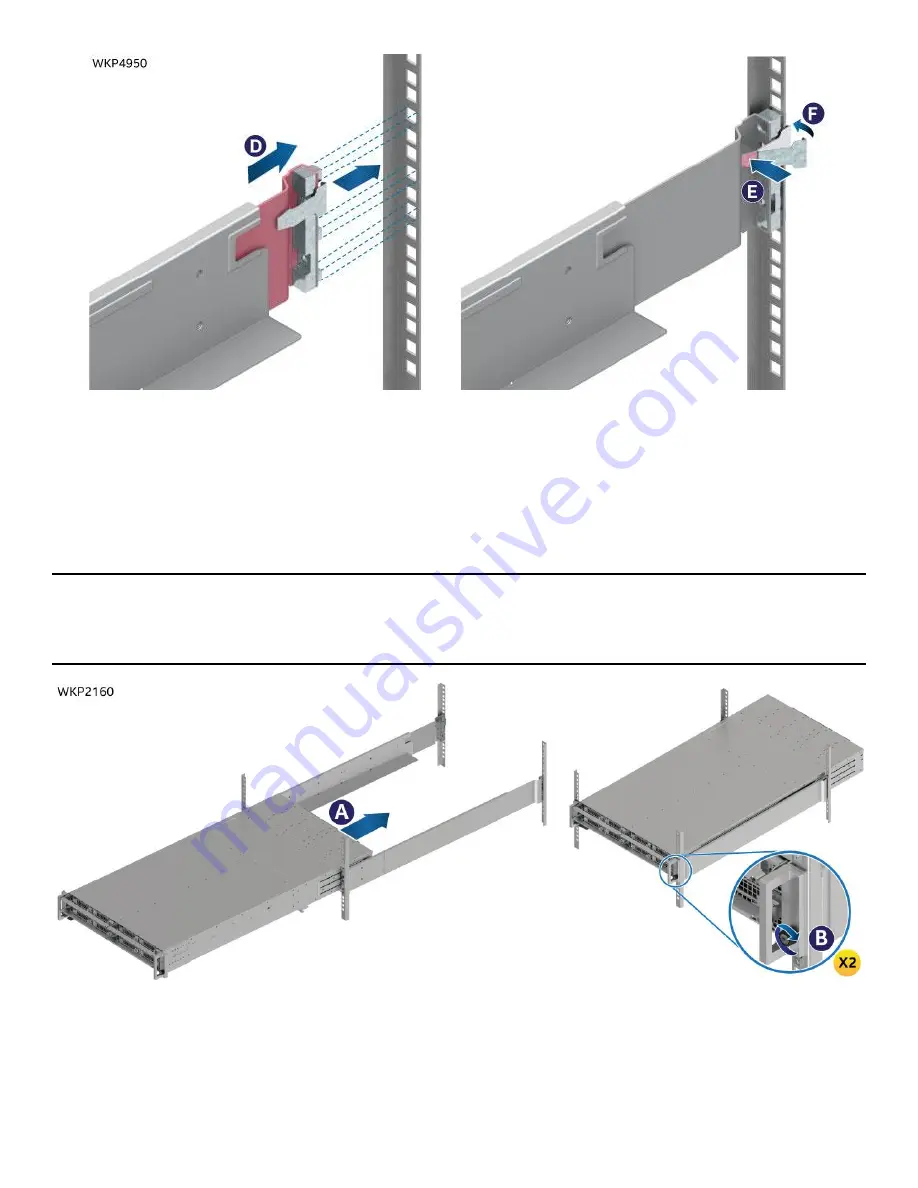
Figure 10. Securing the back of the rail
4.
Extend and align the rear guides with their slots in the back of the rack (see Letter D).
5.
Insert the rail guides into their respective rack slots while pressing on the clip (see Letter E).
6.
Release the clip once the guides are fully inserted into the rack (see Letter F).
7.
Repeat this process with the opposite rail.
2.2.2
Installing the Chassis Into a Rack
Important Safety Note:
Due to the weight of a fully configured system, Intel® recommends using a
mechanical lift to aid with the installation of the system into the rack, and/or to use at least two people to
install the system into the rack, or remove all installed compute modules from the system before attempting
to install the system into the rack.
Figure 11. Installing the chassis into the rack
1.
Insert the chassis onto the rails and slide it back to the rear of the rack (see Letter A).
2.
Tighten the thumbscrews located on the chassis handles to secure the chassis to the rack (see Letter
B).
3.
If removed, install the compute modules into the chassis (see Section 4.2).


