


User Guide for NUC8i7BEK, NUC8i5BEK, NUC8i3BEK
3
This guide tells you how to:
•
•
•
•
•
•
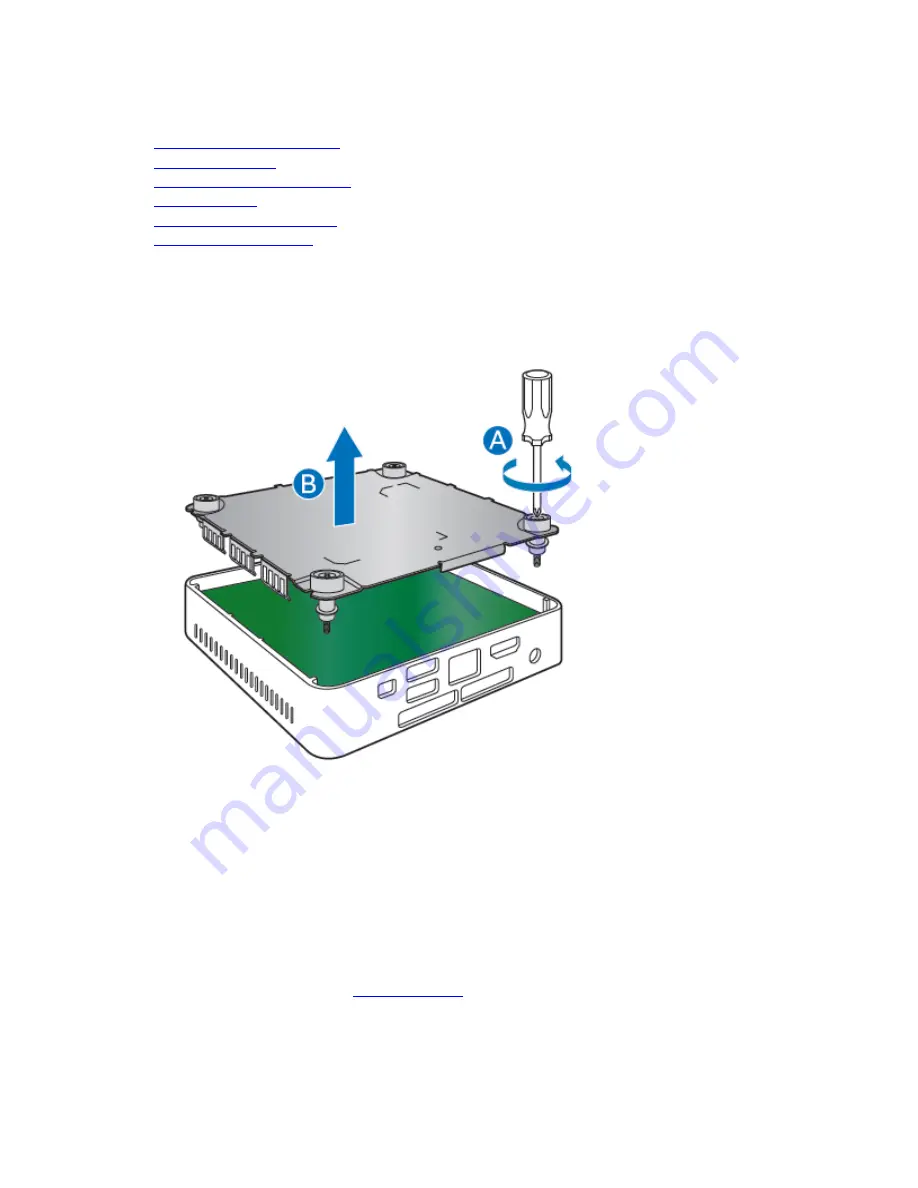
Open the Chassis
Unscrew the four corner screws on the bottom of the chassis and lift the cover.
Installing and Removing Memory
Intel NUC Kits NUC8i5BEK and NUC8i3BEK have two 260-pin DDR4 SO-DIMM sockets. Memory
requirements:
•
1.2V low voltage memory
•
2400 MHz SO-DIMMs
•
Non-ECC
For a list of tested memory, go to the
page on the Support site.


