


User Guide for Intel® NUC 8 NUC8i7HNKQC and NUC8i7HVKVA
3
This guide tells you how to:
•
Open and Close the Chassis
•
Install and Remove Memory
•
Install an M.2 SSD
•
Install a VESA Mount Bracket
•
Connect Power
•
Install an Operating System
•
Install the latest device drivers and software
•
Operating System Recovery
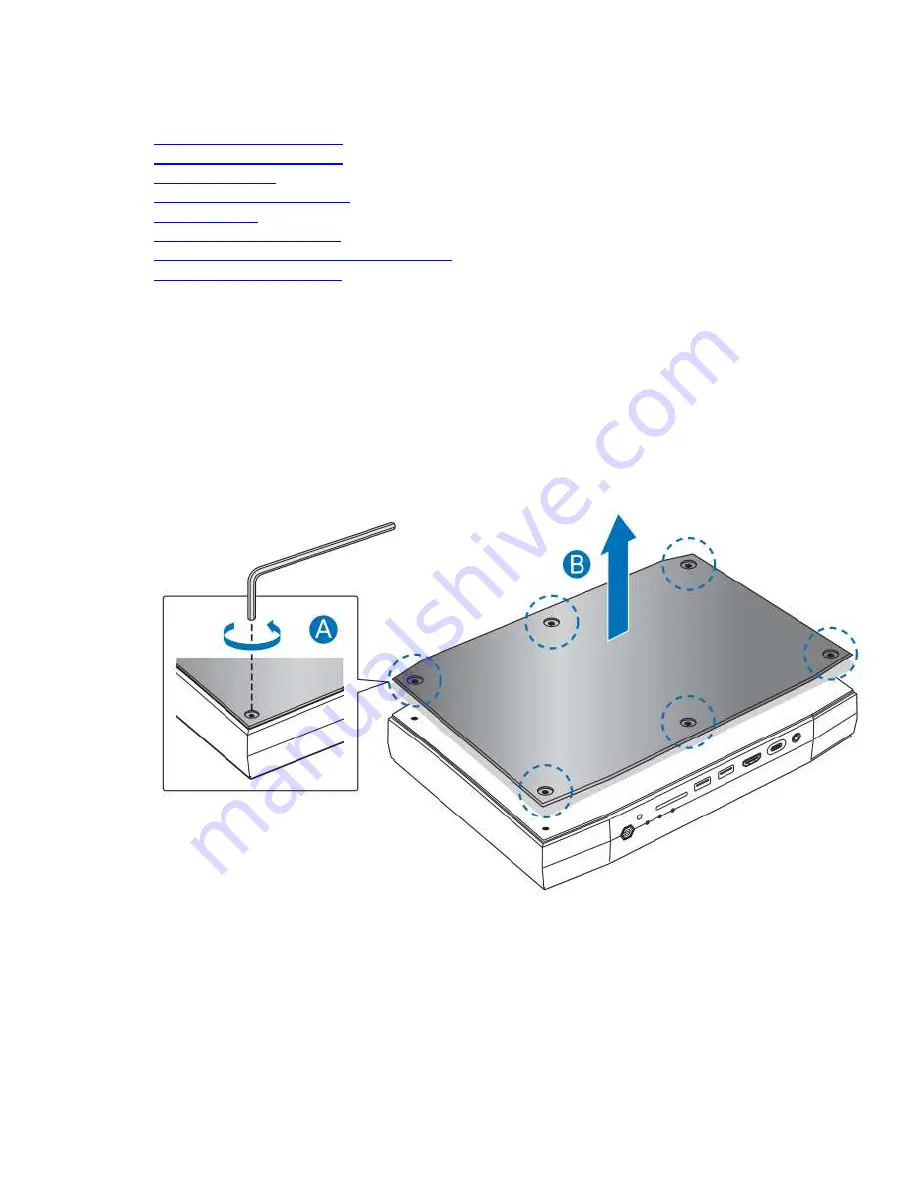
Open the Intel NUC Chassis
To open the Intel NUC chassis, follow these steps:
1.
Using the included hex wrench, unscrew the six screws on the top cover of the chassis and lift the
cover.


