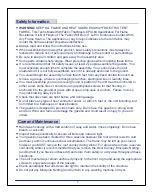
INSTYLE Pinnacle Dia 6414-304 Скачать руководство пользователя страница 3

Extra Reminder:

This gazebo has been created as a non-permanent structure. It is designed for sun shade and is not 

a shelter against adverse weather conditions. Do not use this gazebo in storms, hurricanes, typhoons, strong wind, 

and rain.  Be aware that the water may sit and pool at the fabric canopy top after rain as indicated in the below 

diagram and may cause severe damage to the gazebo. Please always check and tighten the canopy.  Please take a 

minute to lose and remove the roof canopy at least before the weather!

Warning: 

Rainwater may pool here! 

2

Secure the frame  Keep away from 

heat sources and 

open �lames.

Do not use during 

severe weather 

conditions.

Do not use in 

windy conditions

This is a shade structure, not intended to use in 

rain, very windy or other severe weather conditions. 

The structure may collapse due to water pooling on 

canopy or strong wind blow. The canopy top must 

be loosed and/or removed to avoid weather 

damage.

Содержание Pinnacle Dia 6414-304

Страница 1: ...SKU 6414 304 Pinnacle Dia 13 Roof Style Hexagon Pavilion with All Around Netting Instruction Manual...

Страница 2: ...wood stone tiles or concrete using appropriate screws for that flooring or anchored into the ground or grass with proper camp nails or anchors Failure to do so may risk blowing away by wind Check that...

Страница 3: ...damage to the gazebo Please always check and tighten the canopy Please take a minute to lose and remove the roof canopy at least before the weather Warning Rainwater may pool here 2 Secure the frame K...

Страница 4: ...drill that has a narrow body or has an extension adaptor for certain connections and be sure to use low torque so as not to damage the bolt heads PLANNING ASSEMBLY It will take minimum two people to...

Страница 5: ...KAGE CONTENTS 4 Part Qty G Description 1 F 1 H 1 Main Canopy Vent Cover Netting Panel A B C D E F G J H 1 J Part Qty E Description 6 12 6 6 6 A C B D Post Upper Beam Tube Beam Connector Arched Beam Tu...

Страница 6: ...Beam Tube C with Plas c Spacer EE in between Note Don not forget to use Plas c Spacer EE while assemble 1 2 Depress the spring loaded pin and insert Upper Beam Tube B and Arched Beam Tube C into Beam...

Страница 7: ...2 1 A ach Beam Connector E to Post A with Bolt M6x15 AA Please ask for helping hands as you can during the main frame set up Assembly continued STEP 2 Setting Up the Main Frame 6 A E AA E AA A A A A...

Страница 8: ...tinued STEP 3 Attaching the Roof Frame 7 3 1 Depress the spring loaded pin and insert Roof Tube D into Roof Tube Hub F One a er the another un l spring pin pop out and lock the connec on D D D D F D D...

Страница 9: ...1 Depress the spring loaded pin and insert Roof Tube D into Post A One a er another un l spring pin pop out and lock the connector Please move and adjust Roof Tube D to line up the hole posi on to all...

Страница 10: ...er the frame Pull corner pockets over each Roof Tube D 5 2 Pull the Vent Cover G over the roof frame Extend the Vent Cover G over the frame Pull corner pockets over each Roof Tube D Warining Do not pu...

Страница 11: ...FF to assemble the Ne ng Panel J to the Cross Beam Make sure Ne ng Panel J match correctly to each side of the beams Slide the Ne ng Panel J open and close make sure they run smoothly 6 2 Hammer Ancho...

Страница 12: ...SKU 6414 304 Code 17JS00040101 Email support casualwayliving com Home Hardware Stores Limited 34 Henry Street West St Jacobs Ontario Canada N0B 2N0...

Отзывы: