background image

11

Insignia NS-UPDVD 1080p Upconvert DVD Player

www.insignia-products.com

To change the program, press 

/

/


or


 to select the item you want to 

change, then enter the new information, 
or press

 CANCEL

 to cancel the input 

information. Select 

PLAY

, then press 

ENTER 

to start the new program 

playback.

5

Press 

STOP

, then 

PLAY

 to resume normal 

playback.

Searching for a specific title, chapter, or track

To search for a specific title, chapter, or 
track:

1

With a disc in the player, press 

SEARCH

The 

SEARCH

 menu opens in the Edit mode.

2

Press 

/

/


or


 to select the title, 

chapter, or track you want, or to select the 
time option.

3

Press the number buttons to enter the title, 
chapter, or track you want, or the specific 
point in time you want to go to. For example, 
if you enter 

01:23:56

, playback will begin one 

hour, 23 minutes, and 56 seconds into the 
title.

If the number you enter is not valid, “INVALID 
KEY” appears on the screen.

4

Press 

ENTER

 to start playback.

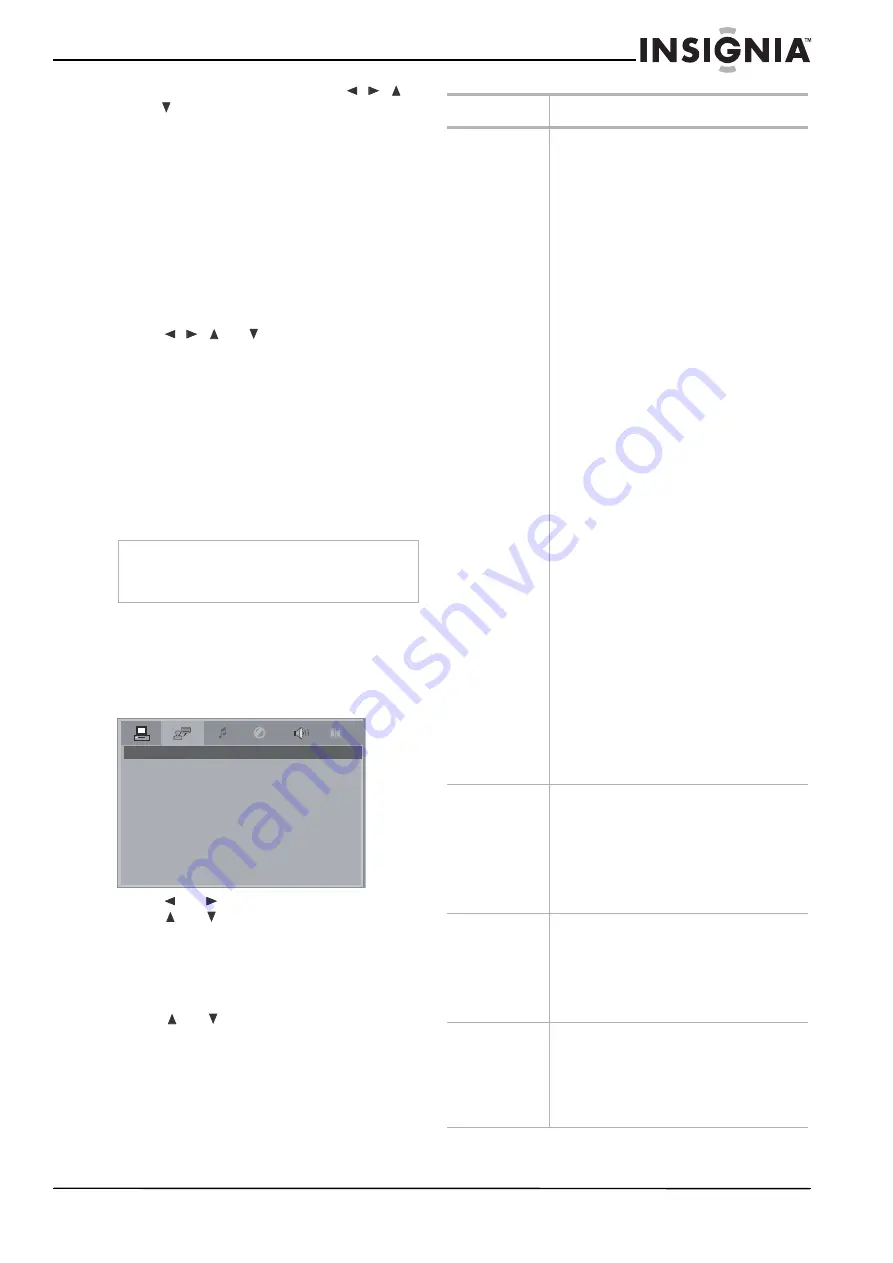
Changing your player’s settings

To change your player’s settings:

1

Press 

SETUP

 on the remote control. The 

SYSTEM SETUP 

menu opens on the TV 

screen.

2

Press 


or


to select a different menu, or 

press 


or


to highlight an item on the 

displayed menu.

3

When you have selected an item on the 
menu, press 

ENTER

 to change the setting for 

that item. A sub-menu with setting options is 
displayed.

4

Press 


or


to highlight the setting you 

want, then press 

ENTER

 to confirm your 

setting.

5

Press 

SETUP


to exit the menu.

Note

This feature does not work in Program Play mode.
If PBC is on, it turns off automatically when you 
enter Search mode.

SYSTEM  SETUP

TV SYSTEM

SCREEN SAVER

HD OUTPUT

VIDEO

TV TYPE

PASSWORD

RATING

DEFAULT

Menu

Available options

SYSTEM 
SETUP

TV SYSTEM

–Select 

AUTO

,

 PAL

, or 

NTSC.

SCREEN SAVER

–Turn screen saver 

On

 or 

Off

.

HD OUTPUT

–There are four options for the 

HDMI port: 

HD OFF

720P

1080i

, or 

1080P

(The number indicates the vertical resolution. 
I=Interlaced scanning/P=Progressive scan. 
Progressive scan gives a better picture. Select 
a resolution that is supported by your TV or 
monitor.)
Note: Every time you turn on your player, 

HD 

OUTPUT

 will be restored to the 

HD OFF


automatically, so you must set the resolution 
to match your TV when you turn it on.

VIDEO

–Select based on how your DVD player 

is connected to your TV:

INTERLACE-YCBCR –

Select if using a 

Y, Cb, Cr component video cable.

P-SCAN YPBPR

–Select if connected to 

a progressive scan TV using a Y, Pb, Pr 
component video cable.

S-VIDEO

: Select if connected using an 

S-VIDEO cable.

TV TYPE

–Choose based on the kind of TV the 

player is connected to:

4:3/PANSCAN

–Select if connected to a 

standard TV. The left and right sides of 
widescreen images will be cut off.

4:3/LETTERBOX

–Select if connected to 

a standard TV. Widescreen images will 
not fill the screen vertically.

16:9

–Select if connected to a 

widescreen TV.

PASSWORD

Lock

 or 

Unlock

. To unlock the 

RATING feature or change the password, press 
the numeric buttons to input the existing 
password (the factory-set password is "

0000

"), 

then press 

ENTER

. You can then change the 

RATING setting as shown below, or input a 
new password and press 

ENTER

.

RATING

–After entering the password (as 

shown above), Select the highest rating you 
want anyone to view, then lock the password. 
To play a disc with a higher rating, the 
password must be entered.

DEFAULT

–Select to restore the player to 

factory settings.

LANGUAGE 
SETUP

OSD LANGUAGE

–Select the language for the 

on-screen display (menus).

AUDIO LANG

–Select the DVD audio language 

you want.

SUBTITLE LANG

–Select the DVD subtitle 

language you want.

MENU LANG

–Select the DVD menu language 

you want.

AUDIO SETUP

AUDIO OUT

–Select the digital audio format:

S/PDIF OFF

–No digital output.

S/PDIF RAW

–Digital audio output is in 

the original format, such as AC3 or 
DTS.

S/PDIF PCM

–Digital audio output is 

converted to PCM.

VIDEO SETUP

BRIGHTNESS

–Sets the picture brightness.

CONTRAST

–Sets the black/white balance.

HUE

–Sets the color balance, red to blue.

SATURATION

–Sets the color saturation.

Note

: Press the up and down arrow buttons to 

adjust these settings.

Содержание NS-UPDVD

Страница 1: ...User Guide Guide de l utilisateur Guía del Usuario 1080p Upconvert DVD Player Lecteur DVD à conversion HD de 1080p Reproductor de DVD con conversión ascendente de 1080p NS UPDVD ...

Страница 2: ......

Страница 3: ...ore cleaning Do not use liquid cleaners or aerosol cleaners Use a damp cloth for cleaning Attachments Do not use attachments not recommended by your player manufacturer because they may cause hazards Water and moisture Do not use your player near water for example near a bath tub wash bowl kitchen sink or laundry tub in a wet basement or near a swimming pool CAUTION TO REDUCE THE RISK OF ELECTRIC ...

Страница 4: ...s or other electric light or power circuits or where it can fall into such power lines or circuits When installing an outside antenna system do not touch power lines or circuits because contact with them might be fatal Overloading Do not overload wall outlets and extension cords because this can result in a risk of fire or electric shock Object and liquid entry Never push objects of any kind into ...

Страница 5: ...an play one layer or two layer discs DVD RW discs can also be played Audio CD or HD CD 8 cm 12 cm disc Music CDs HD CDs or CD Rs CD RWs in music CD format that can be played CD R CD RW 8 cm 12 cm disc CD R CD RWs that contain audio titles MP3 WMA or JPEG files Notes Do not use irregularly shaped CDs for example heart shaped or octagonal Doing so may result in malfunctions Depending on the recordin...

Страница 6: ...escription Function 1 COMPONENT OUTPUT Y Pb Pr Connect to the component video input jacks on a TV if available 2 CVBS Connect to the composite video input jack on a TV if available 3 HDMI OUTPUT Connect to the HDMI input jack on a TV if available 4 AUDIO OUTPUT left right Connect to the audio input jacks left and right of a TV amplifier or other equipment 5 COAX digital AUDIO OUTPUT Connect to the...

Страница 7: ...E Press to restart playback from the first title on the DVD if available 10 ENTER Press to confirm menu selections 11 PBC Press to turn PBC feature for VCDs 2 0 on or off 12 VOL Press to increase the volume 13 SUBTITLE Press to select a subtitle language if available 14 VOL Press to decrease the volume 15 AUDIO Press to select an audio language or audio channel 16 MUTE Press to mute the sound Pres...

Страница 8: ...hile playing a DVD or VCD press to return to the previous menu if available 29 PSCAN NORMAL Toggles progressive scan on or off 30 SLOW Press to begin slow motion playback Press repeatedly to step through slow speeds Press PLAY to resume normal playback 31 STEP Press once to pause playback then press repeatedly to step forward one frame at a time Press PLAY to resume normal playback 32 NEXT Press t...

Страница 9: ...ck of your player to the audio left and right in jacks on the TV using the supplied audio cables To connect a two channel digital stereo or A V receiver with multi channel decoder 1 Connect one of your player s DIGITAL AUDIO OUT jacks coaxial or optical to the corresponding in jack on your amplifier Use an optional digital coaxial audio cable or digital optical cable Warnings The system uses a pol...

Страница 10: ...isc menu 1 With a disc in the player press MENU The DVD menu opens 2 Make your selection from the menu then press ENTER to start playback On some DVDs press MENU repeatedly to return to the root menu Or 1 Press TITLE The DVD menu opens 2 Make your selection from the menu then press ENTER to start playback On some DVDs press TITLE repeatedly to return to the root menu To play a VCD 2 0 disc press P...

Страница 11: ...Progressive scan Progressive scan gives a better picture Select a resolution that is supported by your TV or monitor Note Every time you turn on your player HD OUTPUT will be restored to the HD OFF automatically so you must set the resolution to match your TV when you turn it on VIDEO Select based on how your DVD player is connected to your TV INTERLACE YCBCR Select if using a Y Cb Cr component vi...

Страница 12: ...ect the video cable to the jacks securely The connected TV is not turned on Turn on the TV No sound The equipment connected with the audio cable is not set to receive player signal output Select the correct input mode of the audio receiver so you can listen to the sound from your player The audio cables are not connected securely Connect the audio cable to the jacks securely The power on the equip...

Страница 13: ...an interface between any audio video source such as a set top box DVD player and A V receiver and an audio and or video monitor such as a digital television DTV HDMI has the capacity to support existing high definition video formats 720p 1080i and even 1080p and supports 8 channel digital audio Note Never operate this product immediately after moving it from a cold location to a warm location Leav...

Страница 14: ...zed change or modification is made If this equipment does cause harmful interference to radio or television reception which can be determined by turning the equipment off and on the user is encouraged to try to correct the interference by one or more of the following measures Reorient or relocate the receiving antenna Increase the separation between the equipment and receiver Connect the equipment...

Страница 15: ...ion with a screen 25 inches or larger call 1 888 BESTBUY Call agents will diagnose and correct the issue over the phone or will have an Insignia approved repair person dispatched to your home Where is the warranty valid This warranty is valid only to the original purchaser of the product in the United States and Canada What does the warranty not cover This warranty does not cover Customer instruct...

Страница 16: ...16 Insignia NS UPDVD 1080p Upconvert DVD Player www insignia products com ...

Страница 17: ...e les instructions lire toutes les instructions de sécurité et de fonctionnement avant d utiliser cet appareil ATTENTION ATTENTION AFIN DE RÉDUIRE LES RISQUES DE CHOC ÉLECTRIQUE NE RETIREZ PAS LE COUVERCLE OU LE PANNEAU ARRIÈRE AUCUNE PIÈCE NE PEUT ÊTRE RÉPARÉE PAR L UTILISATEUR CONFIEZ L APPAREIL À UN TECHNICIEN QUALIFIÉ RISQUE DE CHOC ÉLECTRIQUE NE PAS OUVRIR Lesymbolereprésentantunéclairdansun ...

Страница 18: ...nant sur piles ou d autres sources d alimentation consulter les instructions d utilisation Mise à la terre ou polarisation l appareil est équipé d une prise de courant CA polarisée à deux plots un plus large que l autre Cette fiche ne s insère dans une prise secteur que d une seule façon Il s agit d un dispositif de sécurité S il est impossible d introduire à fond la fiche dans la prise secteur es...

Страница 19: ...les Attention Les piles ne doivent jamais être mises au rebut ni incinérées mais éliminées de façon conforme aux réglementations locales relatives aux déchets chimiques Avertissement Pour éviter les chocs électriques introduire la lame la plus large de la fiche dans la fente correspondante de la prise et pousser à fond Disque Caractéristiques DVD disque 8 cm 12 cm DVD de films par exemple qui peuv...

Страница 20: ...lby et le symbole à double D sont des marques de commerce de Dolby Laboratories Utilisation du balayage progressif Les consommateurs doivent savoir que les téléviseurs à haute définition ne sont pas tous entièrement compatibles avec ce lecteur ce qui peut être source de défauts sur l image En cas de balayage progressif de l image nous recommandons d établir la connexion à la sortie de définition s...

Страница 21: ...iption Fonction 1 SORTIE COMPOSANTES Y Pb Pr Pour la connexion aux prises d entrée composantes d un téléviseur si disponible 2 CVBS Pour la connexion aux prises d entrée composantes d un téléviseur si disponible 3 Sortie HDMI Pour la connexion aux prises d entrée HDMI d un téléviseur si disponible 4 Sortie AUDIO gauche droite Pour la connexion aux prises d entrée audio gauche et droite d un télévi...

Страница 22: ... lancer la lecture en boucle Appuyer de nouveau sur cette touche pour annuler la lecture en boucle 5 ZOOM Permet d agrandir une image de DVD de 2 3 4 ou 1 2 1 3 ou 1 4 de fois sa taille originale 6 Touche directionnelle vers le haut Permet de sélectionner les options du menu ou de régler les paramètres 7 CONFIGURATION Permet de fermer et d ouvrir le menu de configuration Setup 8 Touche directionne...

Страница 23: ...ecture d un DVD ou d un VCD permet de revenir au menu précédent si disponible 29 PSCAN NORMAL Permet d activer on ou de désactiver off le balayage progressif 30 RALENTI Permet de reproduire un DVD au ralenti Appuyer de façon répétée pour faire varier les vitesses du ralenti Appuyer sur PLAY Lecture pour revenir au mode de lecture normal 31 IMAGE PAR IMAGE Appuyer une fois sur cette touche pour l a...

Страница 24: ...l et des sources de chaleur excessive de la poussière de l humidité ou des vibrations Dérouler le cordon d alimentation CA pour le déployer entièrement puis le brancher à l arrière de du lecteur Source d alimentation Utiliser le cordon CA polarisé fourni pour le fonctionnement sur courant secteur CA Insérer la prise du cordon d alimentation CA dans une prise secteur CA polarisée standard de 120 V ...

Страница 25: ...prise de sortie audio AUDIO OUTPUT de l appareil à la prise d entrée Phono PHONO IN platine du lecteur du système audio Ne pas brancher l appareil par l intermédiaire d un autre magnétoscope L image DVD pourrait être déformée par le système de protection contre la copie L image et le son d un téléviseur d un magnétoscope ou d une radio à proximité risquent d être déformés lors de la lecture Écarte...

Страница 26: ...t d arrêt en fonction du disque et Pre Stop s affiche sur l écran 6 Appuyer sur lecture PLAY pour reprendre la lecture à partir du point d arrêt Pour commencer la lecture à partir du début du disque appuyer de nouveau sur STOP puis sur lecture PLAY Le lecteur commence la lecture au début du disque 7 Appuyer sur ouvrir fermer OPEN CLOSE pour ouvrir le plateau et retirer le disque 8 Appuyer sur ouvr...

Страница 27: ...appuyer sur SEARCH Recherche Le menu SEARCH s affiche en mode d édition Edit 2 Appuyer sur ou pour sélectionner le titre chapitre ou piste souhaité ou pour sélectionner une option de durée 3 Appuyer sur les toucher numériques pour saisir le titre le chapitre ou la piste souhaité ou le point spécifique de début de la lecture Par exemple si 01 23 56 est saisi la lecture commencera au point correspon...

Страница 28: ...us sélectionner la classification supérieure pour tous publics puis verrouiller le mot de passe Pour lire un disque avec une classification supérieure le mot de passe doit être saisi DEFAULT Paramètres par défaut permet de réinitialiser le lecteur aux paramètres usine LANGUAGE SETUP Configuration de la langue OSD LANGUAGE Langue de l OSD permet de sélectionner la langue d affichage des menus d écr...

Страница 29: ...st endommagé Remplacer le câble par un câble neuf Image médiocre Le disque est sale Nettoyer le disque L appareil ne commence pas la lecture Aucun disque n a été inséré Insérer un disque vérifier que le témoin de disque s allume dans la fenêtre d affichage Le disque inséré est illisible Insérer un disque lisible Vérifier le type de disque et le code régional Le disque a été inséré à l envers Place...

Страница 30: ...ancher le cordon d alimentation pendant 30 minutes puis le rebrancher Cela devrait réinitialiser le lecteur Spécifications HDMI High Definition Multimedia Interface est la première interface audio vidéo numérique non compressée soutenue par le secteur industriel La technologie HDMI fournit une interface entre n importe quelle source audio vidéo telle qu un décodeur lecteur DVD ou un récepteur A V ...

Страница 31: ...eil s il a subi un changement ou une modification non autorisée Si cet équipement produit des interférences préjudiciables lors de réceptions radio ou télévisées qui peuvent être détectées en éteignant puis en rallumant l appareil essayer de corriger l interférence au moyen de l une ou de plusieurs des mesures suivantes Réorienter ou déplacer l antenne réceptrice Augmenter la distance entre l équi...

Страница 32: ...32 Lecteur DVD à conversion HD de 1080p Insignia NS UPDVD www insignia products com ...

Страница 33: ...gréé par Insignia pour la réparation à domicile Où cette garantie s applique t elle Cette garantie ne s applique qu à l acheteur original du produit aux États Unis et au Canada Ce qui n est pas couvert par cette garantie limitée La présente garantie ne couvre pas la formation du client l installation les réglages de configuration les dommages esthétiques les dommages résultants de catastrophes nat...

Страница 34: ...34 Lecteur DVD à conversion HD de 1080p Insignia NS UPDVD www insignia products com ...

Страница 35: ...instrucciones Guarde las instrucciones de seguridad y operación para referencia futura PARA REDUCIR EL RIESGO DE DESCARGA ELÉCTRICA NO RETIRE LA CUBIERTA O SECCIÓN POSTERIOR EN EL INTERIOR DEL APARATO NO HAY COMPONENTES QUE REQUIERAN SERVICIO DE MANTENIMIENTO POR EL USUARIO SOLICITE CUALQUIER OPERACIÓN DE MANTENIMIENTO A PERSONAL DE SERVICIO CALIFICADO AVISO El símbolo del rayo dentro de un triáng...

Страница 36: ...de operación respectivas Conexión a tierra o polarización su reproductor está equipado con un enchufe polarizado de corriente alterna un enchufe que tiene una lámina más ancha que la otra Este enchufe se conecta en el tomacorriente de una sola forma Ésta es una característica de seguridad Si no puede insertar completamente el enchufe en el tomacorriente intente voltearlo Si el enchufe todavía no e...

Страница 37: ...ión específico Discos reproducibles Cuidado Las baterías no deben tirarse o incinerarse sino descartarse de acuerdo con las normativas locales concernientes a desechos químicos Advertencia Para evitar un choque eléctrico haga corresponder la clavija ancha del enchufe con la ranura ancha del tomacorriente e inserte el enchufe completamente Disco Características DVD disco de 8 cm 12 cm Discos DVD có...

Страница 38: ...bricado bajo licencia de Dolby Laboratories Dolby y el símbolo de la doble D son marcas registradas de Dolby Laboratories Uso de barrido progresivo El consumidor debe tener en cuenta que no todas los televisores de alta definición son totalmente compatibles con su reproductor por lo que puede que aparezcan algunos artefactos en la imagen En caso de problemas con la imagen usando barrido progresivo...

Страница 39: ...Función 1 SALIDA DE COMPONENTES Y Pb Pr Se conecta a las tomas de entrada de video de componentes en un televisor si están disponibles 2 CVBS Se conecta a las tomas de entrada de video compuesto en un televisor si están disponibles 3 SALIDA DE HDMI Conecte a la toma de entrada de HDMI en un televisor si está disponible 4 SALIDA DE AUDIO Izq Der Conecte a los tomas de entrada de audio izquierdo y d...

Страница 40: ...o y desactivar la repetición 4 REPETICIÓN A B Presione este botón una vez para establecer el comienzo de un bucle de repetición Presione este botón nuevamente para establecer el final del bucle de repetición y comenzar la reproducción repetida Presione este botón nuevamente para cancelar la repetición 5 AMPLIAR Permite ampliar la imagen del DVD a 2 3 ó 4 veces su tamaño original o reducir a 1 2 1 ...

Страница 41: ...otones direccionales para seleccionar el número de título capítulo pista o la posición de tiempo a la que quiere ir y presione el botón de entrar ENTER para comenzar la reproducción 25 Flecha derecha Permite seleccionar opciones de menú o ajustar la configuración 26 MENÚ Permite abrir el menú principal del DVD 27 Flecha abajo Permite seleccionar opciones de menú o ajustar la configuración 28 RETOR...

Страница 42: ...te de alimentación Use el cable de alimentación de CA polarizado proporcionado para la operación con alimentación de CA Inserte el cable de CA en un tomacorriente CA estándar polarizado de 120 V 60 Hz Si usted causa una descarga de estática al tocar su reproductor y éste deja de funcionar desenchufe su reproductor del tomacorriente CA y enchúfelo nuevamente Su reproductor debe regresar a su operac...

Страница 43: ...l canal de entrada de video correcto No conecte la toma de salida de audio AUDIO OUTPUT de su reproductor a la toma de entrada de fonógrafo PHONO IN de su sistema audio No conecte su reproductor a través de otro VCR La imagen de DVD podría verse distorsionada por el sistema de protección contra copia La imagen o el sonido de un televisor VCR o radio cercano podría verse distorsionado durante la re...

Страница 44: ...l punto donde se detuvo dependiendo del disco y el mensaje Pre Stop Pre parada aparece en la pantalla 6 Presione REPRODUCIR para reanudar la reproducción desde el punto de parada Para comenzar la reproducción desde el principio del disco presione nuevamente el botón de DETENER y presione el botón de REPRODUCIR Su reproductor comenzará a reproducir desde el comienzo del disco 7 Presione el botón de...

Страница 45: ...specíficamente un título capítulo o una pista 1 Con un disco dentro del reproductor presione el botón de búsqueda SEARCH El menú de búsqueda SEARCH se abre en el modo de edición Edit 2 Presione o para seleccionar el título capítulo o la pista que guste o para seleccionar la opción de tiempo 3 Presione los botones numéricos para ingresar el título capítulo o la pista que guste o él punto determinad...

Страница 46: ...ar la contraseña como se muestra anteriormente seleccione la clasificación más alta que cualquier persona pueda vee y bloquee la contraseña Para reproducir un disco con una clasificación superior se debe ingresar la contraseña DEFAULT Predefinido Seleccione este ajuste para restaurar la configuración de fábrica del reproductor CONFIGURACI ÓN DEL IDIOMA OSD LANGUAGE Idioma del OSD Seleccione el idi...

Страница 47: ...ucción insatisfactoria El disco está sucio Limpie el disco El reproductor no empieza a reproducir No se ha insertado un disco Inserte un disco asegúrese de que el indicador de disco en la pantalla esté encendido Se ha insertado un disco que no se puede reproducir Inserte un disco reproducible Revise el tipo de disco y el código regional El disco está colocado al revés Coloque el disco con el lado ...

Страница 48: ... enchufarlo Esto debería reiniciar su reproductor Especificaciones HDMI Interfaz Multimedia de Alta Definición por sus siglas en inglés es la primera interfaz de audio video completamente digital sin compresión que cuenta con el apoyo de la industria HDMI provee una interfaz entre cualquier fuente de audio video tal como una caja decodificadora un reproductor de DVD un receptor de A V y un monitor...

Страница 49: ...si se realiza un cambio o modificación no autorizado Si este equipo causa interferencias perjudiciales en la recepción de la señal de radio o televisión lo cual puede comprobarse encendiendo y apagando el reproductor alternativamente se recomienda al usuario corregir la interferencia mediante uno de los siguientes procedimientos Cambie la orientación o la ubicación de la antena receptora Aumente l...

Страница 50: ...50 Reproductor de DVD con conversión ascendente de 1080p Insignia NS UPDVD www insignia products com ...

Страница 51: ...al 1 888 BESTBUY El soporte técnico diagnosticará y corregirá el problema por teléfono o enviará un técnico certificado por Insignia a su casa En dónde es válida la garantía Esta garantía sólo es válida al comprador original del producto en los Estados Unidos y en Canadá Qué es lo que no cubre la garantía Esta garantía no cubre Capacitación del cliente Instalación Ajuste de configuración Daños cos...

Страница 52: ...chfield MN USA 55423 3645 2008 Best Buy Enterprise Services Inc Tous droits réservés INSIGNIA est une marque de Best Buy Enterprise Services Inc Déposée dans certains pays Tous les autres produits ou noms de marques sont des marques de commerce qui appartiennent à leurs propriétaires respectifs Distribuido por Best Buy Purchasing LLC 7601 Penn Avenue South Richfield MN USA 55423 3645 2008 Best Buy...

Отзывы: