www.insigniarange.com
Last Modified: 18/12/2017
12
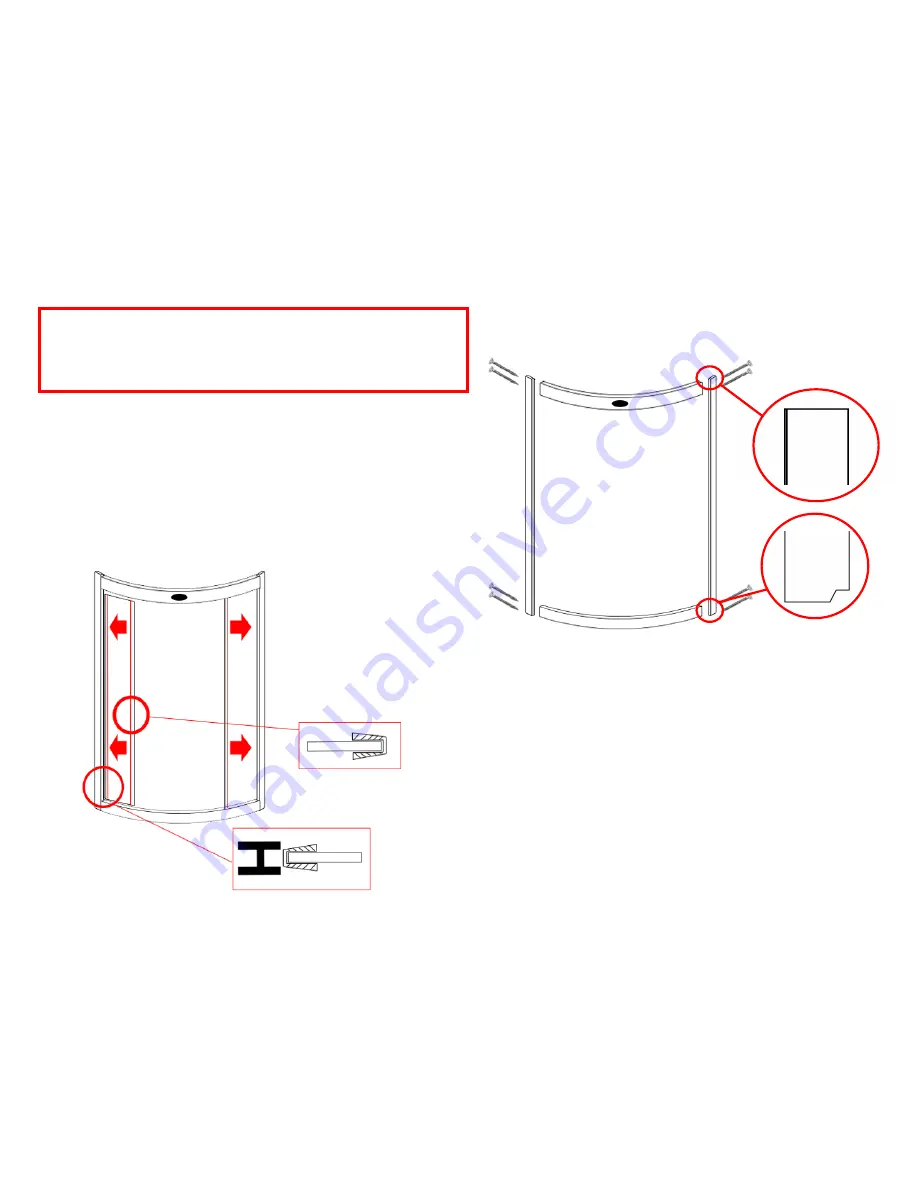
Step 3
Push the
“
U Shape
”
glass seal onto the glass panel prior to insertion into the
frames. Please ensure the thin seal is on the entrance side of the panels with
the thicker to the rear side.
The next step is to attach both front fixed glass panels. In order to do this
take the glass panel (the large black edge to be situated on the entrance
side to the shower) and offer it up to the upright as shown by the arrows.
Step 2
The next step is to attach the uprights (
maybe pre
-
fitted to the front fixed glass see
above)
to the curved rails using the
ST57
screws. The end with the groove is
designed to sit on the tray, with the flat end connecting to the roof. Please note the
‘
U
’
shaped channel is meant to face inwards to allow the glass to fit correctly.
(wider rail with Insignia logo at the top)
PLEASE NOTE
The screw head needs to bypass the OUTER hole. If this does not occur please bore
out the outer hole only by about 2
-
4mm
Thick glass seal on outer side
Thin glass seal on inner side
IMPORTANT
If your front fixed glass has 2 black uprights pre
-
fitted please bypass steps 3 and 4
Please note the wide upright is the outer upright and the cut out sits on the tray side.


