8
Start
Basic Connections
Preparation
Switch off this product and other equipments
before connecting
Read the User Manual carefully before
connecting other equipments
Plug the Audio and Video cable correctly
When connecting this DVB-T receiver with
TV set, only one kind of video output format
will
be
accepted.
Please
choose
a
corresponding video output mode for the
DVB-T receiver, otherwise the image will be
distorted.
NOTE
Users can choose any proper video output
formats according to the TV socket and personal
requirements.
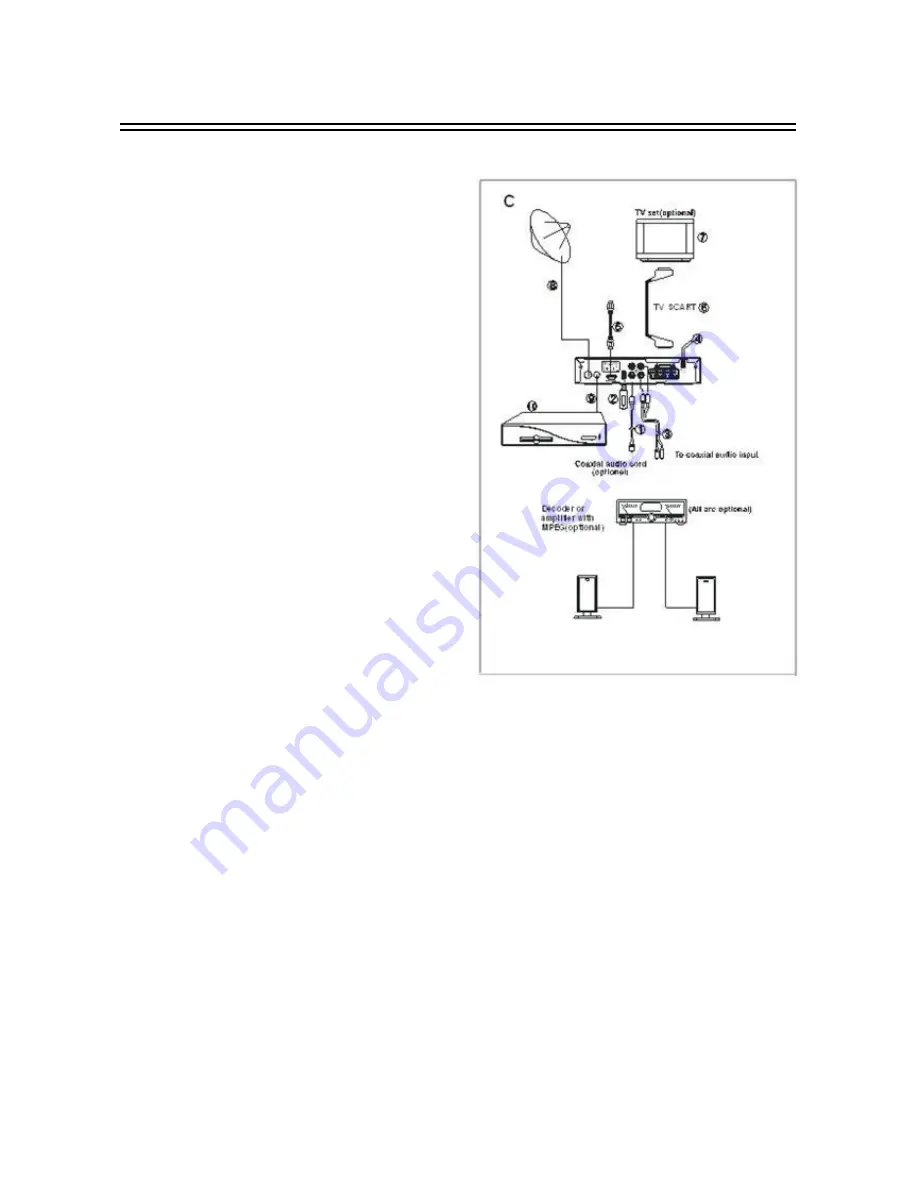
Connecting Diagram (Figure C)
1.
Digital Coaxial Output cable (Not included)
2.
USB Drive (Not included)
3.
Track Left & Right Cable (Not included)
4.
AC IN
5.
HDMI cable (Not included)
6.
TV SCART cable (Not included)
7.
TV Set (Not included)
8.
Antenna (Not included)
9.
RF OUT cable (Not included)
10. Another DVB-T Receiver (Not included)
Fast Installation
Connect this unit and other apparatus according to Chapter “BASIC CONNECTIONS”. Plug the
power cord and wait “Welcome” window appears:
1.
Use [CH▲/▼] button to select item and [VOL◄/►] button to change items.
2.
The default OSD Language is “Polski”, country is “German”, Display Mode is “576i” and Aspect
Mode is “Auto”.
3.
Move cursor to ”OK” and press [OK] button to start auto search.
4.
Press [EXIT] button to back to channel list after auto search has been done. Press [OK] button to
display channel list, use [CH▲/▼] button to select channel and press [OK] button to enjoy watching.
If the “Welcome” window does not appear:
5.
Press [MENU] button, move cursor to “Tools” and press [OK] button to enter in its interface to load
factory default. Default password is “0000”. (This step must be done at first use or after upgrade.)
6.
Choose “Yes” to start load factory default as showed in the picture.
7.
After the factory default has been done, wait “Welcome” window and please operate according to
step 1, 2, 3 and 4.
Read Advanced Operation for more details.


