Inovonics INOmini 673 Скачать руководство пользователя страница 14

— 25 — 

The backlighting has a range of R/G/B color rendering, 

which can be applied universally to the menu trees, except 

for the flashing red alarm condition.  This menu screen al-

lows  you  to  set  the  background  to  nearly  any  color  you  

might fancy.  Simply push the knob to sequentially access 

the 

R:

 (red), 

G:

 (green) and 

B:

 (blue) backlights, and set 

them selectively to any of the 51 brightness levels offered, 

from 

0

 to 

255

 in increments of 5. 

We have established factory values for a nominally-white 

background, although there may be variation in these set-

tings from unit-to-unit as the LCDs vary a bit.  The color set-

tings  shown  here  are 

typical  of  the  factory 

settings…  just  in  case 

you lose your way and 

want to get back close to 

the original values. 

Loading Factory Defaults

 (Hidden Menu Screen 5) 

With the exception of the backlight color settings, all main 

and hidden menu selections can be put back to as-shipped, 

factory values by invoking the 

Load Defaults? 

command.  

With that menu selected, push the knob and turn it from 

No


to 

Yes

.  When you then push the knob, the INOmini 673 will 

reboot with factory defaults. 

Returning to the Menu Tree


To get from hidden menu settings back to the normal, op-

erating menu tree, navigate back to Hidden Menu 1 (show-

ing 

673 Firmware

) and push the knob. 

— 26 — 

Section IV 

UPDATING FIRMWARE 

Firmware Files 

INOmini 673 firmware updates are issued at no charge 

whenever operating features are changed or added.  These 

are small ‘bootloader’ files in a ‘zipped’ format that will be 

available as downloads on the Inovonics Website.


The first step is to connect 

your INOmini 673 to your com-

puter with a popular ‘USB-A’ to 

‘mini-B’ USB cable. 
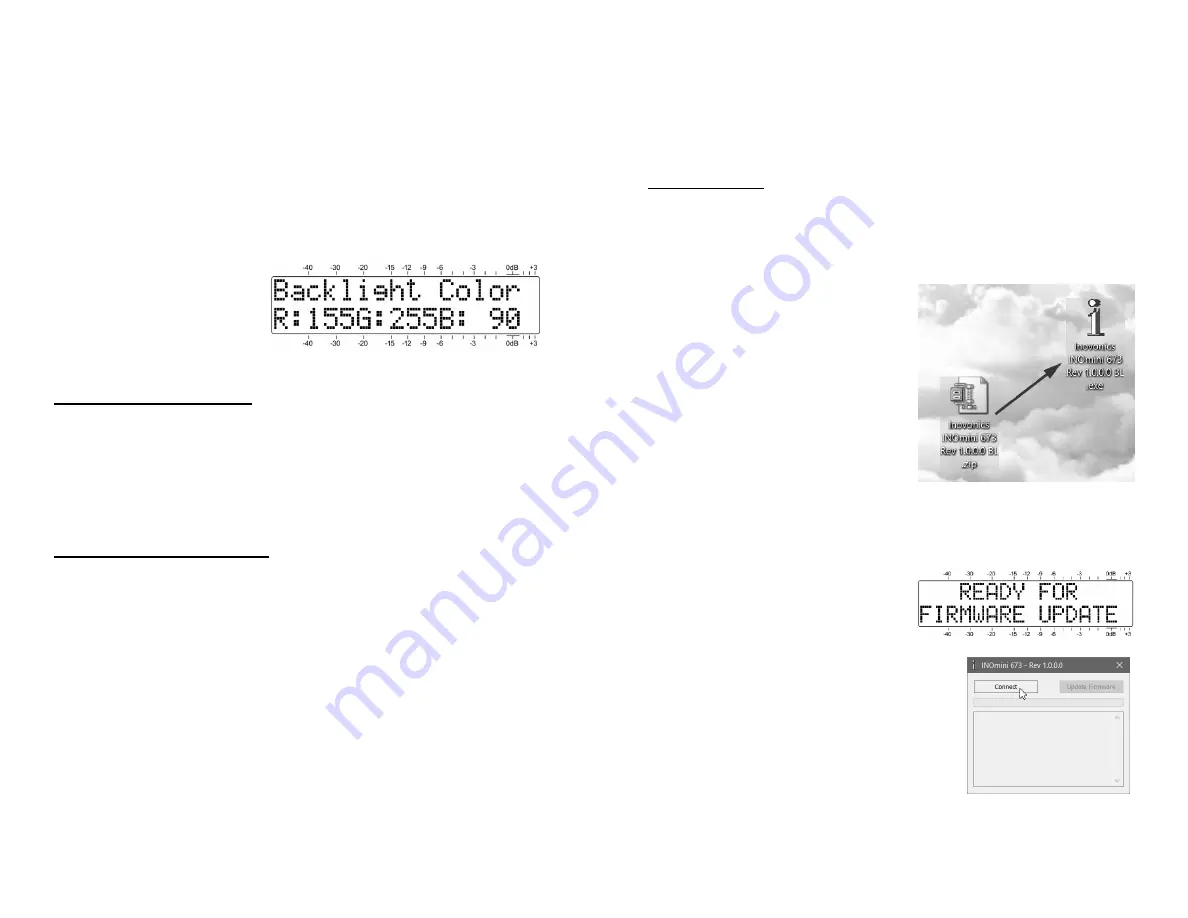
Next, download the zipped file 

to  your  Windows  Desktop  and  

unzip  it  in  place,  as  was  done  

here.   Simply double-click the 

zipped 

BL.zip

 file and follow the 

unzip  utility’s  instructions, 

placing the extracted .exe file 

on the desktop. 
Next, place the INOmini 673 in its ready-state to accept 

firmware updates.  Just unplug the 12VDC power connector 

from the rear panel, and then hold-down the front-panel 

knob  as  you  plug  the  power  

connector back in. This should 

bring-up the wording shown at 

the right.


Double-click the extracted 

BL.exe

 file, 

which will include the product model 

number and firmware version in its 

full  name.    This  will  start  the  boot-

loader utility window shown here.


Click 

Connect

 and the utility should 

quickly advise you that it has found 

your    INOmini  673.    You  can  then  

click 

Update Firmware

  and  the  update  process  will  begin.    

There are a few phases to this process, and a green bar will 

advise you of progress. 

Содержание INOmini 673

Страница 1: ...FM RDS Monitor Receiver Installation User Guide June 2019 Rev 1 0 0 0 Firmware www inovonicsbroadcast com 673...

Страница 2: ...1 Tuning the Receiver 11 Carrier Strength and Alarm 12 Audio Muting 13 Signal to Noise and Multipath 13 FM Stereo Mode 14 Program Audio Metering 15 The Audio Loss Alarm 15 Headphone Monitoring 16 Audi...

Страница 3: ...MHz 107 9MHz in 100kHz steps Antenna Input 75 ohm F Sensitivity SNR 10 V for 50dB monaural S N 35dB V for 70dB monaural S N IF Bandwidth Auto signal adaptive or manual selection of 110kHz 84kHz 60kHz...

Страница 4: ...istration process Not only does registration assure coverage of the equipment under terms of the Warranty printed inside the back cover of this manual but the user automatically receives any specific...

Страница 5: ...Section III of this manual covers the easy setup and programming in structions Headphone Jack The front panel mini phone jack will accommodate stereo headphones of virtually any impedance with a 3 5m...

Страница 6: ...ainst a red background quite visible even across the room If you have not yet set up the unit for use the LOW SIGNAL and or the AUDIO LOSS alarms will begin to flash soon after the receiver is powered...

Страница 7: ...ns A series of bars to the right of RF will give a rudimentary display of incoming carrier strength 12 If it is transmitting an RDS Radio Data System subcarrier once a station is tuned in the station...

Страница 8: ...any thing concrete but certainly more is better Likewise MP gives a relative indication of multipath signal reflection effects that radio transmissions encounter on 14 their trip to the receiver whic...

Страница 9: ...n lightly processed programming will have frequent peaks reaching toward 0dB or 100 16 modulation A setting of 10dB will probably suffice for nearly any programming format Be sure to push the knob aft...

Страница 10: ...may take a short while to receive the RDS Time packet as it is not sent continuously 18 PTY and PTYN Menu Screen 11 The RDS PTY Program TYpe function identifies programming type or format in the US fr...

Страница 11: ...ul in Europe where nationwide networks utilize a number of low power transmitters to cover the entire country In the US translators are some 20 times used to rebroadcast a station s program on another...

Страница 12: ...LOSS on the front panel and activate the rear panel R terminal With PI Error alarm selection the INOmini 673 gives an alarm for a PI code mismatch between the received PI and a PI code entered into t...

Страница 13: ...et functions From most normal navigational menus push and hold down the knob to access these top secret settings 24 Firmware Version Hidden Menu Screen 1 The 673 Firmware screen will apprise you of wh...

Страница 14: ...op erating menu tree navigate back to Hidden Menu 1 show ing 673 Firmware and push the knob 26 Section IV UPDATING FIRMWARE Firmware Files INOmini 673 firmware updates are issued at no charge wheneve...

Страница 15: ...For these reasons and also because of the small format of this manual we have dispensed with schematic diagrams servicing instructions and a listing of component parts Nevertheless our policy has alwa...

Страница 16: ...s been removed or altered III TERMS OF WARRANTY Inovonics Inc products are warranted to be free from defects in materials and workmanship A Any discrepancies noted within THREE YEARS of the date of de...

Отзывы: