


Page 37
EN
Chapter 6 Installation
6.12.1 Adjusting the material consistency
1. Check the material consistency at the pump outlet.
Catch the material in a suitable container. Make sure
that the first material is relatively liquid. Then you can
reduce the amount of water with the fine adjustment
valve (1) of the flow meter until the desired material
consistency is reached.
2. Then switch off the machine by pulling the main switch
to the horizontal position.
6.13 Preparing the machine
1. Disconnect the machine from the mains voltage and
mount the mortar pressure gauge (2) at the pump out-
let, which indicates the pressure in the conveyor hose
during operation.
2. Fill approx. 2-3 litres of lime milk or wallpaper paste into
the conveyor hose as pre-lubrication and then connect
it to the mortar coupling of the mortar pressure gauge.
3. Assemble the appropriate spray head or glue gun to
the end of the mortar hose and also connect the air
hose to the spray head.
4. Close the air valve on the spray head.
5. Connect the air hose to the connection on the machine
(3) and the sprayer.
6. If necessary, extend the mortar hose and air hose to the
desired and appropriate delivery range/delivery height.
1
2
3
!
DANGER
Pressurised conveyor hoses.
Risk of injury and risk of property damage due to es-
caping and/or flying material, and/or bursting con-
veyor hoses.
• Before disconnecting the conveyor hoses, make sure that
the hoses are depressurised. To do so, check the pressure
indicator on the mortar pressure gauge. The pressure in-
dicator must display 0 bar!
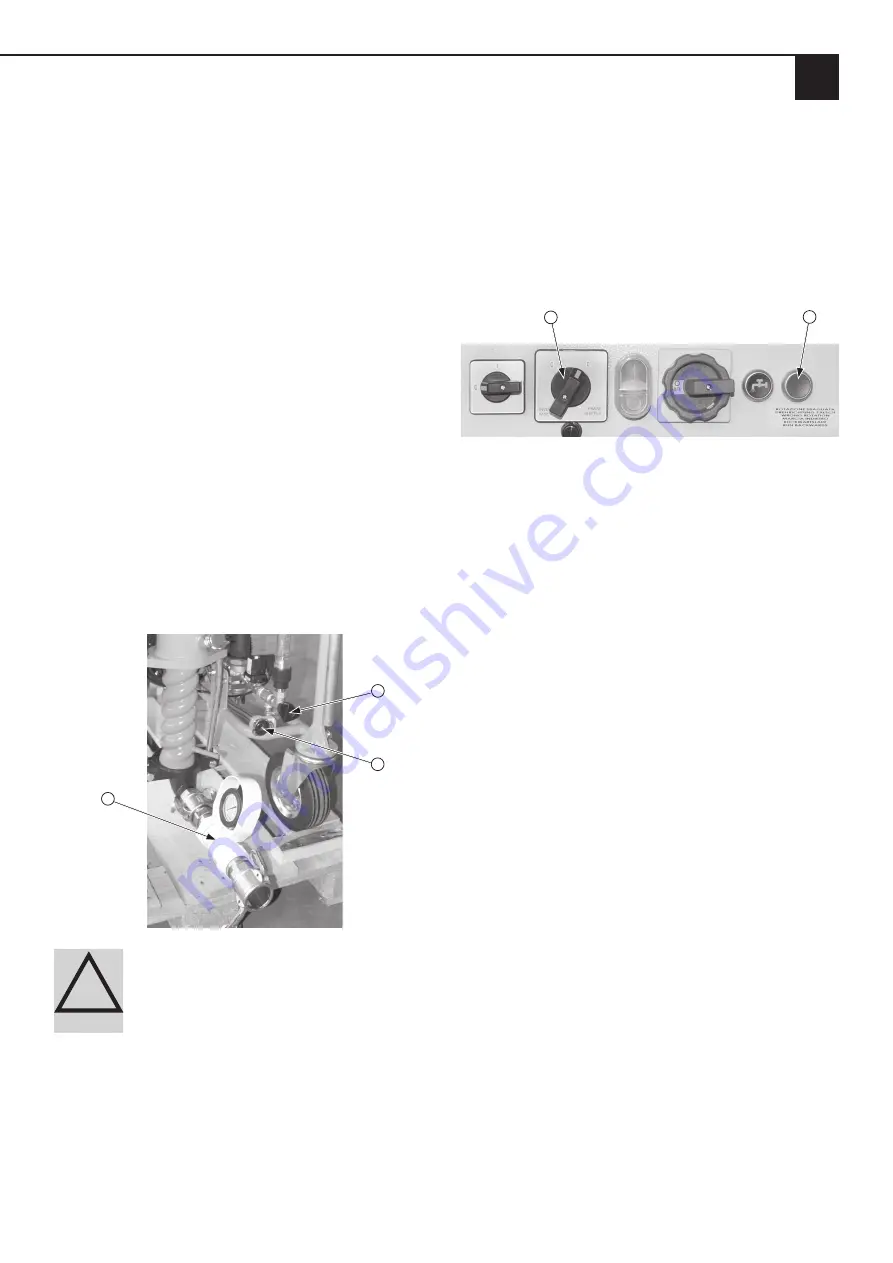
• Before opening the hose coupling, let the
inoCOMB Maxi Power run in reverse to reduce any pres-
sure! To do this, turn the phase-change switch (1) until
the red illuminated button on the machine’s switching
cabinet (2) lights up. Then press the red illuminated but-
ton. The pump then runs backwards.
1
2
• Use only conveyor hoses which are permissible with an
operating pressure of 40 bar and a burst pressure of 120
bar, and are in a technically perfect condition (e.g. are
without any cracks or other external damage!).
6.14 Starting the machine
1. Set the “star feeder selector switch” to “1” (automatic)
and the main switch to the vertical position “I”. The
machine is now ready for operation.
2. Add the dry material to the machine’s material hopper.
3. To start the machine, press the green start button “I”
on the switching cabinet.
4. Switch on the compressor. From now on, the machine
is switched on and off via the air valve on the spray
head.
5. First of all, open the material lever on the spray head
and then the air valve. The actual spraying process
starts. Check the mortar pressure gauge to see if the
mortar pressure is within the permissible range.
6. Process the existing material (e.g. spray-on filling com-
pounds on a wall), with a second worker continuously
filling the material container with bagged goods.


