


11
4.3 How to Make a Probing
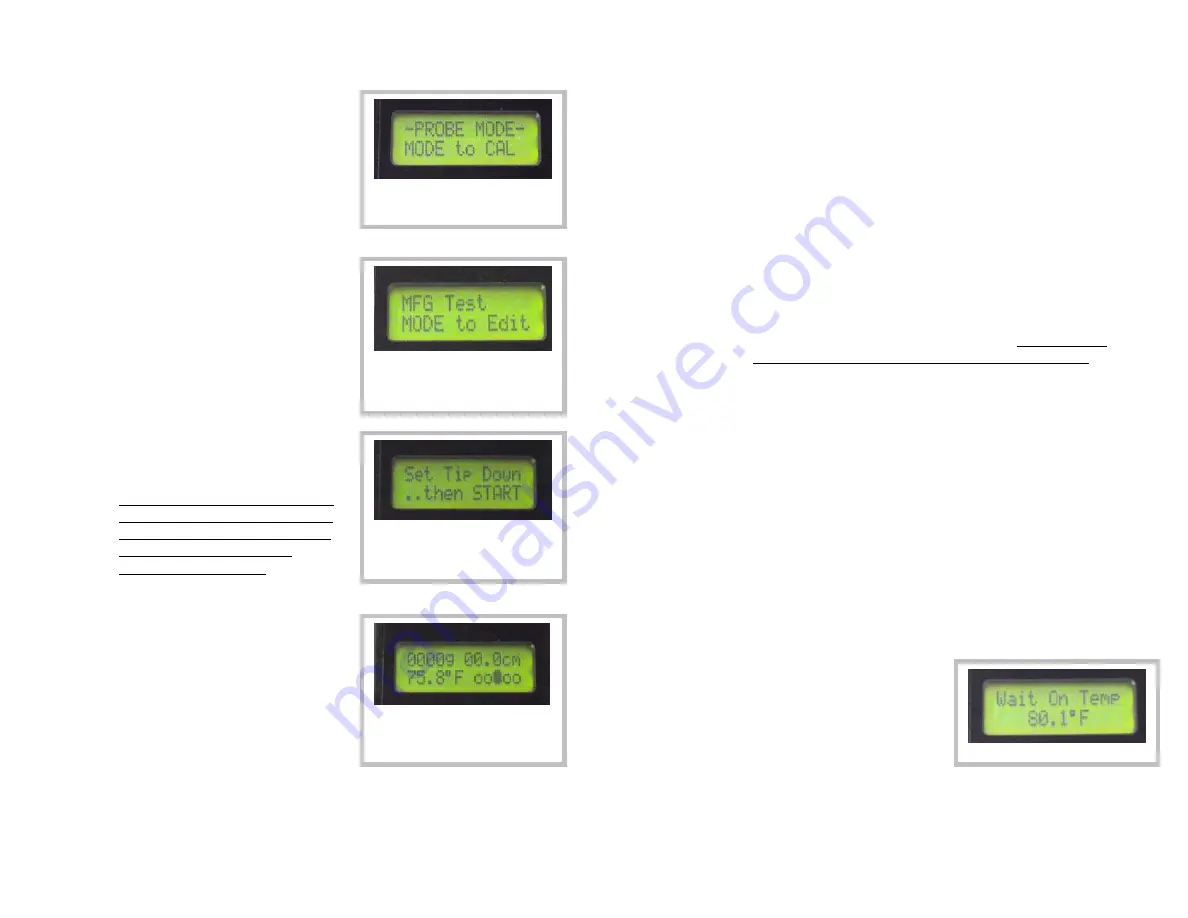
4.3.1 Turn the meter on and select
PROBE MODE if not already on
the screen as shown. (At power
on wait for the splash screens for
battery % and memory full to
finish displaying.)
4.3.2 Press START to begin a reading
once in PROBE MODE, if the
meter was just turned on then the
Product Type last used will be
displayed. If the product type
needs to be changed then press
MODE.
4.3.3 Once the START button is
pressed again the meter will
configure itself for a probing.
Turning the meter OFF and then
back ON will allow selection of a
new Product Type and will reset
all averages and standard
deviation calculations.
4.3.4 Place the meter’s tip on the
surface of the sample and press
START again. The meter will
measure the distance to the
surface for use in calculating
depth during the probing and for
checking probe length for
reporting in the data file. If the
probe length measured does not
match the currently calibrated configuration the meter may
suggest a new calibration is required. Once this screen
appears the user can then proceed by pushing the probe into
the sample.
Defaults to PROBE MODE after
power on, press START to
continue
Select Product Type, START to
continue, MODE to change
Product Type (“MFG Test” is the
Product Type shown here)
When this screen shows set the
meter’s tip on the surface of the
product but DO NOT start
penetrating yet.
When this screen appears the
probe may be inserted into the
product.
12
i. While pushing the probe into the sample watch the
speed indicator in the lower right of the screen. For the
selected insertion speed the indicator must be centered
(ooOoo). If the speed is too fast then the indicator
moves to the right (oooOo). If the speed is too slow
then the indicator moves to the left (oOooo). For
reference: (Ooooo)= 60% of target speed,
(oOooo)=80%, (ooOoo)=100%, (oooOo)=120%,
(ooooO)=140%.
ii. During the probing the force measured and the depth
will be continuously updated on the screen. The meter
will record a force reading at each 1 cm of depth and
save them to calculate a probing average and also for
later review or download to a computer if the logging
function is enabled. Probe averages discard the first 3
cm and the last 1 cm of probing depth. Therefore the
minimum probing depth is 5 cm for a valid reading.
4.3.5 For the meter to allow a probing to be considered complete
the penetration depth must be at least 5 cm. Once the
probing has gone to 5 cm or deeper then the probing reading
can be completed in two ways.
i. The downward penetration can be stopped and the
probe pulled out of the sample, once it has been
withdrawn 4 cm the meter will complete the probing
and then take the temperature that is currently sensed
by the temp sensor and then show FINISHED on the
LCD as shown on the next page.
ii. OR the downward penetration can be stopped at any
depth beyond 5 cm and the meter is left to sit without
further penetration or significant withdrawal for 4
seconds. After this 4 second wait the meter will
recognize that the user
intends to stop the probing
and will automatically enter
a temperature stabilization
mode (looks for less than
0.1*F change every 3
seconds). Once in this
mode it will monitor the temp sensor and only complete
the reading once the temperature measurement has
stabilized. Once stabilized the meter will complete the
probing and show FINISHED on the LCD.
Temp Stabilization Mode
Содержание SpotOn G2
Страница 1: ...Product Manual Innoquest Item 23920...


