


Credit Card Plus: Ingenico iPP320
© 2018 athenahealth, Inc.
Rev 1.52 - Page 4
9.
After completing this installation, reload the
Device Management
page (
Settings
,
Device Management
)
to confirm installation. Successful installation will be ref
lected with green “Installed” text, as shown below.
10.
Last, to ensure your browser works properly, you will need to configure your browser for athenaNet. On the
Main Menu, navigate to Settings, under
My Configurations
section, click
Configure Your Browser
. Under
the
Browser Settings
heading, click the
Update Settings
button (if present), which may cause your browser
to restart. On success, the button will no longer be present on the
Configure Your Browser
page and you
will see the green text as shown below:
•
Note: Skip step 10 if you have already performed this step. The green text above will show if this is the case.
11.
On the Main Menu, navigate to Settings, under
My Configurations
section, click
Device Management
to
return to the setup page. Now proceed with the steps under
Ingenico Terminal Installation
Ingenico Terminal Installation
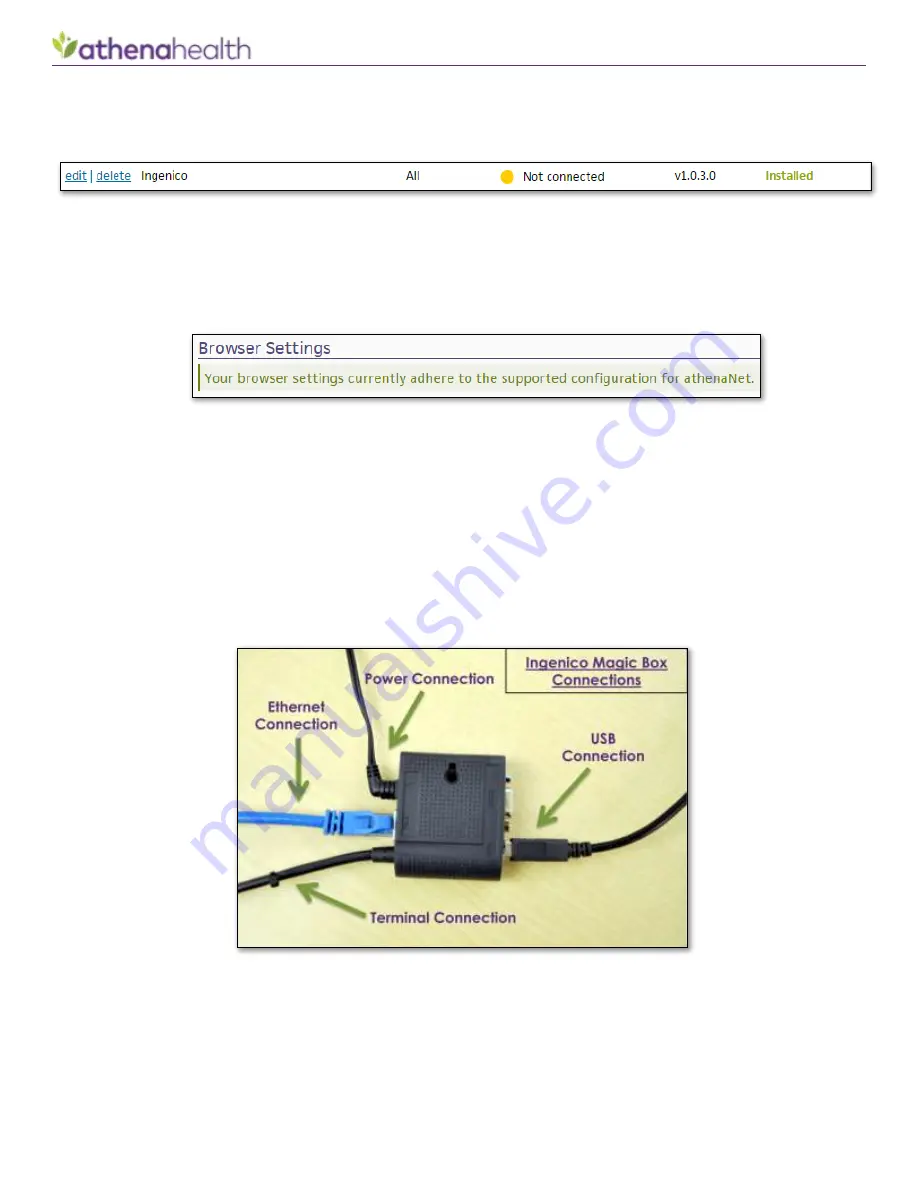
12.
The Ingenico “Magic Box” is the rounded box shown in the center of the figure
below. Connect the USB
cable to the Magic Box and to your computer, as shown below.
Note
: It is not necessary to disconnect
any other devices (ex: RDM check scanner) from the computer unless you need a free USB port.
13.
Connect the Ethernet cable to the magic box (see above) and your Ethernet wall jack or hub.
14.
Plug the power cable into the Ingenico Magic Box and a power outlet.


