0
2
4
6
8 10
12
14
0
2
4
6
8 10
1
2
14
NOTE:
EonServ is assigned with ID
0
by default.
Ÿ
For 2U system, only connect 2U JBODs.
Ÿ
For 3U system, only connect 3U JBODS.
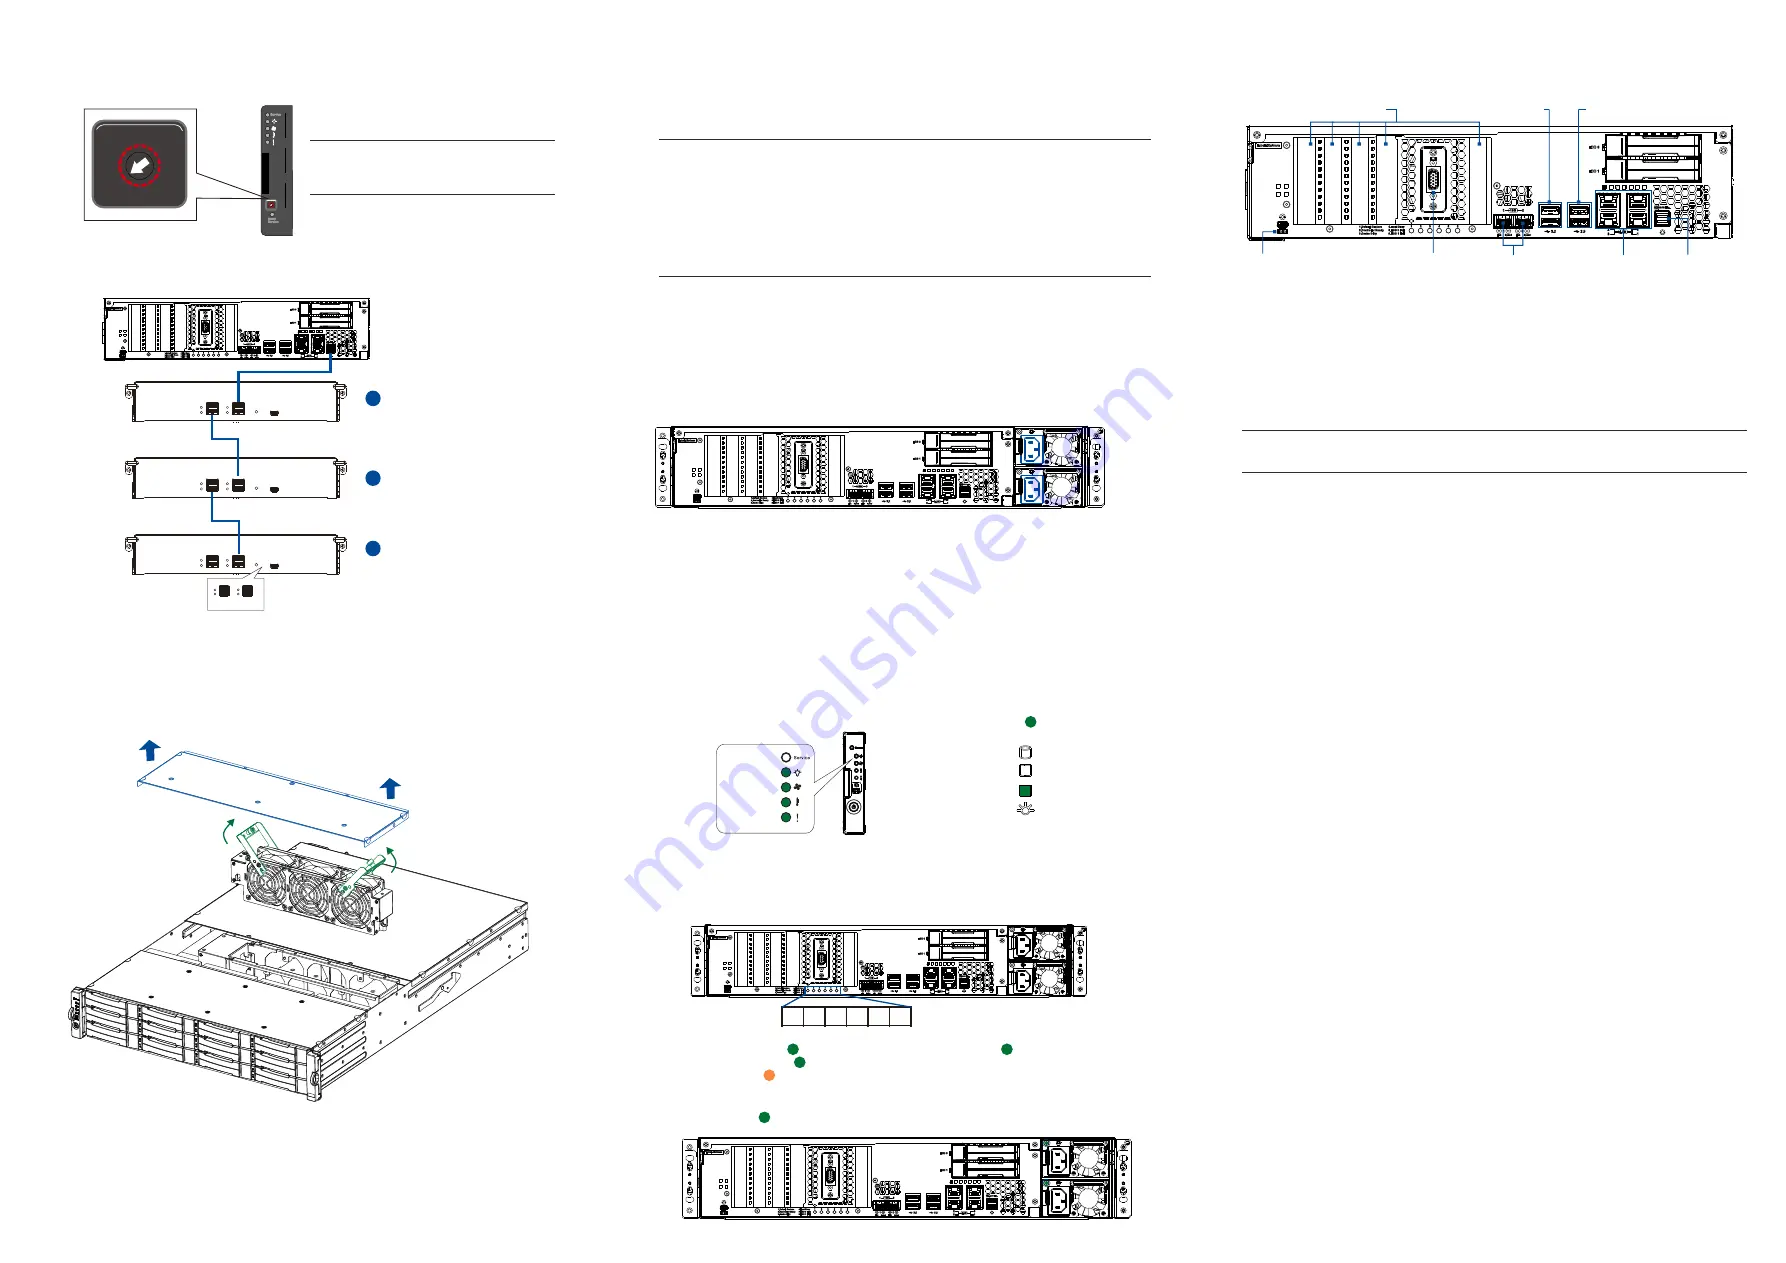
6.2 Making connections
6. JBOD Connections
6.1 Setting the JBOD IDs
Use a small flat blade screwdriver to set the JBOD enclosure ID(s). A different ID
number must be allocated for each JBOD.
7. Replacing the Cooling Module
Loosen the screws and remove the cover (
), then lift up the handles (
) to remove
blue
green
the cooling module.
8. Installing the Operating System
Before you install the operating system, on EonServ, you must set the BIOS to boot from
the desired device. To do this, follow the instructions below:
1. Turn on your system. then press
F2
to enter BIOS.
2. Go to
Boot
tab, then select
OS installation USB device
as your first boot option.
NOTE:
If you wish to set up RAID configuration for your system drives, follow the instructions stated
below. If not, proceed to step 3.
a. Go to
Advanced
>
SATA configuration.
b. Go to
SATA Mode Selection
>
RAID
.
c. Press
F4
to save and exit the BIOS and reboot the system.
d. From the
Intel Rapid Storage Technology
boot screen, press the keys
CTRL + I.
e. Select
1
to create a RAID volume.
f. Use the arrow keys
g. Once the RAID volume is created, press
ESC
to exit BIOS and reboot the system.
3. Complete the OS installation. Refer to the operating system installation guide for the
complete details.
4. Upon reboot, press
F2
to enter BIOS again and set the system drive as the first boot
device.
9. Power up
9.1 Connecting the power cord
Connect the bundled power cord(s) to the power socket(s) of the system.
1. Turn on the networking devices.
2. Turn on the JBODs (if connected) by pressing the power switches on the rear panel.
3. Turn on EonServ system by pressing the button on the front panel.
4. Turn on the application servers.
9.2 Powering up the system
9.3 Verifying the front of enclosure’s status LEDs
Observe the LEDs located at the front of the enclosure. If the LEDs show different status
than what’s described below, of if you hear an audible alarm, contact the customer support.
Front panel LEDs:
Drive tray:
• Power Status:
9.4 Verifying the rear of enclosure’s status LEDs
Observe the LEDs located at the rear of the enclosure. If the LEDs show different status
than what’s described below, of if you hear an audible alarm, contact the customer support.
Controller LEDs:
1. Default Restore:
2. Controller Ready:
3. Cache Dirty:
4. Host Busy:
5. HDD 0 Fail: (Reserved)
6. HDD 1 Fail: (Reserved)
10. Interfaces
10.1 Interface overview
Service port
PCIe card slot
(optional)
D-sub VGA
port
Ethernet
ports (SFP+)
USB 3.0 ports
USB 2.0 ports
Ethernet ports
(RJ-45)
SAS-12G
wide IN port
10.2 SANWatch management software
1. Install the SANWatch software suite, which is included in the CD-ROM, into the
system.
2. Once installed, enter the IP address of the host computer to the browser, then press
Enter
to log into SANWatch interface.
3. When the login screen appears, enter the default password (password is
root
), then
click
Log in
.
NOTE:
For more details, refer to the SANWatch user manual on the CD-ROM that is bundled with the
system.
1
2
3
4
5
6
EonServ SAS Expansion
JBOD
or last JBOD
IN OUT
1
2
3
Service:
Power:
Cooling fan:
Thermal:
System:
PSU LED: ON


