Infortrend Expansion Guide
Copyright © 2019 Infortrend Technology, Inc. All rights reserved.
Page 11 / 15
3. Reconnecting the redundant SAS path
(for redundant models only)
Unplug the SAS cable from the current last expansion controller (see dotted
orange
), then connect it
to the SAS port of newly-added last expansion's second controller (see longest
orange
cable connection in
). A longer
SAS cable may be required.
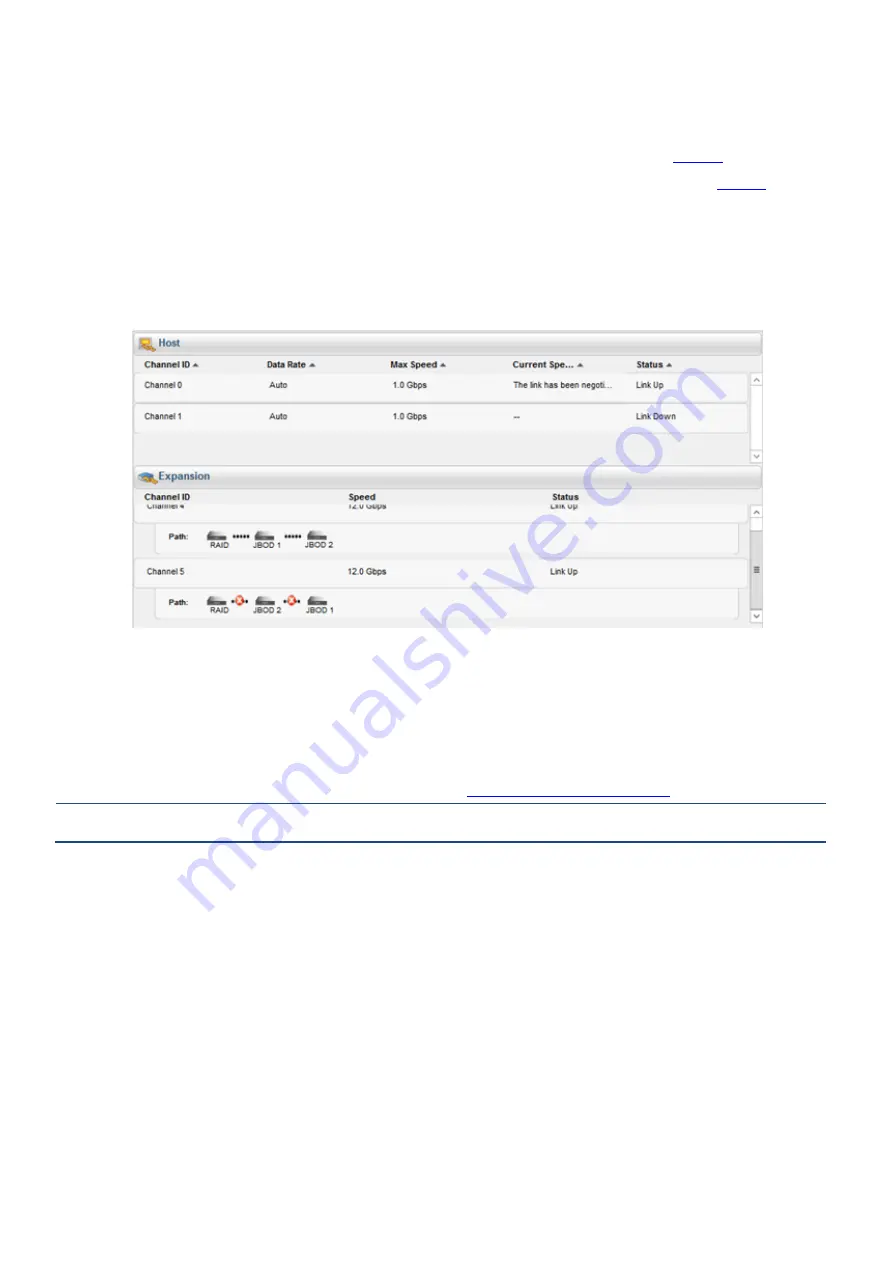
This step involves disconnecting one of the SAS cables, so critical events on storage system such as reports of drive-side
redundant path failure are expected. You will get notification events from the management GUI, LCD panel, LEDs, and other
means of notification alerts.
Figure 14: Redundant path failure of expansion enclosures in SANWatch
4. Connecting new SAS cable
Connect new SAS cables (see
black
connection) from the current last expansion to the newly-added expansion enclosure.
Ensure to follow the SAS connection's
IN to OUT
rule described in
Expansion Enclosure Connections
NOTE:
The sample diagram is only for SAS 12 Gb/s storage system.
5. Turning on the newly-added expansion enclosure
Press the power button to turn on the expansion enclosure, then wait for the storage management GUI to display the
additional expansion enclosure. Once the added subsystem is successfully working with the system assembly, the storage
system's status on the management, GUI, LCD panel, LED panel, and other status features are back to normal.
Do take note that adding a newly-added expansion enclosure also sets the Hot-Add feature, which may cause delay or pause
for about 10-20 seconds on the host I/O. The delay/pause time may vary depending on the operating system, drivers, and
other factors.


