background image

Page 5

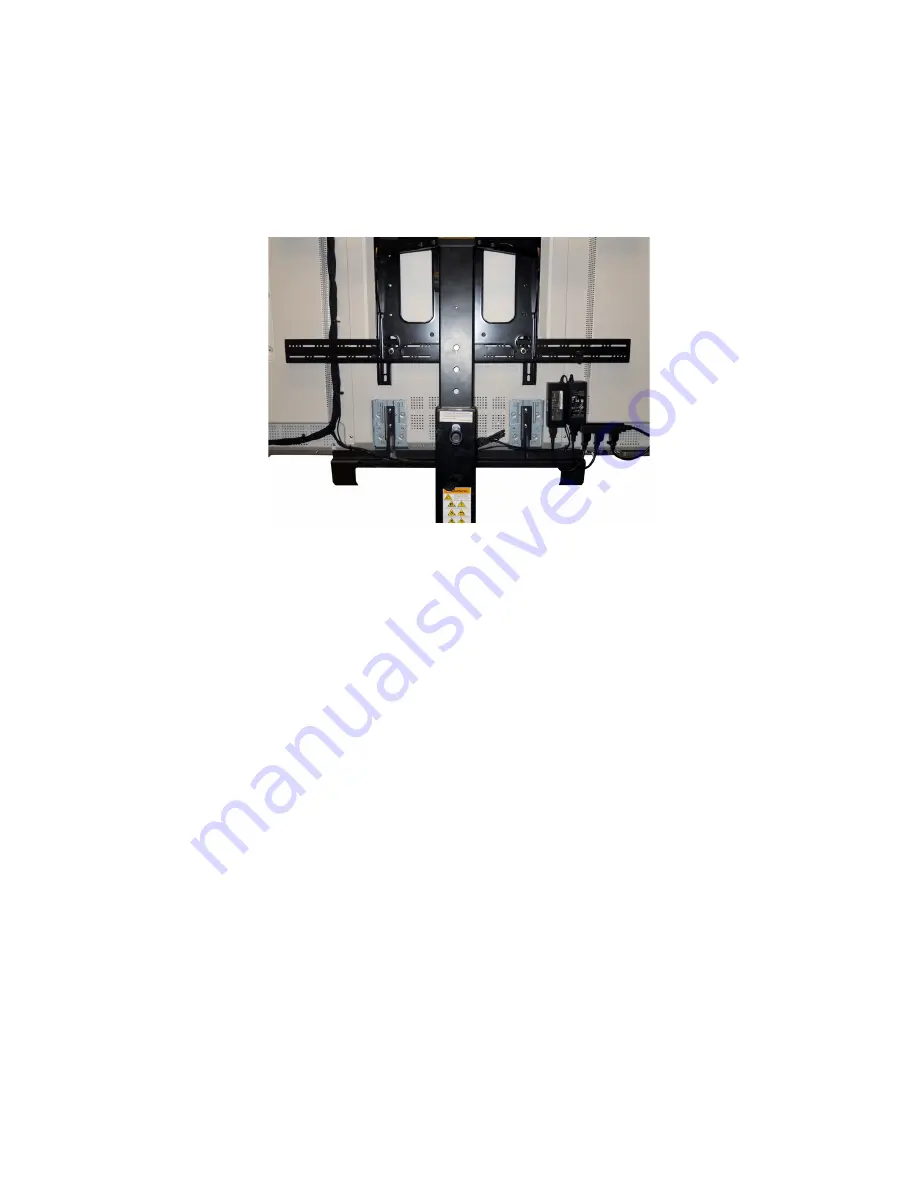
Mounting the Sound Bar

IMPORTANT:


The INF7020 must be mounted to a stand or placed on feet before following these instructions. Review the stand/feet manufactur

-

er's user documentation for more information. 

1) 

Remove the existing feet from the sound bar and set the feet aside. 

NOTE:

 The feet can be used to floor or wall mount the 

sound bar, if you do not want to attach the sound bar to the monitor.

2) 

Remove the screws which hold the two plastic covers on the back of the monitor. Remove the covers.

3) 

From the back of the monitor, slide the flush-side of the sound bar bracket mounting arms underneath the cables and align the 
arms with the screw holes.

 NOTE: 

The sound bar bracket ships with the INF7020.

4) 

Attach the bracket to the back of the monitor using the provided screws.

5) 

From the front of the monitor, attach the sound bar to the mounting bracket with the provided screws, being careful not to 
pinch the cables.

6) 

Tighten all the screws securely.

Содержание INF7020

Страница 1: ...INF7020 Sound Bar MIC Number HW SOUNDBAR 3 Regulatory model VSB200 p n 009 1435 00 User s Guide...

Страница 2: ......

Страница 3: ...Bar 5 Connecting the Sound Bar to your Source Device 6 Control Panel Overview 7 LED Panel Overview 7 Remote Overview 8 Inserting the Remote Battery 8 Operating the Remote 8 Maintenance 9 Troubleshoot...

Страница 4: ...ure of the type of power supplied to your home consult your dealer or local power company Only power of the marked voltage can be used for your HD sound bar Any other voltage than the specified voltag...

Страница 5: ...heavy dust or high humidity may cause fire or electric shock Ensure that the power cord and any other cables are unplugged before moving the HD sound bar When unplugging the HD sound bar hold the pow...

Страница 6: ...Page 4...

Страница 7: ...sound bar to the monitor 2 Remove the screws which hold the two plastic covers on the back of the monitor Remove the covers 3 From the back of the monitor slide the flush side of the sound bar bracke...

Страница 8: ...monitor to INPUT 2 on the back of the sound bar 2 Optional for use with a sub woofer Connect one end of the sub woofer audio cable to SUB OUT on the back of the sound bar and the other end to the ana...

Страница 9: ...ithin a couple of seconds after adjustments have been completed the LEDs turn off LEDs Color Indicates 1 White The soundbar has been turned on 2 White Blinks White when Input 1 is the chosen source in...

Страница 10: ...out from the remote 3 Insert the CR2025 Lithium button battery into the battery holder with the symbol aligned with the symbol on the battery holder 4 Re insert the battery holder into the remote Caut...

Страница 11: ...urce device is powered on and emitting audio to the external port Verify that the Mondopad software is not muted Verify that the audio cables are securely connected between the source device and the s...

Страница 12: ...ate of the audio source device to be either 44 1 KHz or prefer ably 48KHz Solid Solid Blinking Solid Solid An over current error has been detected Reduce the volume setting of the sound bar and subwoo...

Страница 13: ...Efficiency with Low Power Consumption Environmentally conscious High Performance 32 Bit 150MHz DSP Audio Engine Impressive Sound Pressure Level measuring 90dB SPL 1W 1M Advanced 24 Bit Linear PCM to...

Страница 14: ...ser s guide or in this warranty This warranty does not cover maintenance repair replacement of parts due to normal wear and tear Remanufactured Products are exempt from the foregoing Limited Warranty...

Страница 15: ...action regardless of form arising out of the agreement to purchase the Product may be brought by purchaser more than one year after the cause of action has accrued Governing Law Any action regardless...

Отзывы: