iNFinuvo CLEANMATEQQ5 Скачать руководство пользователя страница 13

Scheduler Operations

Time setting

Scheduler

Week Mo Tu We Th Fr

Sa Su

Full

Auto cleaning

The scheduling function of QQ5 is built in Charging-base.
User has the freedom to set up the cleaning time according to pre-programmed 
schedule.
On this preset cleaning time, QQ5 will leave charging-base and start the cleaning 
session automatically.
User can program it to start cleaning job at the same time on every day, or on any day of 
week user choose.
The scheduler LCD display is located on the top of "charging-base" unit.
Before setting local time and cleaning time, user needs to plug in "Charger", to power 
up the "Charging-base".

Button switch:

Local time setting button : Push the button, the ":" pattern of LCD will stop 
                                               blinking.
                                               User can push the "Week", "Hour", "Min." button to 
                                               update local time.

:

:

For example: Push "week" button, will show "Monday", push again will show 
                        next day of week.
                        Choose the true day, then push "            " button again. 
                        The ":" pattern will regain blinking, the Day setting is completion. 
                        The "Hour" and " Min." are same operation.
TIP : If user operating local time setting, the LCD display will show 
         " Time setting".

Scheduling cleaning time button :
Step 1 : Push the button, the ":" pattern of LCD will stop blinking. and the LCD 
              will show "Scheduler".
Step 2 : Push "Week" button, LCD will show "Mo" and blinking.
              You can push "Week" button again during in period 8 sec. to set “Mo" is 
              cleaning day.
              If you did not push "Week" button over 8 sec., “Mo" will jump to "Tu" 
              automatically. 
              You can choose some days in one week. after finished setting, will show 
              on LCD.
Step 3 : Push "Hour" button to schedule hour setting, you can see "Hour" number 
              on LCD, Choose the right Hour number of cleaning time.
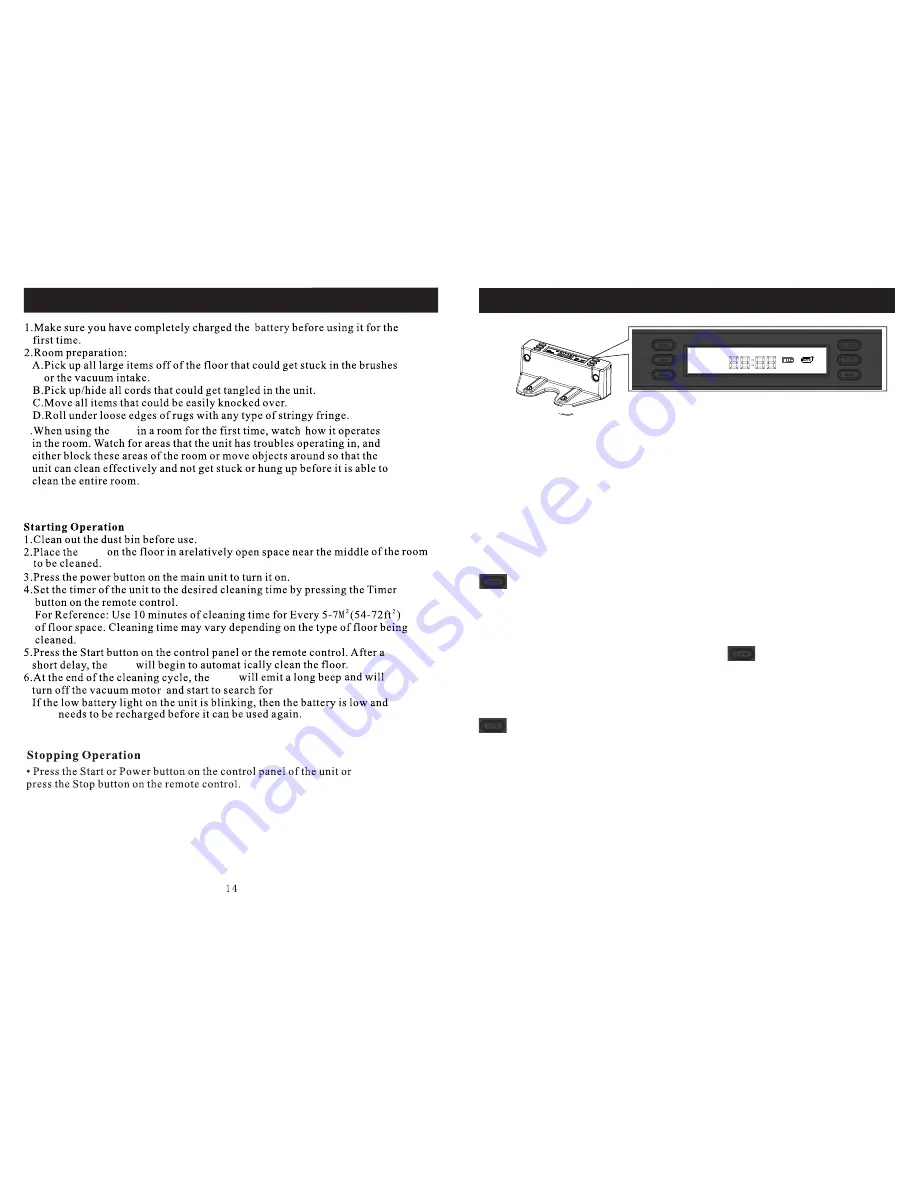
General Operation

3

QQ5

QQ5

QQ5

QQ5

QQ5

charging base.

11

Содержание CLEANMATEQQ5

Страница 1: ......

Страница 2: ...Table of Content 1 1 2 2 3 4 7 8 9 10 11 13 14 15 17 19 21 22 Setting ID with Main unit...

Страница 3: ...24 Safety Precautions Safety Instruction...

Страница 4: ...ral movement Used remoter Mode 1 from inside to outside cycling All cleaning parts could renew from unit outside and by yourself Cleaning a wide variety of floor types Optimum dimension 33 8cm 13 3 1i...

Страница 5: ...e parts 4 Remote control 5 Sonic wall 6 Battery pack 7 Charger 8 Manual 2 9 Cleaner brush 10 Rolling brush cleaner 4 1 6 8 5 2 7 3 Spare parts box On the top of dust bin On the back of Charging base 3...

Страница 6: ...unction display Universal Wheel Side Brush Charging Pad Rolling Brush Air outlet UV Light Rolling Brush Switch Drop Sensor 6 Wheel set Dust bin button Remote control Power switch Dust bin unit Main Un...

Страница 7: ...up QQ5 Timer Movement Mode Error display 1 Timer Yon can use remote controll setting clean time 80 60 40 20 80 repeat During cleaning the timer will be countdown the setting time When next time turns...

Страница 8: ...ion fan is activated You can push Fan button of remote controll to ON OFF it UV Light The blue symbol light up the UV Light is activated You can push UV button of remote controll to ON OFF it When QQ5...

Страница 9: ...light up before you start setting please clear previous ID of Main unit You can follow the step of instruction f c Let the sonic wall start to study If the three symbol are all light up please clear...

Страница 10: ...een used yet Tip Each one main unit at most can be equipped with one remote control two charging stations and 3 sonic walls at the same time Step Each one of main unit remote control charging station...

Страница 11: ...ng it means battery low 1 2 3 4 5 When QQ5 cleaning the Sonic Wall position must be away from charging base at least 1m 3 ft and avoid face to charging base When QQ5 complete cleaning you can power of...

Страница 12: ...e Self Charging Base and turn it on Now press the Home key on remote control The QQ5 should return to the Home Base automatically for self charging Make necessary adjustment to the Home Base if the QQ...

Страница 13: ...r Min button to update local time For example Push week button will show Monday push again will show next day of week Choose the true day then push button again The pattern will regain blinking the Da...

Страница 14: ...ring QQ5 charged fully Full will show on LCD Step 4 Push Min button same as above setting minutes of cleaning time Step 5 Push again when you completed the cleaning time setting The pattern of LCD wil...

Отзывы: