37
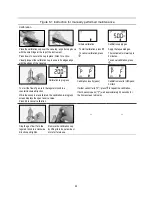
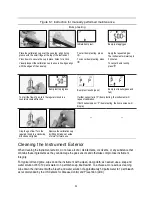
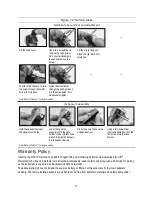
Figure 7.2 Service tasks
Garment clip removal and attachment
—
Lift the clip's cover.
Use a torx screwdriver to
remove the clip's screw.
Turn counterclockwise to
loosen and remove the
screw.
Lift the clip to remove it.
Close the clip; store it for
future use.
—
—
To attach the clip cover, place
the screw through the center
hole of the clip back.
Guide the screwdriver
through the clip's hole and
into the screw head. Turn
clockwise to tighten.
Note
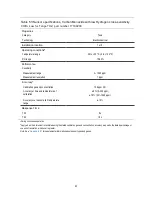
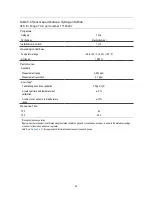
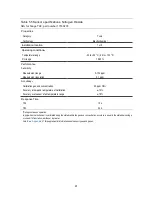
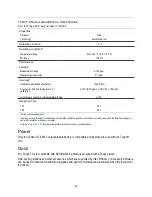
: Refer to Table 7.1 for torque values.
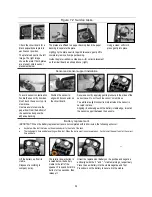
Instrument assembly
Hold the case bottom near
the upper screw holes.
Lower the case top
assembly onto the case
bottom. Use a straight-down
motion to guide the sensors
into the sensor barrels.
Press to secure the case top
and case bottom.
Using a torx screwdriver,
insert and tighten each of the
four screws into the case
bottom.
Note
: Refer to Table 7.1 for torque values.
Warranty Policy
I
ndustrial Scientific Corporation’s portable Tango
® TX2 gas-monitoring instrument is Guaranteed for L
ife™.
Warranted to be free from defects in material and workmanship, under normal and proper use and service for as long
as the instrument is supported by Industrial Scientific Corporation.
The above warranty does not include the sensors, battery, or filters, but the sensors carry their own separate
warranty. The factory-installed sensors are warranted to be free from defects in material and workmanship under
Содержание TANGO TX2
Страница 6: ......
Страница 16: ......
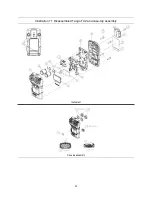
Страница 38: ...32 Illustration 7 1 Disassembled Tango TX2 and case top assembly Instrument Case top assembly...

