background image

When the new
washer arrives

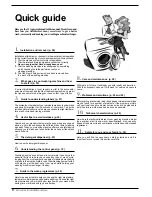
Installation and removal

Whether new or just  transported to a new house,
installation is extremely important for the correct
functioning of your washing machine.

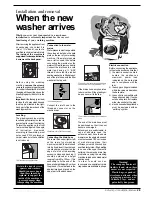
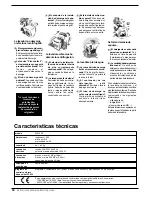
The hook to be used in case the drain

hose ends at a height below 60 cm.

If the drains hose empties into a
tub or sink then fit the plastic gui-
de and secure it to the tap.

The guide for draining into tubs and

sinks.

The end of the drain hose must
be positioned so that it cannot
become submerged.
Extensions are unadvisable. In
case of absolute need, the
extension must have the same
diameter as the original hose and
must not exceed 150 cm. In case
of wall draining pipes, their
efficiency must be checked by a
qualified technician. If the dwelling
is on one of the upper floors of a
building, there may be drain trap
problems causing the washing
machine to load and unload water
continuously.
In order to avoid such an
inconvenience, special anti-drain
trap valves are available in shops.

After removing the appliance from
its packaging, check that it is
intact. If in doubt, contact a
qualified technician immediately.
The inside of the machine is
supported, for transportation, by
4 screws on the back panel.

Before using the washing
machine, remove the screws,
remove the spacers together with
the rubber tubes attached to them
(keeping all the parts) and use the
plastic plugs provided to fill in the
holes.
Important: Use the cap (provided)
to close the 3 holes which housed
the stop pin, situated in the right-
hand part of the lower back of the
washing machine.

Levelling
The washing machine must be
levelled appropriatey in order to
guarantee its correct functioning.
To level the appliance, the front
feet must be adjusted; the angle
of inclination, measured
according to the worktop, must
not exceed 2°. When placed on
carpet, make sure the ventilation
is not reduced.

The front feet are adjustable.

Connection to the water
mains
Water pressure must range within
the values indicated on the data
plate on the rear of your washing
machine. If the water pipes are
new or left unused, then before
connecting the machine run the
water until clear to remove debris.
Connect the inlet hose to a cold
water tap having a ¾ “ BSP
thread. Ensure that the rubber
sealing washers are fitted at each
end of the inlet hose, with the fitter
washer at the tap end.

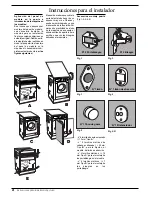
A

The rubber gasket.

Connect the inlet hose to the
threaded connector on the
machine rear.

Water pipe inlet at the top right.

Connecting the drain hose
There are two hooks (right or left)
on the rear of your washing
machine to which the drain hose
is to be fixed. Insert the other end
in a stand pipe or place it on the
edge of a sink or tub avoiding
excessive kinks and bending. It
should be placed at a height
ranging from 60 to 100 cm. If it is
necessary to fix the end of the
hose at a height below 60 cm from
the ground, it must be fixed in the
appropriate hook placed on the
upper part of the back panel.

Warning!

The company denies all

liability if and when these

norms are not respected.

Plastic bags, expanded

styrofoam, nails and other

packaging parts are not

children’s toys, and are

potentially dangerous.

Retain the transit screws,

spacers and washers.

Should you move house

then these should be

replaced to support the

inside of the machine to

prevent damage when

transporting the machine.


Instructions for installation and use  

26

Electric connection
Before connecting the appliance
to the electric socket, be sure that:
1)  the electric socket is able to

sustain the appliance’s
maximum power load
indicated on the data plate
and in compliance with the
law;

2)   the supply voltage is included

within the values indicated on
the data plate;

3)   the socket is compatible with

the appliance’s plug. If not, do
not use adapters, but replace
either the socket or the plug;

4)   electric household appliances

must be equipped with an
“earthing” system.

Содержание WME 6 X

Страница 1: ...Istruzioni per l installazione e l uso Washing machine Instructions for installation and use Lavadora Instrucciones para la instalaci n y uso M quina de lavar roupa Instru es para a instala o e a uti...

Страница 2: ...ruzioni per l installazione e l uso Washing machine 17 Instructions for installation and use Lavadora 31 Instrucciones para la instalaci n y uso M quina de lavar roupa 47 Instru es para a instala o e...

Страница 3: ......

Страница 4: ...e lavare Oggi la tua lavabiancheria che ti d molti buoni consigli 5 Il cassetto dei detersivi p 7 Come utilizzare il cassetto dei detersivi 6 Capire il pannello dei comandi p 3 Il pannello dei comandi...

Страница 5: ...manopola A sia posizio nata su uno dei simboli Stop Reset Scegliere il programma Il programma si sceglie in base al tipo di indumenti da lavare Per scegliere il programma consul ta la tabella a pagin...

Страница 6: ...ar coincidere l indice po sto sulla manopola con il sim bolo numero corrispondente al programma desiderato A questo punto premi il pulsante di acceso spento G posizione I la spia H inizia a lampeggiar...

Страница 7: ...e centrifuga delicata Risciacqui Risciacqui antipiega o centrifuga delicata Ammorbidente Risciacqui con prelievo dell ammorbidente antipiega o centrifuga delicata Centrifuga Scarico e centrifuga delic...

Страница 8: ...tte Impara questi simboli e laverai meglio i tuoi capi dureranno di pi e la tua lavabiancheria ricambier la tua attenzione lavando meglio In tutta Europa ogni etichetta contiene un messaggio affida to...

Страница 9: ...iacche a vento Anche i piumini e le giacche a vento se l imbottitura d oca o di anatra possono essere lava te in lavatrice L importante non fare un carico di 5 kg ma al massimo di 2 3 kg ripetendo il...

Страница 10: ...atrice Fanno eccezione i detersivi spe cificamente studiati per il lavag gio a mano e per quello in lava trice Un ultimo segreto quando lavi con acqua fredda riduci sem pre la quantit di detersivo nel...

Страница 11: ...ra dell impianto idraulico della lavabiancheria ed elimina il pericolo di perdite quando in casa non c nessuno Lasciare sempre socchiuso l obl In questo modo non si creano cattivi odori Pulire delicat...

Страница 12: ...ante il ciclo di centrifugazione la lavatrice ha bisogno di oscillare un po opportuno che intorno ad essa ci siano alcuni cm liberi La lavabiancheria perde acqua La ghiera del tubo di carico ben avvit...

Страница 13: ...udi i fori con i tappi di plasti ca forniti in dotazione Importante Chiudi con il tap po in dotazione i 3 fori nei qua li era alloggiata la spina situati nella parte posteriore in basso a destra della...

Страница 14: ...uso della mac china consigliamo lo stesso senso di apertura dell obl con le cerniere applicate sul lato si nistro Accessori montaggio portina Fig 1 2 3 4 5 n 6 viti autofilettanti l 13 mm tipo A n 2 v...

Страница 15: ...zoccolo agire cone segue fig 8 Fig 6 Fig 7 Fig 9 D C C Regolazione in altezza della macchina La macchina pu essere rego lata in altezza da 815 mm a 835 mm agendo sui 4 piedini Se si desidera portarla...

Страница 16: ...tiepida e sapone Mai esagerare con le dosi Il normale detersivo contiene gi prodotti anticalcare Solo se l ac qua particolarmente dura cio molto ricca di calcio ti consiglia mo di utilizzare ad ogni l...

Страница 17: ...lusiva mente presso i Centri di Assistenza Tecnica auto rizzati Per sostituirlo occorre fare cos 1 Assicurati che la lavabian cheria sia spenta e la presa sia scollegata 2 Togli la copertura svitando...

Страница 18: ...i t i Indesit ti vicina anche dopo l acquisto 15 Istruzioni per l installazione e l uso Aderisci subito ai servizi speciali Ti puoi garantire anni ed anni di totale tranquillit per i tuoi nuovi elettr...

Страница 19: ...Istruzioni per l installazione e l uso 16...

Страница 20: ...u to wash wool even better than an expert laundress would by hand 5 The detergent dispenser p 23 How to use the detergent dispenser 6 Understanding the control panel p 19 Washing machine s control pan...

Страница 21: ...he water supply is turned on 4 Selector knob A is positioned on one of the symbols Stop Reset Choosethedesiredprogramme The programme is selected accordingtothetypeofgarments thatneedtobewashed Tochoo...

Страница 22: ...a programme you should turn the knob so that the symbol number of the desired programme is in line with the pointer on the knob Now press on off button G position I pilot lamp H will start flashing Af...

Страница 23: ...icate spin cycle Rinse cycles Rinse cycles anti crease or delicate spin cycel Fabric softener Rinse cycles with automatic introduction of softener anti crease or delicate spin cycle Spin cycle Drainin...

Страница 24: ...longer resulting in an improved wash All over Europe garment labels contain messages expressed in small yet important symbols Understanding them is very important if you want to get better results and...

Страница 25: ...with whites Quilted coats and anorak You can wash quilted coats and wind cheaters too if they are padded with goose or duck down Do not load more than 2 3 kg and never load 5 kg Repeat rinse once or t...

Страница 26: ...t because it may form too much foam which could damage the washing machine Detergents that are specifically formulated for both hand and machine wash are an exception One last secret when washing with...

Страница 27: ...It could have been moved whilst cleaning Is there electricity in the house A circuit breaker may have switched off as a result of too many electrical appliances working at the same time Or maybe due...

Страница 28: ...the machine and adjacent units If it is not a built in model the washing machine will oscillate a bit during the spin cycle A few cm of space should therefore be left around it The washing machine le...

Страница 29: ...s not reduced The front feet are adjustable Connection to the water mains Waterpressuremustrangewithin the values indicated on the data plate on the rear of your washing machine If the water pipes are...

Страница 30: ...we recommend that the panel be hinged on the same side as the door for the machine itself the left Door Mounting Accessories Fig 1 2 3 4 5 No 6 type A self threading screws l 13 mm No 2 type B metric...

Страница 31: ...how to assemble the plinth guide fig 8 Fig 6 Fig 7 Fig 9 D C C Adjusting the appliance height The height of the appliance can be adjusted from 815 mm to 835 mm by turning the 4 feet Should you requir...

Страница 32: ...ate with doses Normal detergents already contain deliming agents Only if the water is particularly hard that is rich in lime content do we recommend the use of a specific product at every wash A perio...

Страница 33: ...ing machine power supply cable is specialandcanbepurchased exclusively from authorised Technical Service Centres To replace the cable 1 Makesurethatthemachine isswitchedoffandunplugged 2 Remove the co...

Страница 34: ...permite incluso lavar lana tal como podr a hacerlo una experta lavandera a mano 5 El dep sito de detergente p 37 C mo utilizar el dep sito de detergente 6 Comprender el funcionamiento del panel de man...

Страница 35: ...e 3 El grifo del agua est abierto 4 El mando A est situado en uno de los s mbolos Stop Reset Elegir el programa El programa se elige seg n el tipo de prendas a lavar Para elegir el programa consulta l...

Страница 36: ...ta la selecci n la luz indicadora H deja de centellear permaneciendo encendida y comienza el ciclo de lavado Si desea interrumpir el programa en curso o seleccionar uno nuevo escoja uno de los s mbolo...

Страница 37: ...o centrifugaci n delicada Suavizante Aclarados con toma del suavizante antiarrugas o centrifugaci n delicada Centrifugaci n Descarga y centrifugaci n delicada Stop Reset Interrumpe Anula el programa...

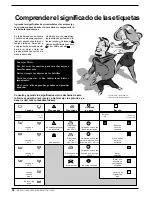
Страница 38: ...r s mejor tus prendas durar n m s y tu lavadora recompensar tu atenci n lavando mejor En toda Europa cada etiqueta contiene un mensaje represen tado por peque os pero impor tantes s mbolos Aprender a...

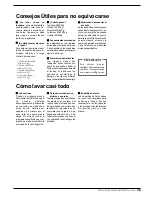
Страница 39: ...Tambi n las parkas acolchadas con plumas y los anoraks si el relleno es de pluma de ganso o de pato pueden ser lavados en lavadora Lo importante es no completar una carga de 5 kg llegando al m ximo a...

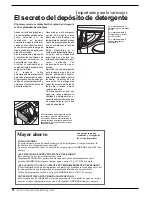
Страница 40: ...ialmente da ina para la lavadora Constituyen una excepci n los detergentes espec ficamente estudiados tanto para el lavado a mano como en lavadora Un ltimo secreto al lavar con agua fr a reduce siempr...

Страница 41: ...iezas de goma de la lavadora Descuidar el dep sito de detergente Puede ser extra do y para lavarlo basta dejarlo un poco de tiempo bajo el agua corriente Irse de vacaciones sin pensar en la lavadora A...

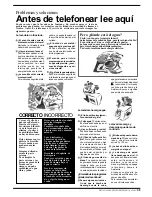
Страница 42: ...stalaci n La lavadora est nivelada La nivelaci n debe ser contro lada peri dicamente Con el paso del tiempo la lavadora podr a haberse desplazado lenta e imperceptiblemente Actuar sobre las patas cont...

Страница 43: ...ctivosdeben sercerradosconlostaponesdepl stico que se suministran adjuntos Importante cierre con el tap n suministrado con el aparato los 3 orificiosenloscualesestabaalojadoel enchufe situadosenlapart...

Страница 44: ...se aconseja el mismo sentido de apertura de la portilla o sea con las bisagras aplicadas a la izquierda Accesorios montaje puerta Fig 1 2 3 4 5 n 6 tornillos de autoenroscado l 13 mm tipo A n 2 torni...

Страница 45: ...o Si la m quina ha sido instalada en un extremo de los muebles de la cocina montar una o ambas gu as del z calo como se indica en la fig 8 regulando su profundidad en funci n de la posici n del z calo...

Страница 46: ...onunpa oem bebido en agua tibia y jab n No exagerar nunca las dosis El detergente normal contiene ya productosanticalc reos S losiel agua es particularmente dura esto es muy rica en calcio te aconseja...

Страница 47: ...ederdelasiguienteforma 1 Controla que la lavadora est apagadayelenchufeest desconectado 2 Extraiga la tapa desenroscando los tornillos I fig 13 3 Desconecta los cables del filtro antiinterferencia F f...

Страница 48: ...electrodom stico A s i s t e n c i a especializada Llame al 902 133 133 le responder el centro de Asistencia Indesit m s cercano a su domicilio Cuando llame para requerir asistencia recambios o acceso...

Страница 49: ...Instrucciones para la instalaci n y el uso 46...

Страница 50: ...dia a sua m quina de lavar roupa fornece muitos bons conselhos e at permitelavarl damesmamaneiraqueumadelicadalavagem m o 5 A gaveta dos detergentes p 53 Como utilizar a gaveta dos detergentes 6 Compr...

Страница 51: ...torneira da gua est aberta 4 O selector A est colocado num dos s mbolos Stop Reset Escolha do programa O programa escolhido com base no tipo de roupas a serem lavadas Para escolher o programa consult...

Страница 52: ...dicador luminoso H iniciar a piscar Depois de 5 a programa o ter sido aceite o indicador luminoso H p ra de piscar mas permanece aceso e iniciar o ciclo de lavagem Se desejar interromper um programaem...

Страница 53: ...30 C 30 Lavagem a 30 C enxaguamentos e centr fuga delicada Enxaguamento Lix via Enxaguamentos anti rugas ou centr fuga delicada Amaciador Enxaguamentos com colecta do amaciador anti rugas ou centr fug...

Страница 54: ...gua Compreender as etiquetas Aprenda a reconhecer estes s mbolos e lavar melhor as suas roupas durar o mais e a m quina de lavar roupa recompensar os cuidados ao lavar melhor Cada etiqueta cont m uma...

Страница 55: ...Tamb m os edred es e os anaroques se o recheio for de plumas de ganso ou de pato podem ser lavados na m quina de lavar O importante n o carregar 5 kg mas no m ximo 2 ou3kg repitaaenxaguadauma ou duas...

Страница 56: ...a a lavagem m o porque formam demasiada espuma potencial mentedanificanteparaam quina de lavar excep o dos detergentes especificamente estudados que permitam a lavagem m o e na m quina de lavar Um lti...

Страница 57: ...racha da m quina de lavar roupa Ignorar a gaveta dos detergentes Pode ser tirada e para lav la suficiente deix la um pouco de tempo na gua corrente Sair de f rias sem pensar na m quina Antes de sair d...

Страница 58: ...cta men te Veja a p gina sucessiva dedicada instala o A m quina de lavar roupa est bemnivelada preciso controlar periodicamente o nivelamento do aparelho Com o passar do tempo a m quina delavarpodeter...

Страница 59: ...os parafusos tireaborrachinhacom orespectivocal o guardetodasas pe as efechetodososfuroscom as tampas de mat ria pl stica fornecidasanexas Importante feche com tampas fornecidas os 3 furos nos quais...

Страница 60: ...mesma direc odeaberturadaescotilha com as dobradi as aplicadas do lado esquerdo Acess rios montagem portinhola Fig 1 2 3 4 5 6 parafusos auto roscantes l 13 mm tipo A 2 parafusos m tricos de cabe a al...

Страница 61: ...p realize as seguintes opera es fig 8 Fig 6 Fig 7 Fig 9 D C C Regula o da altura da m quina A altura da m quina pode ser regulada desde 815 mm at 835 mm mediante os 4 p s Se desejar lev la a uma altur...

Страница 62: ...vado com um pano molhado com gua morna e sab o Nunca exagerar nas doses O normal detergente j cont m produtos contra o calc rio Somente se a gua for especialmente dura ou seja muito rica de c lcio ser...

Страница 63: ...cial e pode ser adquirido exclusivamente nos Centros de Assist n cia T cnica autoriza dos Para troc lo preciso fazer o seguinte 1 Certificar se que a m quina de lavar esteja desligada e a ficha deslig...

Страница 64: ...Sevi os t cnicos completamente gratuitos e nas condi es da garantia do 1 ano descritas no Certificado inclu do no seu electrodom stico A s s i s t e n c i a Li gue para o numero 707 202 707 para saber...

Страница 65: ...Instru es para a instala o e a utiliza o 62...

Страница 66: ...Instru es para a instala o e a utiliza o 63...

Страница 67: ...Instru es para a instala o e a utiliza o 64...

Страница 68: ...3 2002 195032522 02 XEROX BUSINESS SERVICES DOCUTECH Merloni Elettrodomestici Viale Aristide Merloni 47 60044 Fabriano Italy Tel 39 0732 6611 Fax 39 0732 662501 www merloni com Leader for young Europe...

Отзывы: