background image

CUISINIERE

Mode d’emploi 

Sommaire

Attention,2

Installation, 3-6

Positionnement et nivellement
Raccordement électrique
Raccordement gaz
Adaptation aux différents types de gaz
Caractéristiques techniques
Tableau Caractéristiques des brûleurs et des 
injecteurs

Description de l’appareil, 7

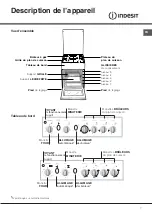
Vue d’ensemble
Tableau de bord

Mise en marche et utilisation, 8-10

Utilisation du plan de cuisson
Utilisation du four
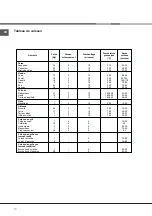
Tableau de cuisson

Précautions et conseils, 11

Sécurité générale
Mise au rebut
Economies et respect de l’environnement

Nettoyage et entretien, 12

Mise hors tension
Nettoyage de l’appareil
Entretien robinets gaz
Remplacement de l’ampoule d’éclairage du four
Assistance

English, 13

Français,1

GB

FR

K6G2S/FR S

KN6G2S/FR S

KN6G12S/FR S

Содержание K6G2S/FR S

Страница 1: ...ion de l appareil 7 Vue d ensemble Tableau de bord Mise en marche et utilisation 8 10 Utilisation du plan de cuisson Utilisation du four Tableau de cuisson Pr cautions et conseils 11 S curit g n rale...

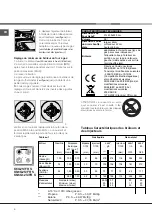
Страница 2: ...ipient de cuisson contenant de l huile ou de la graisse sur le foyer est dange Il ne faut JAMAIS essayer d teindre une flamme ou un incendie avec de l eau Il faut teindre l appareil et couvrir la flam...

Страница 3: ...issance install e Les prises d air prot g es par des grilles doivent disposer d un conduit d au moins 2 cm2 de section utile et dans une position qui leur vite tout risque d tre bouch es accidentellem...

Страница 4: ...ure ambiante Avant de proc der au branchement assurez vous que la prise est bien munie d une terre conforme la loi la prise est bien apte supporter la puissance maximale de l appareil indiqu e sur la...

Страница 5: ...du tuyau ne d passe pas 2 m tres d extension maximale Veillez ce que le tuyau ne soit pas cras et ne touche en aucun point des parties mobiles V rification de l tanch it Une fois l installation termin...

Страница 6: ...1013 mbar gaz sec Propane P C S 50 37 MJ Kg Butane P C S 49 47 MJ Kg Naturel G20 P C S 37 78 MJ m3 K6G2S FR S KN6G2S FR S KN6G12S FR S CARACTERISTIQUES TECHNIQUES Dimensions du Four HxLxP 31x43 5x43 5...

Страница 7: ...eau 3 niveau 2 niveau 1 Br leur gaz Plateau du plan de cuisson Pied de r glage Pied de r glage niveau 5 niveau 4 ALLUMAGE automatique Manette FOUR Manettes BR LEURS du plan de cuisson Manette MINUTERI...

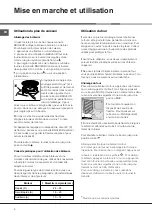
Страница 8: ...aphe Caract ristiques des br leurs et des injecteurs Mise en marche et utilisation Utilisation du four Lors de son premier allumage faites fonctionner le four vide porte ferm e pendant au moins une he...

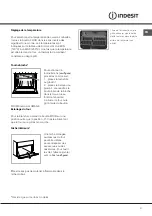
Страница 9: ...acez le berceau au gradin 4 et encastrez le bout arri re de la broche dans le trou situ au fond de l enceinte 3 allumer le four ou le gril l aide du bouton FOUR bouton ALLUMAGE Eclairage du four Pour...

Страница 10: ...sson Maquereaux Dent Truite en papillote 1 1 1 5 1 3 3 3 10 10 10 180 200 180 200 180 200 35 40 40 50 40 50 Pizza Napolitaine 1 3 15 220 15 20 G teaux Biscuits Tarte Tartes sal es G teaux lev s 0 5 1...

Страница 11: ...la porte du four ouverte Cet appareil n est pas pr vu pour tre utilis par des personnes y compris les enfants dont les capacit s physiques sensorielles ou mentales sont r duites ou des personnes d nu...

Страница 12: ...essifs contenant du phosphore Il est conseill de rincer abondamment et d essuyer apr s le nettoyage Mieux vaut essuyer aussit t tout d bordement d eau Contr ler les joints du four Contr lez p riodique...

Страница 13: ...Overall view Control panel Start up and use 19 21 Using the hob Using the oven Oven cooking advice table Precautions and tips 22 General safety Disposal Respecting and conserving the environment Maint...

Страница 14: ...Unattended cooking on a hob with fat or oil can be dangerous and may result in fire NEVER try to extinguish a fire with water but switch off the appliance and then cover flame e g with a lid or a fire...

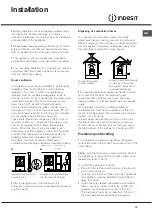
Страница 15: ...eed of any fans used Disposing of combustion fumes The disposal of combustion fumes should be guaranteed using a hood connected to a safe and efficient natural suction chimney or using an electric fan...

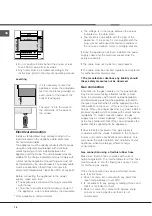
Страница 16: ...socket must be easily accessible The cable must not be bent or compressed The cable must be checked regularly and replaced by authorised technicians only The manufacturer declines any liability shoul...

Страница 17: ...the burners off their seats 2 Unscrew the nozzles using a 7 mm socket spanner see figure and replace them with nozzles suited to the new type of gas see Burner and nozzle specifications table 3 Replac...

Страница 18: ...ion quickly or open and shut the oven door making sure that the burner is not extinguished S S R A TECHNICAL DATA Oven Dimensions HxWxD 31x43 5x43 5 cm Volume 58 l Useful measurements relating to the...

Страница 19: ...panel Overall view GRILL TIMER knob OVEN control knob Hob BURNER control knobs OVEN BURNER ignition button HOB BURNER ignition button pilot light pilot light GRILL TIMER knob OVEN control knob Hob BU...

Страница 20: ...y should also be suited to the size of the burner Start up and use Burner Cookware diameter cm Fast R 24 26 Semi Fast S 16 20 Auxiliary A 10 14 To identify the type of burner please refer to the diagr...

Страница 21: ...BUTON KNOB Oven light This is switched on by turning the OVEN knob to any position other than 0 It remains lit as long as the oven is operating Lower compartment There is a compartment underneath the...

Страница 22: ...80 90 95 Fish Mackerel Dentex Trout baked in foil 1 1 1 5 1 3 3 3 10 10 10 180 200 180 200 180 200 35 40 40 50 40 45 Pizza Neapolitan style 1 3 15 220 15 20 Pies Biscuits Tart Savoury pies Leavened c...

Страница 23: ...ance from the electricity mains If the appliance breaks down under no circumstances should you attempt to repair the appliance yourself Repairs carried out by inexperienced persons may cause injury or...

Страница 24: ...he seals are damaged please contact your nearest Authorised After sales Service Centre We recommend that the oven is not used until the seals have been replaced Gas tap maintenance Over time the taps...

Отзывы: