background image

SAF

E

T

Y


PR
E

C

A

U

T

IO

N

S

1

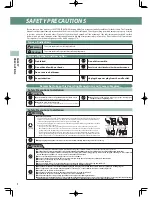
SAFETY PRECAUTIONS

Be sure that you have read these SAFETY PRECAUTIONS thoroughly before using your Inada DreamWave for the fi rst time. The Operating 
Manual contains important information about how to use the chair safely and correctly, avoiding possible damage to property or injury 
to persons using the chair and others. First of all, you should understand well the meaning of the indications and symbols described 
below, which are used throughout the Operating Manual to highlight important safety instructions. Please adhere to all precautions. 
Descriptions of each chair component can be found on pages 5-8.

Types of Indications

 Warning

This action could result in serious injury or death.

 Caution

This action could result in personal injury or damage to property.

Types of Symbols and Description

Prohibited

Prohibited.

Do not

disassemble

Do not disassemble. 

No wet hands

Do not handle with wet hands. 

Do not wet

Do not use in a location where the chair may become wet.

Prohibited

Do not use in a bathroom. 

Required Action

Required action.

Unplug

the chair

Unplug the power plug from the wall outlet. 

Remember to keep this Operating Manual in an easily accessible place.

Safety Precautions: Installation

 Caution

Prohibited

●  

Do not install the chair in an area of high humidity, such as a bathroom or sauna.

→ 

Could result in electric shock or damage to the chair.

Prohibited


Never connect the ground wire to gas pipes, water pipes, 
telephone lines, or lightning rods.

Required Action

Install on a flat, level surface only.

  Chair could tip over accidentally if placed on an uneven surface, 

resulting in an accident. 

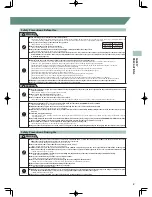
Safety Precautions: Installation

 Warning

Electrical

grounding

 Space  Requirements

This product must be grounded. If it should malfunction or breakdown, grounding provides a path of least 
resistance for electric current in order to reduce the risk of electric shock. This product is equipped with a 
cord having an equipment-grounding conductor and a grounding plug. 
The plug must be plugged into an appropriate outlet that is properly installed and grounded in accordance 
with all local codes and ordinances.
•   Improper connection of the equipment-grounding conductor can result in the risk of electric shock. 

Check with a qualifi ed electrician or serviceman if you are in doubt as to whether the product is properly 
grounded. Do not modify the plug provided with the product if it will not fi t the outlet; have a proper 
outlet installed by a qualifi ed electrician. This product uses on a normal Alternating Current(AC) circuit 
and has a grounding plug that looks like the plug illustrated in the fi gure to the right. Make sure that the 
product is connected to an outlet having the same confi guration as the plug. No adapter should be used 
with this product.

Required Action

 Always unplug this appliance from the electrical outlet immediately after using and before cleaning.

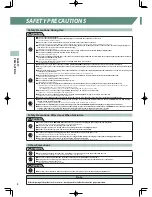
 Caution

Prohibited

 Do not operate under blanket or pillow. Excessive heating can occur and cause fi re, electric shock, or injury to persons.

  Use this appliance only for its intended use as described in this Operating Manual. Do not use attachments not recommended by the manufacturer.

  Never operate this appliance if it has a damaged cord or plug, if it is not working properly, if it has been dropped or damaged, or dropped into 
water. Return the appliance to a service center for examination and repair.

 Do not carry this appliance by supply cord or use cord as a handle.

 Never operate the appliance with the air openings blocked. Keep the air openings free of lint, hair, and the like.

 Never drop or insert any object into any opening.

 Do not use outdoors.

 Do not operate where aerosol (spray) products are being used or where oxygen is being administered.

 Children should be supervised to ensure that they do not play with the appliance.

Required Action

 An appliance should never be left unattended when plugged in. Unplug from outlet when not in use, and before putting on or taking off  parts.

  Close supervision is necessary when this appliance is used by, on, or near children, invalids, or disabled persons.

  Keep the cord away from heated surfaces.

 To disconnect, turn all controls to the off  position, then remove plug from outlet.

 Keep children away from extended foot support (or other similar parts).

 Connect this appliance to a properly grounded outlet only. See Grounding Instructions.

  This appliance is not intended for use by persons (including children) with reduced physical, sensory or mental capabilities, or lack of experience and knowledge, 
unless they have been given supervision or instruction concerning use of the appliance by a person responsible for their safety.

Содержание HCP-11001A

Страница 1: ...r daily health preservation for many years to come HCP 11001A HCP 11001D CONTENTS SAFETY PRECAUTIONS 1 MAIN FEATURES 4 COMPONENTS DESCRIPTION 5 BEFORE USE 9 POSITION ADJUSTMENT 11 AFTER USE 14 MASSAGE...

Страница 2: ...ctric shock Check with a qualified electrician or serviceman if you are in doubt as to whether the product is properly grounded Do not modify the plug provided with the product if it will not fit the...

Страница 3: ...ge to the mechanism Also an accident or injury may result if the chair tips over Do not use with anything other than the accessories supplied with this product Required Action Before plugging the powe...

Страница 4: ...ut of the Upper Arm Unit or Forearm Unit during the massage do not try to force it back in Undue force may result in damage to the mechanism The heater is located under the seat and back of the chair...

Страница 5: ...efloor Theangleofthe leg rest can be adjusted by approx 90 according to your preference With state of the art technology Various Course Functions Healthcare programs Well Being programs that allow you...

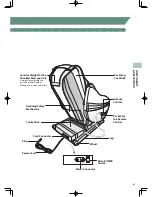
Страница 6: ...rmrests COMPONENTS DESCRIPTION Chair Shoulder Massage Unit Rollers Storage roller positions are inside the upper part of the seat back Upper Arm Units Seat Calf Unit Foot Unit Forearm Units Leg Rest B...

Страница 7: ...hanism Control Box Cord Connector Plug Power Cord Wheel Power Connector Main POWER Switch Counter Weight for the Shoulder Massage Unit A weight for adjusting the position of the Shoulder Massage Unit...

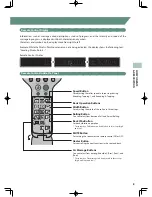
Страница 8: ...er positions can be adjusted using and BACK 3 D Buttons For adjusting the intensity of massage stimulation on the back use and EMERGENCY STOP Button Use this button to shut the chair off immediately i...

Страница 9: ...d Button For adjusting the roller speed in three steps during Kneading Tapping 1 and Kneading Tapping Basic Operation Buttons Width Button For adjusting the width of the rollers in three steps MUTE Bu...

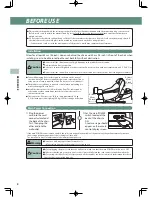
Страница 10: ...ir on a carpeted surface or to lay a piece of carpet under the chair Do not use electric blanket The product is very heavy so please be careful when unloading it so as not to damage floor surfaces Ins...

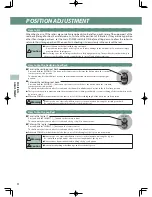
Страница 11: ...Warning Before each use check for holes or tears in the cover of the back pad Also check the other parts for tearing Stop using the chair immediately if you find even the smallest tear Unplug the cha...

Страница 12: ...INE button on the remote control Release the button when the seat back reaches your desired position The button may be released after 2 seconds and the chair will continue to auto recline to the full...

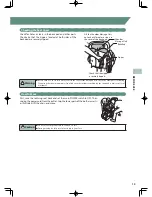
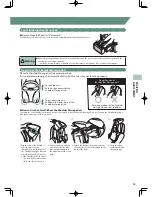
Страница 13: ...tion of the Shoulder Massage Unit To raise the unit Push up the headrest of the Shoulder Massage Unit To pull down the unit Pull down the lower parts of the Shoulder Massage Unit How to Use the Chair...

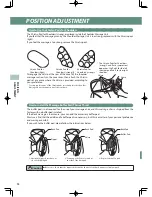
Страница 14: ...elcro is provided according to your preference For easy replacement of the Shiatsu pads raise and place the Shoulder Massage Unit at the upper part of the seat back Velcro Velcro How to Install the Ma...

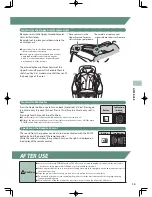
Страница 15: ...ter turns itself off automatically about 2 hours after it is turned on Without the remote control power on it is possible to turn the heater on or off if the main POWER switch at the rear of the chair...

Страница 16: ...ses PRESET PROGRAMS A total of 16 Preset Programs provide massages to meet your desired purpose and application according to the preset menus MANUAL SELECTION MODE You can combine your favorite massag...

Страница 17: ...ded for persons who have a bad morning or who have not recovered from their fatigue 6 Night For night massage It is recommended to use this before going to bed 7 Stretch For stretching operations This...

Страница 18: ...POWER button The rollers will return to their storage positions and stop Caution If you feel the massage is too strong reduce the stimulation according to this Operating Manual If this solution does...

Страница 19: ...course When 2 massage programs have been strung together the button of the first selected course is glow continuously while the second selected course flashes intermittently Note the youth course cann...

Страница 20: ...massage mimicking the touch of human hands Each time the button is pressed forward direction reverse direction or stop can be selected See page 21 Double Kneading Kneading in the forward and reverse d...

Страница 21: ...t the intensity of vibration is High Rolling Automatic Shiatsu Point Locator is performed in the same manner as in the Preset Program Operation Button Action Indication Width Up Down Rolling This perf...

Страница 22: ...ng the center position of the range of Partial Rolling can be adjusted If or is pressed during Full Rolling upward or downward movement is reversed Speed Buttons Operation Button Indication Action Spe...

Страница 23: ...he POWER button The rollers will return to their storage positions and the seat will automatically return to the full upright position automatically Caution If you feel the massage is too strong reduc...

Страница 24: ...Cause Solution These noises are a normal part of the product s operation and do not affect its performance in any way Problem Remote control buttons do not seem to be activating normally Cause Solutio...

Страница 25: ...e is too much pressure to the rollers they may stop moving temporarily This is not breakage Just slightly lift your body Problem The rollers moved up to the top and then stopped Cause Solution The aut...

Страница 26: ...of seat side air cells until they rest flat again Problem One of the back massage rollers snaps or skips sideways when the chair Cause Solution The back roller mechanism is designed to move side ways...

Страница 27: ...ed at the rear of the back pad How do I make the massage lighter During Preset Programs adjust the intensity of massage with the BACK 3 D AIR LEVEL Back Vibe button behind the panel or each operation...

Страница 28: ...k Pad and Covers Soak a piece of soft cloth in lukewarm water in which a small amount of mild detergent has been added Then thoroughly wring it out before cleaning off any spots or grime Caution The f...

Страница 29: ...o see the Serial No label on the control box of the chair 4 Date of purchase 5 Trouble status 6 Proof of purchase If the warranty is valid A service charge may apply subject to the nature of the troub...

Страница 30: ...ome cases Other failures To Use Safely Fabric of the chair roller fabric is consumable and its service life is 3 years conditions of use two 15 minute sessions a day every day For safe use periodic in...

Страница 31: ...75 times minute Max Approx 2925 times minute Seat 1 step Min Approx 1840 times minute Max Approx 4170 times minute Air Pressure 60 Hz Approx 38 kPa Auto Timer Approx 15 minutes Preset Programs vary in...

Страница 32: ...Manufactured by FAMILY INADA CO LTD DATE OF ISSUE day mo yr 1 5 2014 Made in Japan 778612000...

Отзывы: