


4 |
2. Scanner Quick Guide
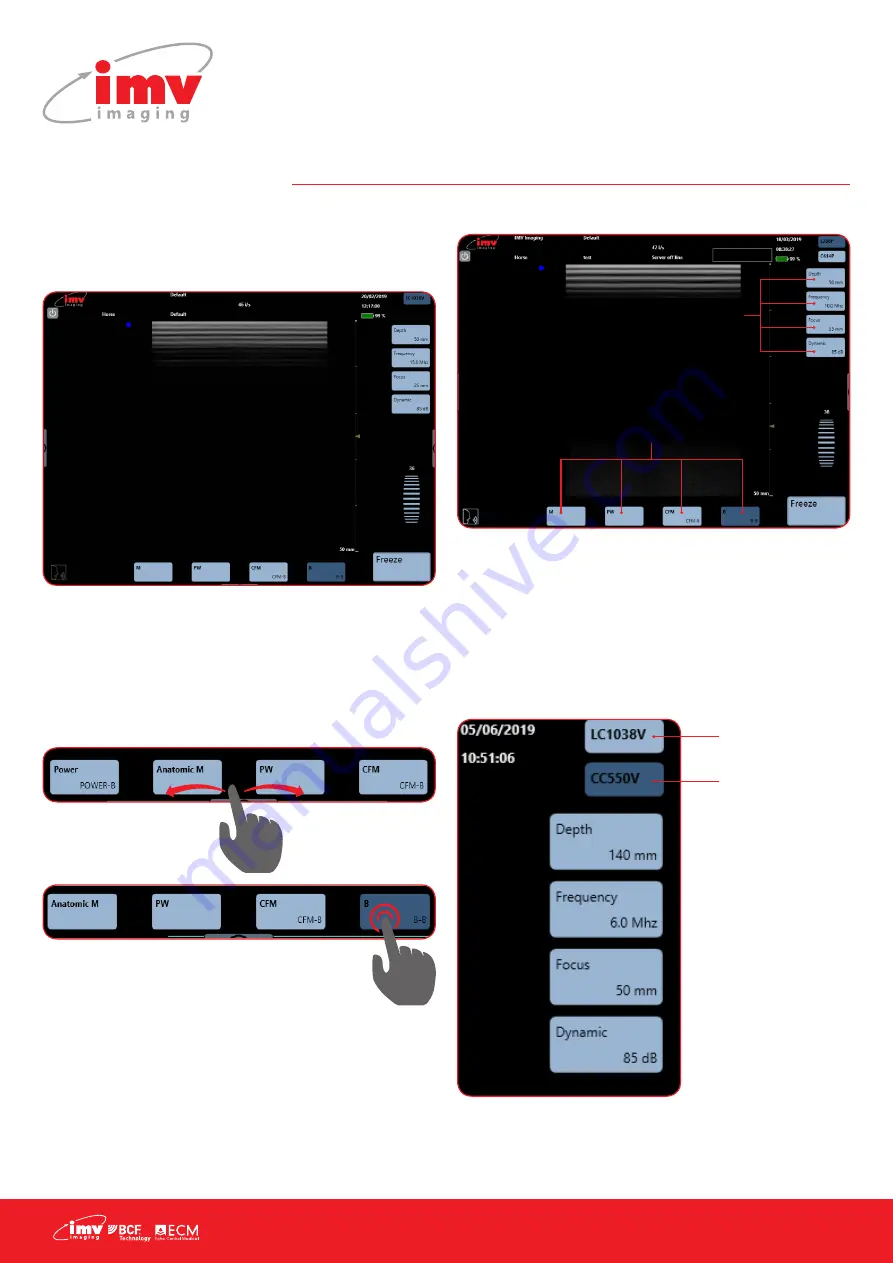
2.1 Screen
The ExaPad scanner has a full touch-screen interface.
The ExaPad scanner turns on in B imaging mode with a screen
display as below:
2.2 Access to the controls of the scanner
You can access the available imaging modes by clicking on the
corresponding mode: Power, M, Anatomic M, PW, CFM or B mode.
4 modes are visible at the one time. Drag the mode menu to
access other imaging modes. The order of the modes can be
configured in the Setting page (see Settings: Page 5).
2.3 Menus
2.4 Choice of probes
ExaPad has two probe connectors located at the back of the
scanner.
The first connector from the top of the scanner corresponds to the
probe displayed in the top of the screen.
The second connector from the top of the scanner corresponds to
the second probe displayed.
N.B: The ExaPad Mini has only one probe connector.
2. Scanner Quick Guide
Screen
The ExaPad scanner has a full touch-screen interface.
The ExaPad scanner turns on in B imaging mode with a screen display as below:
Access to the controls of the scanner
You can access the available imaging modes by clicking on the corresponding mode: Power, M,
Anatomic M, PW, CFM or B mode.
4 modes are visible at the one time. Drag the mode menu to access other imaging modes. The order of
the modes can be configured in the Setting page
(Settings: Page X).
Sorcha Stephens 5/6/2019 10:44
Comment [4]:
Crop from image
Crop from image 2
Put a graphic to show you swipe along?
Menus
**POINT TO M, PW, CFM, B AT BOTTOM OF SCREEN**
Each mode will activate sub-menus and specific parameters accordingly to the mode chosen.
**POINT TO DEPTH FREQUENCY FOCUS DYNAMIC AT RIGHT OF SCREEN**
Make adjustments in the sub-menu.
Choice of probes
ExaPad has two probe connectors located at the back of the scanner.
The first connector from the top of the scanner corresponds to the probe displayed in the top of the
screen.
The second connector from the top of the scanner corresponds to the second probe displayed.
**Point to dark blue box** – Active convex probe
**POINT TO LC1038V** - Inactive linear probe**
Sorcha Stephens 5/6/2019 10:47
Comment [5]:
Two probe crop
Make adjustments
in the sub-menu
Each mode will activate sub-
menus and specific parameters
accordingly to the mode chosen.
Active
convex probe
Inactive
linear probe


