


Page 27
5.4.2
Mandibular and Maxillary Scanning
1.
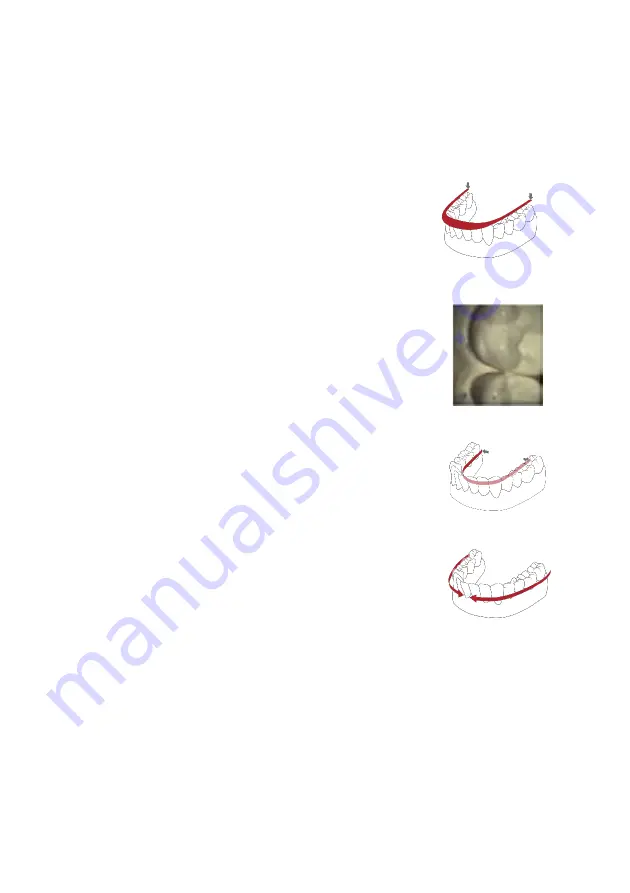
Begin your scan by starting on the arch of chosen
restoration. If scanning both arches, you may select
either arch to begin.
2a.
For a full arch, follow a scan path of occlusal,
lingual then buccal. Beginning on the posterior
terminal molar, working across the entire occlusal
plane of the arch, you will end at the opposing
terminal molar. When scanning the anterior region,
ensure to slightly roll the scan tip at least 1mm over
the incisal edges to capture some facial surface.
2b.
The live view window to the left is the main point
of reference. While scanning, what is shown in the
live window will appear on the 3D image. Ensure the
anatomy of the tooth is centered in the view window
with little to no cheek or tissue present.
3.
When finished scanning the occlusal, starting at
the terminal molar, slightly rotate the scanner to 45
degrees scanning the entire lingual surface of the
entire arch ending at the opposing terminal molar.
4.
To scan the buccal surface, again beginning on
the posterior terminal molar, you will rotate at 45
degrees scanning the buccal segment stopping at
the midline. You will repeat the process on the
opposing terminal molar to connect the midlines.
Ensure you do not scan all the way around the entire
arch on the buccal facial surfaces. Finalize in
scanning the buccal side of the molars with the
scanner in a 90 degree angle being sure to capture
at least 5mm of gingiva.
5.
When scan is complete, turn the scanner off by
the power button on the handle of the scanner. If
scanning both arches, select the other arch now in
the software.
6.
Repeat the same scan path and strategy for
both arches.
Содержание ione scan
Страница 1: ...User Manual com imes icore be...
Страница 2: ...Small Scanner Great Comfort...
Страница 5: ......


