


GETTING STARTED
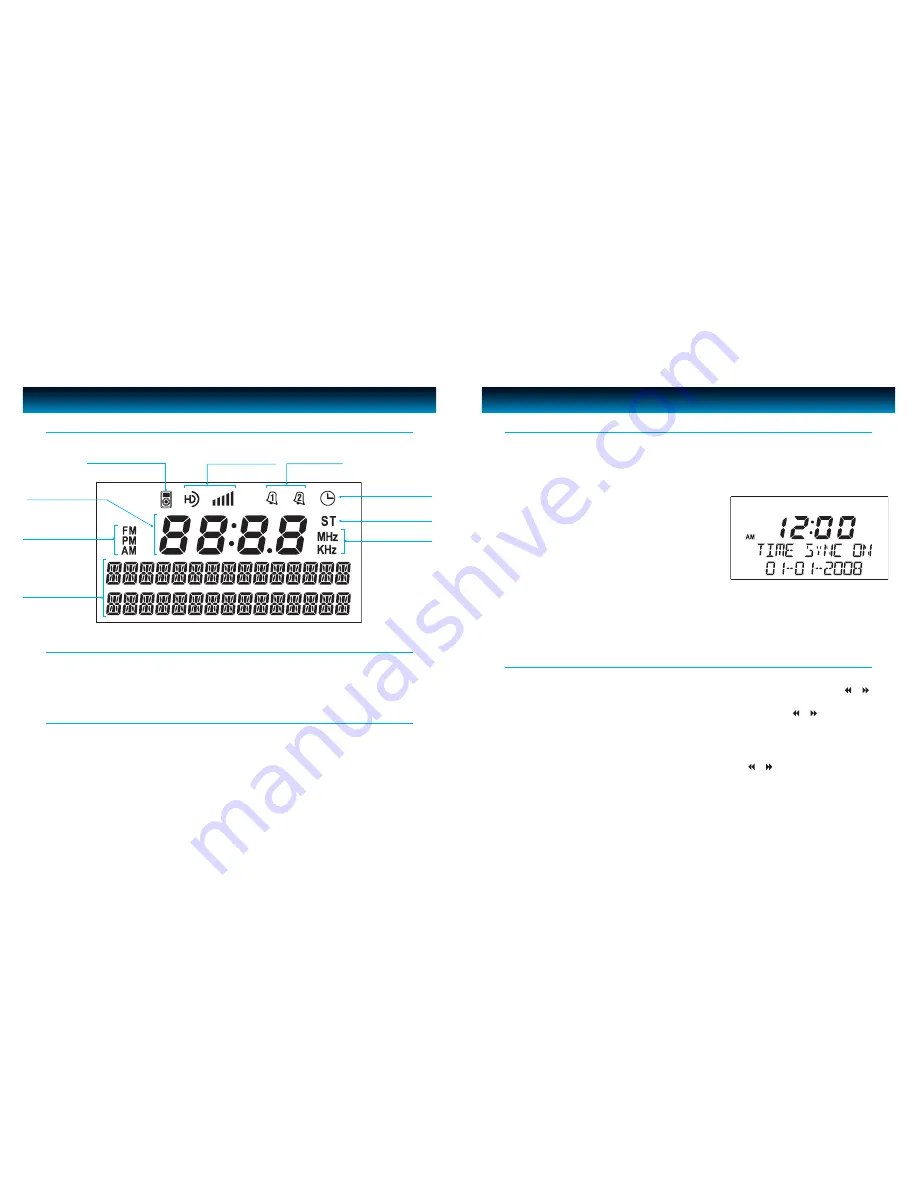
Location of Indications on the LCD Screen
ALARM 1 / ALARM 2
indicator
iPod mode
indicator
FM STEREO
Indicator
Frequency unit
Band / AM-PM
indicator
OPERATIONAL INSTRUCTIONS
The iHD171 is equipped with a Time Sync feature which sets the time and date on the clock of the iHD171
in sync with the docked iPhone or iPod.
1. Press and hold
EQ / TIME SYNC
Button for approximately two (2) seconds to turn Time Sync function
ON or OFF. “TIME SYNC ON” or “TIME SYNC OFF” will temporarily display on the LCD screen for five (5)
seconds.
2. After the Time Sync function is turned ON, dock your
iPhone or iPod, the unit will start authenti cation and
will sync time/date from docked iPhone or iPod.
3. As Time Sync processes, “TIME SYNC” will flash for
approximately two (2) minutes on LCD.
4. If Time Sync is turned ON while your iPhone or iPod is
docked, the iHD171 will automatically synchronize time
and date from the docked iPhone or iPod
Note:
Time Sync is compatible with iPhone 3G, iPhone, iPod touch (2nd generation), iPod nano (4th generation),
iPod classic, iPod touch (1st generation), iPod nano (3rd generation), iPod nano (2nd generation), iPod with video, iPod
nano (1st generation).
Using the Time Sync Feature
iLuv | 8
iHD171 | V10M10_IM_EN_103008
7 | iLuv
RBDS Messages /
Date / FUNCTION
indicator
HD Radio / Signal
Strength
indicator
SLEEP
Indicator
Time / Frequency
readout
1. Push the connector plug on the end of the antenna wire onto the FM Antenna Connector at the
rear of the radio.
2. Straighten out the Antenna to its full length and orient the wire for the best reception.
Connecting the FM Antenna Wire
Connect the provided Loop Antenna as described below:
1. Connect the 3.5mm plug of AM loop antenna to the AM ANTENNA jack at the rear of the unit.
2. Orient the AM loop antenna for the best reception.
Connecting the AM Loop Antenna
1. Press and hold the
TIME SET
Button located on the top of the unit until 12H or 24H appears. Select
your desired clock display either 12 hour or 24 hour by turning
TUNING
Knob (or press
I
or
I
on
the remote control). Then press the
TIME SET
Button again to confirm 12H or 24H mode setting.
2. The hour display at the center will flash. Turn the
TUNING
Knob (or press
I
or
I
on the remote
control) to set the current time, then press the
TIME SET
Button again to confirm clock setting.
(
Note:
if the system is set to 12-hour mode, the AM or PM indicator will be lighted on.) The minute
display will now flash. Follow the same procedure to set the minute.
3. The month, date and year display at the lower right will flash successively. Press the
TIME SET
Button
to accept the current setting, or turn
TUNING
Knob (or press
I
or
I
on the remote control) until
current month, date or year is displayed. Press the
TIME SET
Button to confirm month, date or year
setting.
Setting the Clock Time and Calendar


