iLuv | 8
i1166 | V10M10_IM_EN_091509
7 | iLuv
GETTING STARTED
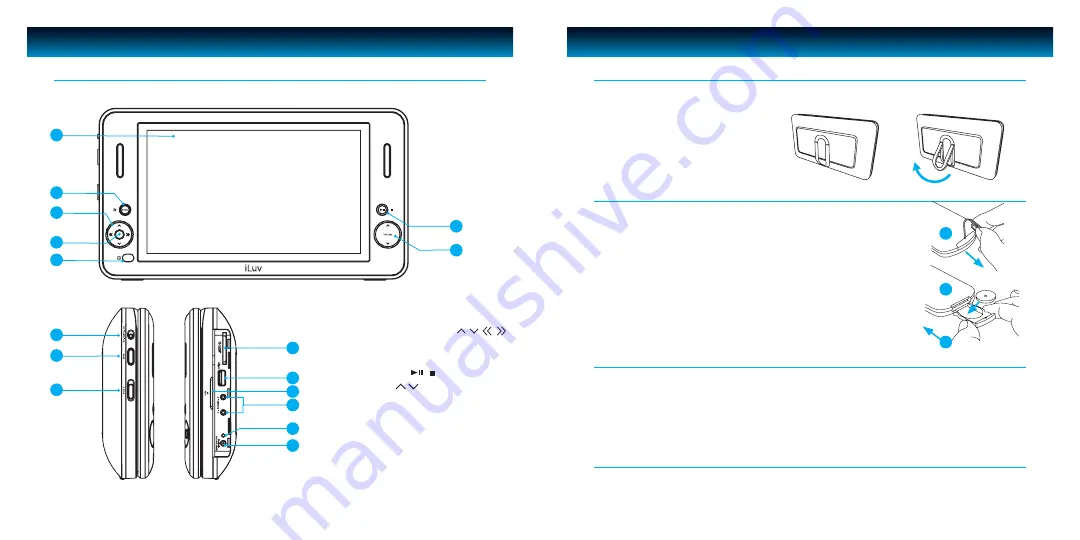
Location of Controls on the Main Unit
GETTING STARTED
How to Make Your Player Stand
8
9
10
11
12
14
13
15
16
1. LCD
2. MENU (Back)
3. UP, DOWN, LEFT RIGHT
4. SELECT
5. Remote sensor
6. PLAY/PAUSE ( )
7. VOLUME
8. POWER OFF/ON
9. HOME
10. HOLD
11. SD/MMC card slot
12. USB port
13. OPEN
14. Headphone jacks
15. LED
16. DC input
Pull out the stand in the rear of the unit and adjust the angle as needed.
Remote Control Battery Installation
If the remote control does not work or the signal weakens, the battery
may be weak. If this is the case, the battery should be replaced.
1. Pull out battery holder by using a small prying tool.
2. Place one battery (CR 2025). Match the polarity (+/–) of battery
with the marks inside the unit.
3. Insert battery holder into its compartment.
Note:
Do not attempt to recharge, short-circuit, disassemble, heat, or throw
batteries into a fire.
Using the AC Adapter
1. Insert the DC plug at the end of the adapter cord into the DC IN jack on the right
side of the player.
2. Plug the other end into an AC wall outlet.
Note:
Use ONLY the supplied AC adapter. Use with other AC adapters could cause damage. Remove both the DC
plug and AC plug to disconnect the AC adapter when not necessary.
Using the Cigarette Lighter (Car) Adapter
Plug the small end of the cigarette lighter (car) adapter into the DC IN jack and plug the other end
into the cigarette lighter socket.
1
2
3
1
2
3
4
5
6
7


