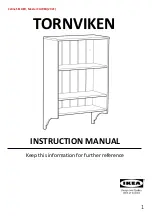
IKEA TORNVIKEN Скачать руководство пользователя страница 5


Tips 


1.


For ease and speed of assembly, please check that all parts 
are present before you start the assembly of your furniture 

2.


Please ensure that you have sufficient space and people (as 
indicated below) to assemble your product safely 

3.


Always place the product on a flat, steady and stable surface 

4.


We recommend that you assemble the product as near as 
possible to the area in which it will be placed in use, to avoid 
moving the product unnecessarily once assembled 

5.


Please use caution and care when lifting the product to avoid 
personal injury and/or product damage 


Essentials 


You will need

 : 


-


A flathead screwdriver 

-


A crosshead screwdriver 

-


A carpenter’s level 


2-Person

 Assembly 


To  prevent  any  damage,  please 

place 

the  product  on  a  protected  surface


during assembly 


Should anything be


unclear


Do not hesitate to 

contact Ikea 

Customer Service


Tips before you start


Содержание TORNVIKEN

Страница 1: ...1 TORNVIKEN INSTRUCTION MANUAL Keep this information for further reference C line SELLIER Master CAWEB 2021...

Страница 2: ...d 4 Tips before you start 5 Tips 5 Essentials 5 ASSEMBLY 6 Parts listing 7 Structure 7 Screws and fixings 7 Step 1 8 Step 3 9 Step 3 9 Step 4 10 Step 5 11 Step 6 12 Step 7 13 Step 8 14 Step 9 14 Step...

Страница 3: ...3 INTRODUCTION Important information read carefully...

Страница 4: ...e wall with a non included wall attachment devices Fastening devices for the wall are not included since different wall materials require different types of fastening devices Use fastening devices sui...

Страница 5: ...the product as near as possible to the area in which it will be placed in use to avoid moving the product unnecessarily once assembled 5 Please use caution and care when lifting the product to avoid...

Страница 6: ...6 ASSEMBLY Follow each step of the instruction carefully...

Страница 7: ...Bolt x 10 Cam Lock x 10 Wood Dowels x 22 Pan Head Self Tapping Screws x 4 Phillips Mod Truss Self Piercing Screws x 2 Allen Wrench x 1 Parts listing Left side panel Right side panel Bottom panel Firs...

Страница 8: ...B on a flat covered area with the holes facing up Insert the 10 supplied Cam Bolt into the pre threaded holes as shown 5 on each panel Screw them in by using a crosshead screwdriver Caution Tighten o...

Страница 9: ...l A holes bottom of the panel Carefully push the Bottom Panel C onto the dowels Insert 2 wood dowels into the Bottom Panel C holes Step 2 You will need C Bottom Panel A Left Side Panel Step 3 You will...

Страница 10: ...First Inner Panel D holes Caution Make sure the bevelled edges of the First Inner Panel D will ultimately face the room and not the inside of the furniture Instructions Insert the 4 Cam Locks into the...

Страница 11: ...r tightening could cause the Cam to bend or break Instructions Insert 3 wood dowels into the Left Side Panel A holes middle of the panel Carefully push the Second Inner Panel E onto the dowels Insert...

Страница 12: ...f the panel Carefully push the Support Board F onto the dowels Insert 2 wood dowels into the Support Board F holes Caution Make sure the bevelled side of the Support Board F faces the First Inner Pane...

Страница 13: ...as a C shaped back Insert the Cam Lock so the opening of the C fits over the head of the Cam Bolt Use a flat screwdriver to turn the Cam Lock clockwise on half a turn so it locks onto the head of the...

Страница 14: ...ns Lift turn and align the Right Side Panel B over the wood dowels Carefully push the Right Side Panel D onto the dowels Step 8 Right Side Panel Step 9 Right Side Panel F Support Board F Support Board...

Страница 15: ...he Right Side Panel B 5 in total as shown above Please notice the Cam Locks have a C shaped back Insert the Cam Locks so the opening of the C fits over the head of the Cam Bolt Use a flat screwdriver...

Страница 16: ...d dowels into the Left Side Panel A holes upper edge Insert 2 wood dowels into the Right Side Panel F holes upper edge Step 11 You will need 4x Left Side Panel Right Side Panel Step 12 F Support Board...

Страница 17: ...ution Make sure you turn the Top Panel H so that the notch 1 is on the side of the Support Boad F and fits together with the Back Panel G Instructions Insert the 4 Flat Head Socket Screws in the provi...

Страница 18: ...he provided holes on the Back Panel H 1 for each corner Tighten the screws with the crosshead screwdriver Caution Make sure you take and use Pan Head Screws Please do not confuse them with Phillips Mo...

Страница 19: ...19 TIPS BEST FASTENING DEVICE Please remember fastening devices are not included...

Страница 20: ...pe used to hang cabinets or other objects Position a carpenter s level where you want the bottom of the cleat on your wall and draw a line along the level s top edge Screw the French cleat to the wall...

Страница 21: ...ns Lift and position the assembled furniture so that the provided holes in the Back Panel G are placed on the French cleat Screw the Back Panel G to the French cleat with 2 Phillips Mod Truss Self Pie...

Отзывы: