


ENGLISH
COMPLIANT TIMING
APPENDIX 23
Vertical
Frequency
59.940Hz
72.809Hz
75.000Hz
85.008Hz
56.250Hz
60.317Hz
72.188Hz
75.000Hz
85.061Hz
60.004Hz
70.069Hz
75.029Hz
84.997Hz
75.000Hz
60.020Hz
75.025Hz
70.087Hz
85.039Hz
66.667Hz
74.500Hz
74.720Hz
56.424Hz
72.000Hz
66.004Hz
VGA TEXT
Video Mode
VESA
Macintosh
PC9801
SVGA
VGA
XGA
SXGA
1024 × 768
640 × 480
800 × 600
1280 × 1024
1152 × 864
720 × 400
640 × 480
832 × 624
640 × 400
Work Station
1280 × 1024
SGI
1024 × 768
Horizontal
Frequency
31.469kHz
37.861kHz
37.500kHz
43.269kHz
35.156kHz
37.879kHz
48.077kHz
46.875kHz
53.674kHz
48.363kHz
56.476kHz
60.023kHz
68.677kHz
67.500kHz
63.981kHz
79.976kHz
31.469kHz
37.927kHz
35.000kHz
49.725kHz
60.150kHz
24.827kHz
76.968kHz
61.846kHz
Dot Clock
25.175MHz
31.500MHz
31.500MHz
36.000MHz
36.000MHz
40.000MHz
50.000MHz
49.500MHz
56.249MHz
65.000MHz
75.000MHz
78.750MHz
94.500MHz
108.000MHz
108.000MHz
135.000MHz
28.322MHz
35.500MHz
30.240MHz
57.283MHz
80.000MHz
21.053MHz
130.076MHz
94.500MHz
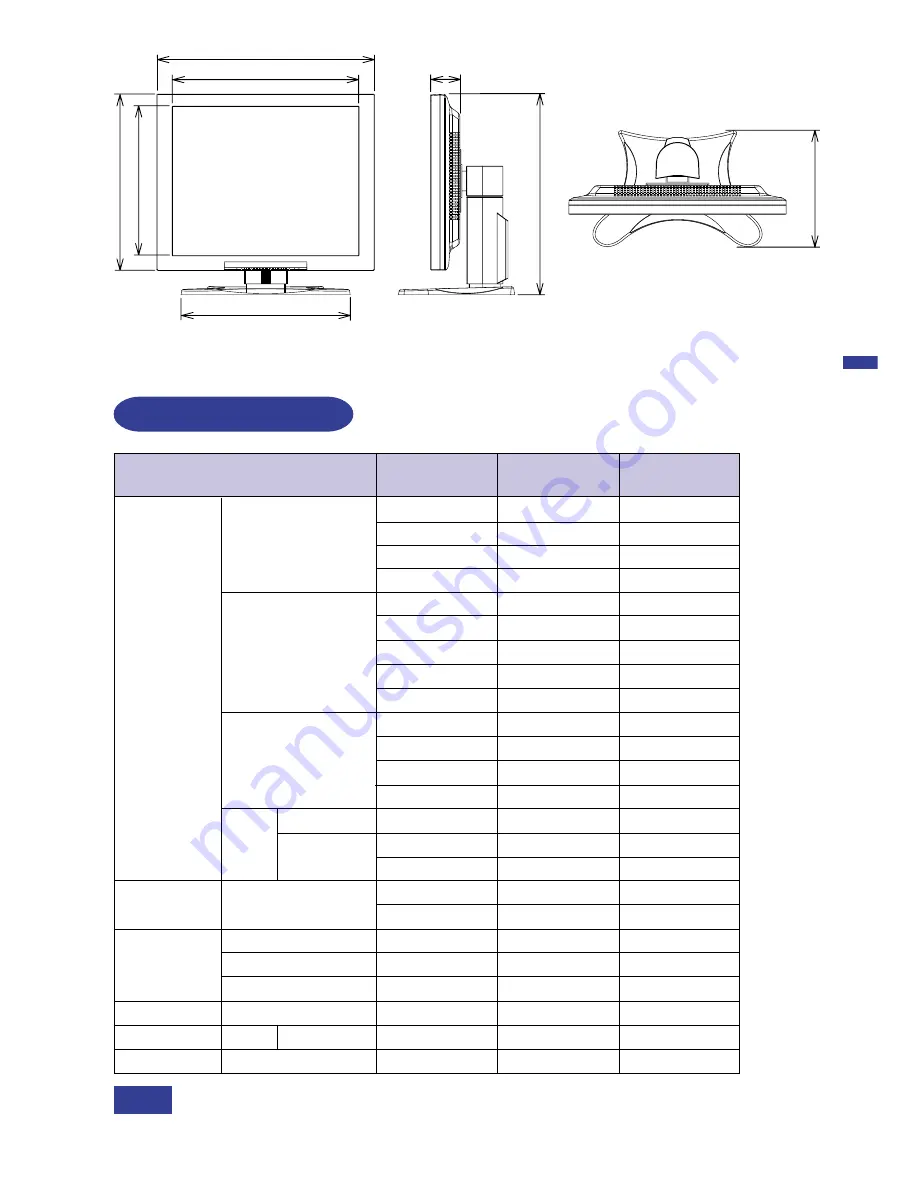
430.0mm/16.9"
380.0mm/15.0"
304.7mm/12.0"
344.0mm/13.5"
360.7mm/14.2"
75.5mm/3.0"
414.3mm/16.3"
(524.3mm/20.6")
240.9mm/9.5"
( ): Maximum adjustment range
SUN66
1152 × 900
*
*
*
*
*
*
*
*
*
*
*
DVI input is not compliant.
NOTE


