Quick Start Guide
– 2 –
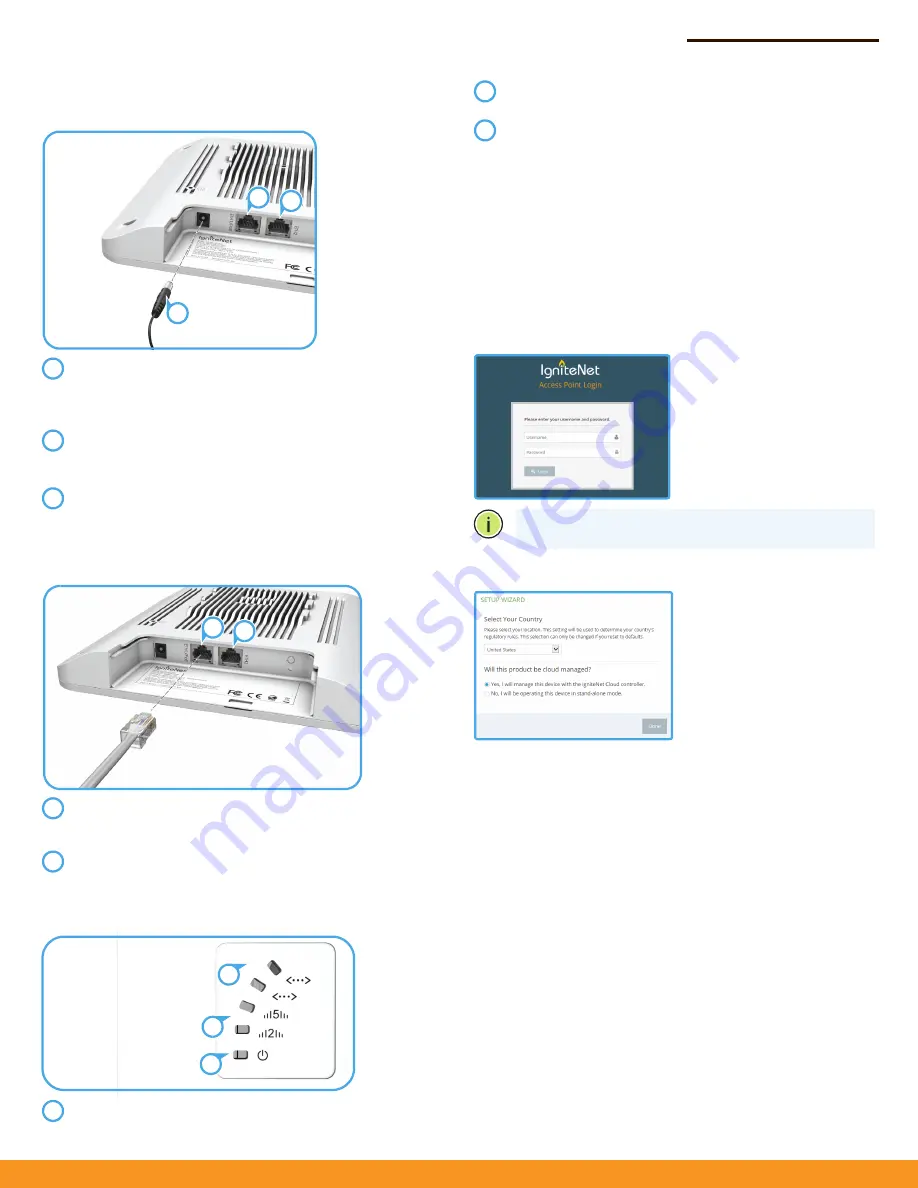
4. Connect Cables
a. Using the AC/DC Power Adapter
Connect the cable from the AC/DC power adapter to the DC
power jack on the AP.
Connect the power adapter to a nearby AC power source
(100-240 VAC, 50/60 Hz).
Connect Category 5e or better cable to the
ETH1/PoE
RJ-45
port.
Connect the other end of this cable to a LAN switch.
(Optional) Connect local LAN devices to the other RJ-45 port
on the AP using Category 5e or better cable.
This 1000BASE-T port is labeled
ETH2
.
b. Using a PoE Power Source
Connect Category 5e or better cable to the
ETH1/PoE
RJ-45 port, and the other end of this cable to an 802.3af PoE
LAN switch.
(Optional) Connect local LAN devices to the other
ETH2
RJ-45 port on the AP using Category 5e or better cable.
5. Verify AP Operation
The
power
LED should be on amber.
2
3
1
1
2
3
1
2
1
2
1
3
2
1
During normal operation, the wireless LEDs should be on/
blinking green.
The
ETH1/PoE
port link/activity LED should be on/blinking
green.
When connected, the
ETH2
port link/activity LEDs should
also be on/blinking green.
6. Connect to the Web User Interface
To access the web interface, connect a PC directly to the AP’s
ETH2
RJ-45 port. In a web browser, enter the AP’s default management IP
address of 192.168.2.1 to access the web login page.
If you want to connect to the web interface using the
ETH1/PoE
port, the IP address is automatically assigned through DHCP by
default. If a DHCP server is unreachable, the
ETH1/PoE
port reverts
to a fallback IP address of 192.168.1.20.
Note:
To reset the AP to factory default settings, press and
hold down the AP’s
Reset
button for 5 seconds.
7. Complete the Setup Wizard
Manage the AP with the IgniteNet Cloud Controller
Go to
cloud.ignitenet.com
to register your AP.
Log in and select
Devices
from the menu. Click
Add Device
and
enter the AP serial number and MAC address to register the AP with
your cloud network. The serial number and MAC address can be
found on the product packaging or label.
Manage the AP in Stand-Alone Mode
If you select to manage the AP in stand-alone mode, use the web
interface to manually make your configuration changes.
For more information on AP configuration in stand-alone mode,
refer to the
HeliOS User Manual
, which can be downloaded from
ignitenet.com/support
.
2
3
Log in to the web interface
using the default settings:
◆
Login Name — root
◆
Password — admin123
Select the country of
operation for the AP. Setting
the correct country ensures
that the radios operate within
local regulations specified for
Wi-Fi networks.


