background image

Quick Start Guide

–  3  –

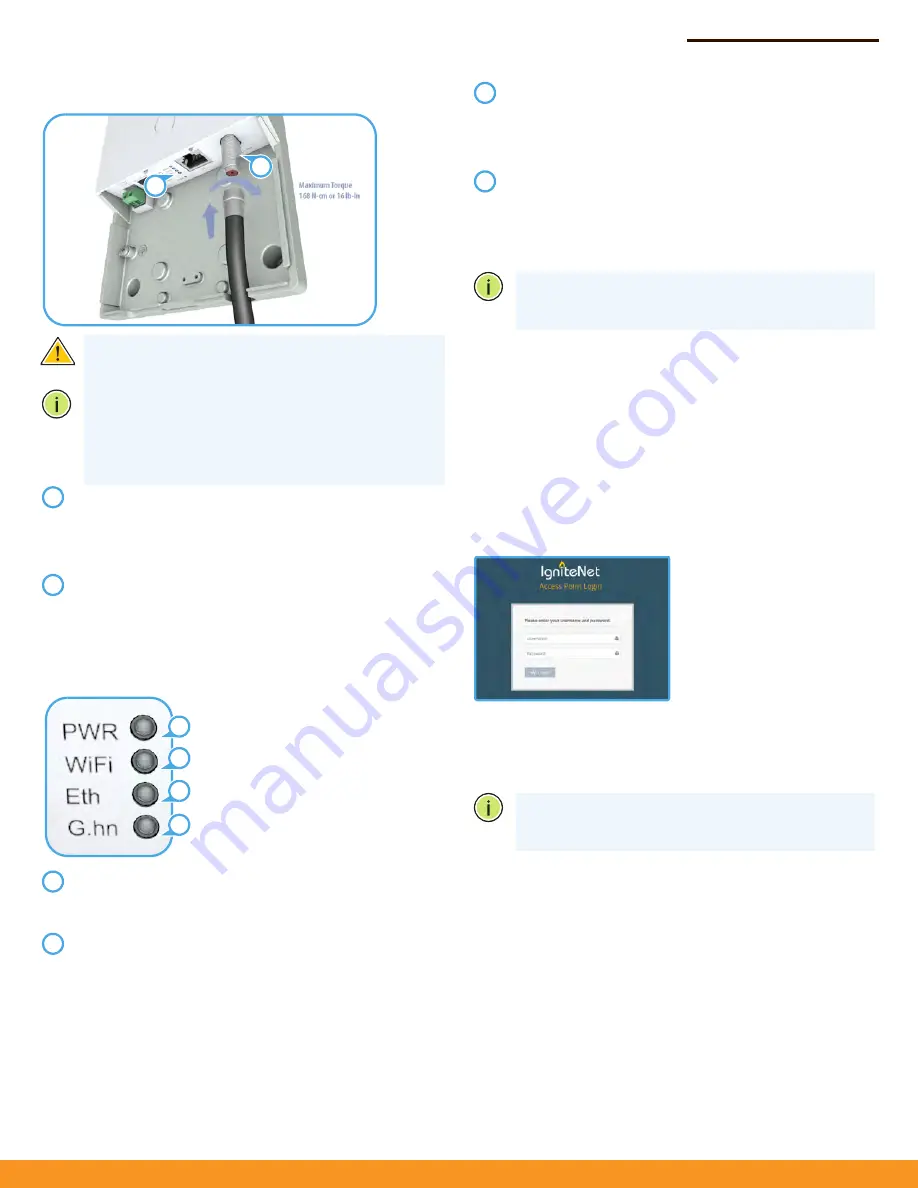
6. Connect a Coaxial Cable

Caution:

 Damage may occur if an F-type cable connector 

on the GLinq is overtightened. Do not tighten a connector 
more than the maximum torque rating of 

168 N-cm (16 lb-in).

Note:

 Use only threaded male F-type compression coaxial 

cable connectors to connect coaxial cable between the 
bridge APs. 

Note:

 It is NOT recommended to use Flex F or push-on 

connectors. Always use standard threaded male F-
connectors.

Screw a male coaxial cable connector onto the bridge AP F-
type coaxial connector until it is finger tight. If you are using 
a specialized torque wrench, tighten the connector to the 
maximum specified torque of:

168 N-cm or 16 lb-in

As the connection is made, check the G.hn port status LED to 
be sure the link is valid:

On Green — Port has a valid link. 

Blinking Green — Indicates network activity.

7.Verify AP Operation 

Power LED, cloud status, gateway status –

power connected (on)

no power connected (off )

Wifi – 

radio enabled (on)

radio disabled (off )

link activity (blinking)

1

2

1

2

1

2

3

4

1

2

Ethernet – 

plugged wire (on)

unplugged wire (off )

link activity (blinking)

G.hn – 

coaxial cable connected (on)

coaxial cable disconnected (off )

link activity (blinking)

Note:

 To reset the Bridge AP to factory default settings, 

press and hold down the AP’s 

Reset

 button for 5 seconds. 

A quick press of the 

Reset

 button reboots the AP.

8. Complete the Device Configuration

a. Manage the AP with the IgniteNet Cloud Controller

Go to 

https://cloud.ignitenet.com

 to register your AP. Log in and 

select 

Devices

 from the menu. Click 

Add Device

 and enter the AP 

serial number and MAC address to register the AP with your cloud 
network. (The serial number and MAC address can be found on the 
product packaging or label.)

b. Manage the AP in Stand-Alone Mode (Optional)

To access the web interface, connect a PC directly to the AP’s 

Eth


RJ-45 port. In a web browser, enter the AP’s default management IP 
address of 192.168.1.20 to access the web login page.


If you select to manage the AP in stand-alone mode, use the web 
interface to manually make your configuration changes.
For more information on AP configuration in stand-alone mode, 
refer to the 

HeliOS User Manual

, which can be downloaded from: 

https://support.ignitenet.com

Note:

 To reset the Bridge AP to factory default settings, 

press and hold down the AP’s 

Reset

 button for 5 seconds. 

A quick press of the 

Reset

 button reboots the AP.

3

4

Log in to the web interface 
using the default settings:

Login Name — root

Password — admin123

Содержание GLinq GL-O-1GE-1C

Страница 1: ...n the wall and secure it in place using the included three M4 x20 tapping screws 3 Connect Power The bridge AP can receive power from one of three different power sources The supplied DC power adapter to the DC power jack An external DC power source to its DC In Out terminal block Power over Coaxial cable PoC to the F type coaxial connector from another Ignite GLinq only a DC Power Jack Plug the D...

Страница 2: ...ly connecting a coaxial cable follow the instructions in step 6 Connect a Coaxial Cable Using the DC jack connect power to the bridge AP that is to supply coaxial cable power On both the power source and receive bridge APs connect a coaxial cable Refer to step 6 Connect a Coaxial Cable of this guide on how to connect coaxial cable connectors On the bridge AP that is to supply power slide the PoC D...

Страница 3: ... cable disconnected off link activity blinking Note To reset the Bridge AP to factory default settings press and hold down the AP s Reset button for 5 seconds A quick press of the Reset button reboots the AP 8 Complete the Device Configuration a Manage the AP with the IgniteNet Cloud Controller Go to https cloud ignitenet com to register your AP Log in and select Devices from the menu Click Add De...

Страница 4: ...1 can be operated Selection of other channels is not possible Quick Start Guide IMPORTANT NOTE FCC Radiation Exposure Statement This equipment complies with FCC radiation exposure limits set forth for an uncontrolled environment This equipment should be installed and operated with minimum distance 20 cm between the radiator and your body Industry Canada This device complies with Industry Canada li...

Страница 5: ...頻電機之使用不得影響飛航安全及干擾合法通信 經 發現有干擾現象時 應立即停用 並改善至無干擾時方得繼續使用 前 項合法通信 指依電信法規定作業之無線電通信 低功率射頻電機須忍 受合法通信或工業 科學及醫療用電波輻射性電機設備之干擾 Warnings and Cautionary Messages CZ CY CH BG BE AT FI ES EL EE DK DE IT IS IE HU HR FR NL MT LV LU LT LI SI SE RO PT PL NO UK TR SK Warning This product does not contain any serviceable user parts Warning Installation and removal of the unit must be carried out by qualified personnel...

Страница 6: ...ernet G hn Status LEDs Power 12 54 VDC 1 0 A DC Input Power Coaxial Cable Input Power 12 VDC 1 0 A Maximum Coaxial Cable Output Current 2 5 A Power Consumption 6 5 W maximum Standards Ethernet Wireless G hn Coax IEEE 802 3ab 1000BASE T IEEE 802 11b g n 2 4 GHz with 2x2 MIMO ITU T G hn G 9960 G9961 bandplan 25 MHz 50 MHz 100 MHz 200 MHz max 2 Gbps Regulatory Compliance Radio Frequencies 2412 2472 F...

Отзывы: