


-13-
www.igmtools.com
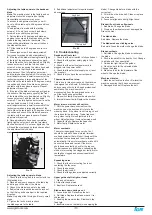
Resawing.
Resawing is the process of cutting a board in
half along its height. The bandsaw is perhaps
the most creative tool in the shop because of
its ability to cut thick or thin, straight or curved.
The ability to cut thick stock such as re-sawing,
making veneers, book matching or cutting
flitches from small logs has great appeal to
the woodworker. These capabilities greatly
enhance he woodworker’s design ability
without the need for additional equipment.
When a board is resawed and the two pieces
are lying next to each other, you will note that
they are mirror images of each other. When
these two boards are glued together, it is called
bookmatching.
Note: It is unsafe to cut wood that is
unsupported by the table and should never
be attempted. This is especially important to
note when cutting round logs.
8.2 Selecting the Right Blade
Introduction
The selection and use of blades is a very
extensive subject, and there have been many
books written on it. This section of the manual
is intended as a general guide only.
Selecting a blade
Using the correct blade is important, as it is the
first step in attaining good bandsaw
performance. The most frequently asked
question is „How do I decide on the correct
blade to use?“ The answer is not simple, and
we will explore it in this section of the manual.
Firstly, there is
NO
ideal blade that will do
everything. The blades that you choose will be
determined by the type of work that you are
doing. Large-tooth wide blades are selected for
fast course cuts, and fine, thin blades are used
for intricate scrollwork. You will find that you
will need a large selection of blades if you do
a lot of varied work and fewer blades if you are
concentrating on one section of bandsawing
such as re-sawing. Using the wrong blade
is the best way to abuse it. Using a blade
for its intended purpose allows for maximum
efficiency and is the best way to prolong its life.
Blade terms
The amount that the teeth are wider than the
thickness of the backing material. The larger
the set, the larger the saw cut and the smaller
the radius that can be cut. This can also be
an advantage if you are cutting a job that has
a tendency to nip the blade. The smaller the
set, the smaller the saw cut and the larger the
radius that can be cut; the wood waste is less.
On tipped blades (Resaw King) there is no set,
as the tip is wider than the backing material.
Thickness
The thicker the blade, the stiffer the blade and
the straighter the cut. The thicker the band, the
greater the tendency for the blade to break.
Pitch
The size of the teeth. This is usually quoted in
teeth per inch (TPI). The larger the tooth, the
faster the cut because the tooth has a large
gullet and has a greater capacity to transport
large amounts of sawdust through the job. The
larger the tooth, the coarser the cut and the
poorer the surface finish of the cut. The smaller
the tooth, the slower the cut as the tooth has
a small gullet and cannot transport large
amounts of sawdust through the job. The
smaller the tooth, the finer the cut and the
better the surface finish of the cut
Material Hardness.
When choosing the blade with the proper pitch,
one factor you should consider is the hardness
of the material that is being cut: the harder the
material, the finer the pitch that is required. For
example, exotic hardwoods such as ebony and
rosewood require blades with a finer pitch than
American hardwoods such as oak or maple.
Soft wood such as pine will quickly clog the
blade, decreasing its ability to cut. Having a
variety of tooth configurations in the same width
will most likely give you an acceptable choice
for a particular job. There are certain things that
indicate if a blade has a proper pitch, too fine a
pitch or too coarse a pitch.
Some are listed below:
Proper Pitch
Blades cut quickly.
A minimum amount of heat is created when the
blade cuts.
Minimum feeding pressure is required.
Minimum horsepower is required.
The blade makes quality cuts for a long period.
Pitch Is Too Fine
The blade cuts slowly.
There is excessive heat, which causes
premature breakage or rapid dulling.
Unnecessarily high feeding pressure is
required.
Unnecessarily high horsepower is required.
The blade wears excessively.
Pitch Is Too Coarse
The blade has a short cutting life.
The teeth wear excessively.
The bandsaw vibrates.
Width
The dimension from the back of the blade to the
front of the teeth. The wider the blade, the
stiffer the blade and the straighter the cut. This
is usually called beam strength. But wide
blades cannot cut small radiuses.
The narrower the blade, the more flexible the
blade and the greater the tendency the blade
has to wander. These have low-beam strength,
but can cut small radiuses. Blades are
available from 3mm up for your machine.
Kerf
The width of the saw cut. The larger the kerf,
the smaller the radius that can be cut, the
greater the amount of wood the blade has to be
removed by the blade and the greater the
horse power that is needed because the blade
is doing more work. The greater the kerf, the
larger the amount of wood that is being wasted
by the cut.
Hook or Rake
The cutting angle or shape of the tooth. The
greater the angle, the more aggressive the
tooth and the faster the cut. But the faster
the cut, the faster the tooth will blunt, and
the poorer will be the surface finish the cut
will have. Aggressive blades are suitable
for soft woods but will not last when cutting
hard woods. The smaller the angle, the less
aggressive the tooth, the slower the cut and
the harder must be the wood that the blade is
suitable to cut. Hook teeth have a progressive
cutting angle and take the form of a progressive
radius. They are used for fast cutting where
finish is not important. Rake teeth have a flat
cutting angle and are used for a fine surface
finish of the cut.
Gullet
The area in which the sawdust has to be
transported through the wood, the larger the
tooth (pitch) the bigger the gullet is.
Relief
The angle from the tip of the tooth back. The
greater the angle, the more aggressive
the tooth but the weaker the tooth.
Beam Strength
This is the ability of the blade to resist bending
backwards. The wider the blade, the stronger
the beam strength; therefore, a 25mm blade
has far greater beam strength than a 3mm
blade and will cut straighter and is more
suitable for resawing.
Blade Selection
As you have seen from the previous section,
there are a great number of variables. The
blade selection that you will make will greatly
depend on the type of work that you intend to
do with your machine. If you have experience
with the bandsaw, you will probably have a
good idea of the blades that are suitable for
you. If you lack the experience or are unsure
of the type of work you will be doing with your
machine, we recommend that you purchase a
selection similar to that listed below, which is
a good general selection and will allow you to
tackle most jobs. As you gain experience, you
will settle on the blades that suit you.
1.
6 mm x 6 TPI. This is a small, aggressive
blade that is suitable for tight curves and fast
cutting where a good surface finish of the cut is
not important.
2.
6 mm x 14 TPI. This is a small, fine blade
suitable for reasonably tight cuts where the
surface finish is important but speed of cut is
less important.
3.
13 mm x 3 TPI. This is a general-purpose
blade that can cut large radiuses and short
sections of straight cuts. The cut is fast but the
surface finish of the cut is poor.
4.
19 mm x 3 TPI. This is a general-purpose
blade, which will be used for straight cuts and is
suitable for large radiuses.
5.
25 mm x 2 TPI. This is a resaw blade, which
will be used for straight cuts and is suitable for
processing veneers.
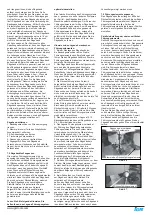
Rounding the back of the blade
With most guide systems it is recommended
that the back of the blade be rounded with a
stone. As the machine is supplied with Laguna
ceramic guides, this is not imperative because
the ceramic will round the back of the blade as
it is used. However, if you decide that you want
to round the back of the blade, a procedure
follows.
A round blade back creates smooth interaction
between the thrust bearing and the blade. If the
blade rotates slightly, there is no sharp blade
corner to dig into the thrust bearing; also, the
rounding process smoothes the weld. A blade
with a round back makes tight turns better
because the round back has smooth interaction
with saw kerfs.
After the guides have been adjusted and the
machine is running, hold the stone against the
back corner of the blade for about a minute.
Wear safety glasses when rounding the blade.
Then, do the same thing on the opposite
corner. Next, slowly move the stone to round
the back. The more pressure you put on the
back, the faster you will remove the metal. Be
careful that the inside of the machine is free of
sawdust because sparks could start a fire. On
small blades such as a 1/4“ blade, the pressure
on the back of the blade may bring the blade