User Manual
20
Ⅶ
Anti-rejection Settings
7.1 Anti-rejection setup
Step 1 Click
Advanced Setup
-
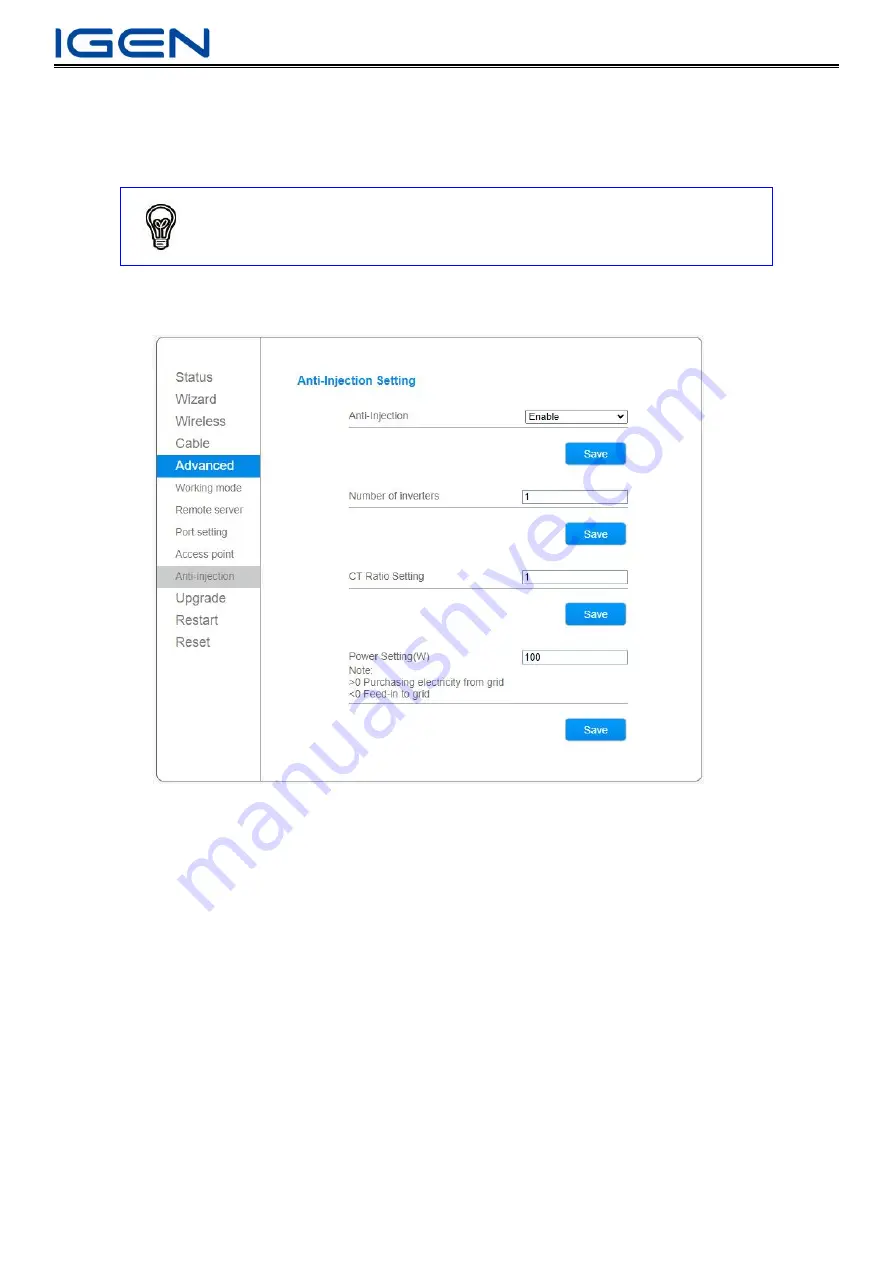
Anti-rejection setup
Step 2 If anti-rejection function is required, select
“
Enable
”
, set inverter number, CT ratio and power.
Inverter Number Instruction
Inverter number: 10, and click save. (Set according to actual situation on site.)
CT Ratio Setup Instruction
If CT is 200/5A, please enter 40 and save.
After CT ratio is set, the logger will automatically send the ratio to the meter after restarting, and the power and energy
displayed on the meter screen will be converted into the real value multiplied by the ratio. However, the original value
transmitted by the meter to the logger through RS485 is still the original value without ratio conversion, so after adding
the plant, the meter data is still the original value in the "Device Details".
Power Setup Instruction
Set power according to actual situation. (Default: 100W.)
E.g. If you set 100W, which means inverter adjustable production power is 100W less than load power and will continue to
buy 100W from the Grid.
If you set 0W, which means all inverter production power is used for load and grid-tie power is 0W.
(Due to there is a certain time difference between the power reduction command issued by the logger and the power
reduction command executed by the inverter, it might encounter the situation of the fluctuation of actual grid-tie power
Notice
Default: Anti-rejection Function: ON


