background image


u IBX-230-BT  Em b e d d e d   S ys te m  

P a g e   69 

5.6


Bo o t 

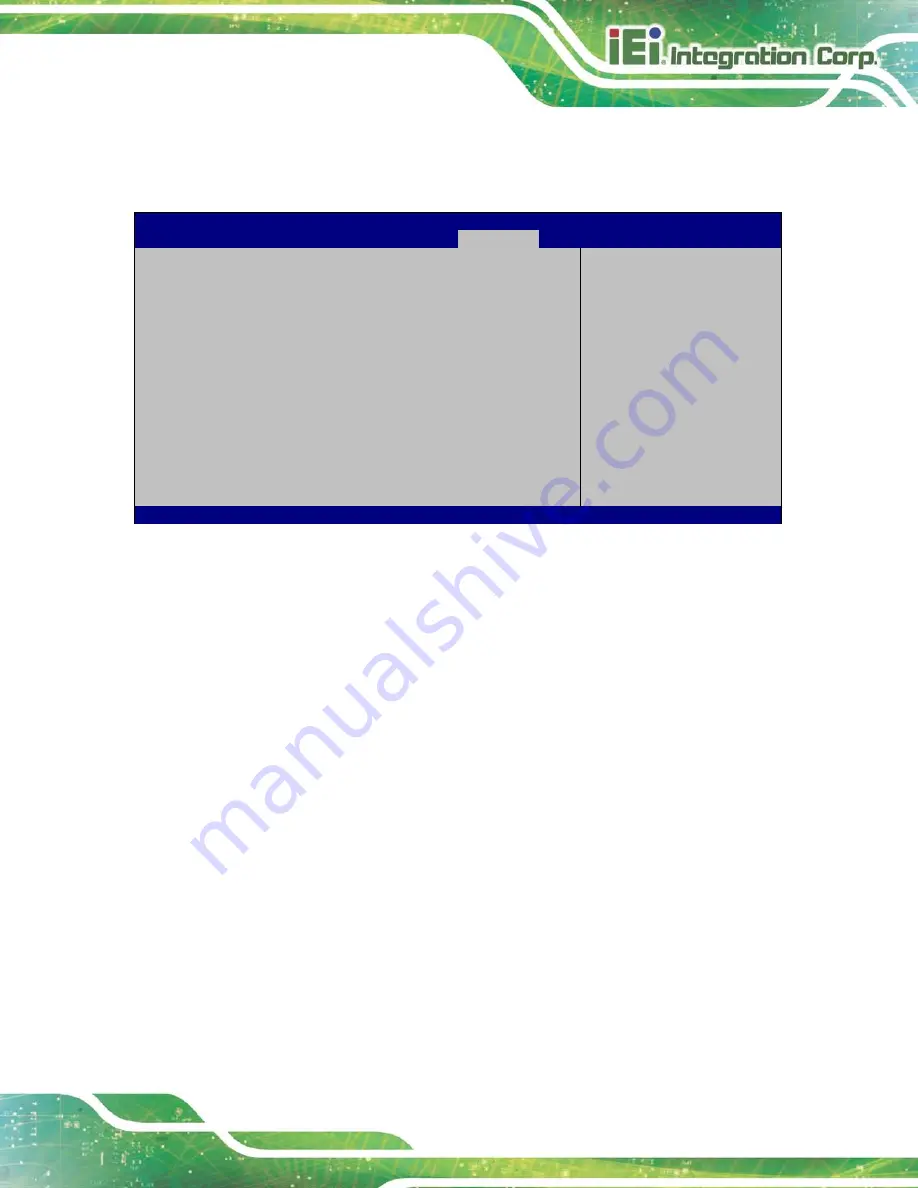
Use the 

Boot

 menu (

BIOS Menu 19

) to configure system boot options. 

Aptio Setup Utility – Copyright (C) 2013 American Megatrends, Inc. 

Main 

Advanced 

Chipset 

Security 

Boot


Save & Exit 


Boot Configuration 

Bootup NumLock State 

[On] 

Quiet Boot 

[Enabled] 

Option ROM Messages 

[Force BIOS] 

UEFI Boot 

[Disabled] 

Launch PXE OpROM 

[Disabled] 


Boot Option Priorities 


Select the keyboard 
NumLock state 
 
 
--------------------- 



: Select Screen 


: Select Item 

Enter 

Select 

F1 

General Help 

F2 

Previous Values 

F3 

Optimized 

Defaults 
F4 

Save  

ESC 

Exit 

Version 2.16.1242. Copyright (C) 2013 American Megatrends, Inc. 

BIOS Menu 19: Boot 


Bo o tu p   Nu m Lo c k S ta te  [On ] 

Use the 

Bootup NumLock State

 BIOS option to specify if the number lock setting must 

be modified during boot up. 


On 

D

EFAULT


Allows the Number Lock on the keyboard to be 

enabled automatically when the computer system 

boots up. This allows the immediate use of the 

10-key numeric keypad located on the right side of 

the keyboard. To confirm this, the Number Lock LED 

light on the keyboard is lit. 


Off 


Does not enable the keyboard Number Lock 

automatically. To use the 10-keys on the keyboard, 

press the Number Lock key located on the upper 

left-hand corner of the 10-key pad. The Number 

Lock LED on the keyboard lights up when the 

Number Lock is engaged. 

Содержание uIBX-230-BT Series

Страница 1: ...BT Embedded Sys tem Page i Us er Manual MODEL uIBX 230 BT Series Fanles s Embedded Sys tem with Intel Celeron N2930 1 83 GHz VGA GbE One USB 3 0 Three USB 2 0 One COM and RoHS Compliant Rev 1 00 11 November 2014 ...

Страница 2: ...uIBX 230 BT Embedded Sys tem Page ii Revis ion Date Version Changes 11 November 2014 1 00 Initial release ...

Страница 3: ...mages arising out of the use or inability to use the product or documentation even if advised of the possibility of such damages This document contains proprietary information protected by copyright All rights are reserved No part of this manual may be reproduced by any mechanical electronic or other means in any form without prior written permission of the manufacturer TRADEMARKS All registered t...

Страница 4: ...LIST 9 3 INSTALLATION 10 3 1 INSTALLATION PRECAUTIONS 11 3 2 INSTALLATION AND CONFIGURATION STEPS 11 3 3 HARD DISK DRIVE HDD INSTALLATION 11 3 4 AT ATX MODE SELECTION 14 3 4 1 AT Power Mode 15 3 4 2 ATX Power Mode 15 3 5 RESET THE SYSTEM 15 3 6 POWERING ON THE SYSTEM 16 3 7 MOUNT THE SYSTEM 16 3 8 EXTERNAL PERIPHERAL INTERFACE CONNECTORS 17 3 8 1 Audio Connection 18 3 8 2 LAN Connection 19 3 8 3 R...

Страница 5: ...10 EC FW Connector 33 4 2 11 Front Panel Connector 34 4 2 12 LAN LED Connector 34 4 2 13 Power Button Connector 35 4 2 14 Reset Button Connector 36 4 2 15 RS 232 Serial Port Connector 37 4 2 16 SATA 3Gb s Drive Connector 38 4 2 17 SATA Power Connector 39 4 2 18 USB Connector 40 4 3 EXTERNAL INTERFACE PANEL CONNECTORS 40 4 3 1 LAN Connector 41 4 3 2 Power Connector 42 4 3 3 USB Connectors 42 4 3 1 ...

Страница 6: ...ion 62 5 4 CHIPSET 63 5 4 1 North Bridge Configuration 64 5 4 1 1 Intel IGD Configuration 64 5 4 2 Southbridge Configuration 66 5 5 SECURITY 68 5 6 BOOT 69 5 7 EXIT 71 A SAFETY PRECAUTIONS 73 A 1 SAFETY PRECAUTIONS 74 A 1 1 General Safety Precautions 74 A 1 2 Anti static Precautions 74 A 1 3 Product Disposal 75 A 2 MAINTENANCE AND CLEANING PRECAUTIONS 76 A 2 1 Maintenance and Cleaning 76 A 2 2 Cle...

Страница 7: ...ctor 18 Figure 3 10 LAN Connection 19 Figure 3 11 DB 9 Serial Port Connector 20 Figure 3 12 USB Device Connection 21 Figure 3 13 VGA Connector 22 Figure 4 1 System Motherboard 24 Figure 4 2 AT ATX Mode Select Switch Location 26 Figure 4 3 Audio Connector Location 27 Figure 4 4 Battery Connector Location 28 Figure 4 5 BIOS FW Connector Location 28 Figure 4 6 Buzzer Connector Location 29 Figure 4 7 ...

Страница 8: ...gure 4 15 Reset Button Connector Location 37 Figure 4 16 RS 232 Serial Port Connector Location 38 Figure 4 17 SATA 3Gb s Drive Connector Location 39 Figure 4 18 SATA Power Connector Location 39 Figure 4 19 USB Connector Location 40 Figure 4 20 LAN Connector 41 Figure 4 21 VGA Connector 43 ...

Страница 9: ... Fan Connector Pinouts 31 Table 4 9 Display Port Connector Pinouts 33 Table 4 10 EC FW Connector Pinouts 34 Table 4 11 Front Panel Connector Pinouts 34 Table 4 12 LAN LED Connector Pinouts 35 Table 4 13 Power Button Connector Pinouts 36 Table 4 14 Reset Button Connector Pinouts 37 Table 4 15 RS 232 Serial Port Connector Pinouts 38 Table 4 16 SATA Power Connector Pinouts 39 Table 4 17 USB Connector...

Страница 10: ...uIBX 230 BT Embedded Sys tem Page 1 Chapter 1 1 Introduction ...

Страница 11: ...p to 8 GB The uIBX 230 BT supports a 2 5 SATA HDD with up to 3 Gb s data transfer rate One serial port one USB 3 0 port and three USB 2 0 ports ensure simplified connectivity to a variety of external peripheral devices 1 2 Model Variations The model variations of the uIBX 230 BT series are listed below Models CPU Memory uIBX 230 BT N2 R10 Intel Celeron N2930 w o memory uIBX 230 BT N2 2G R10 Intel ...

Страница 12: ...l specifications are listed in Table 1 2 Chas s is Color Silver Dimens ions WxDxH 137 x 102 8 x 52 mm Sys tem Fan Fanless Chas s is Cons truction Extruded aluminum alloys Motherboard CPU Intel Celeron N2930 1 83 GHz Chips et SoC Sys tem Memory One 204 pin DDR3L 1 35V SO DIMM 2GB pre installed system max capacity 8G Storage Hard Drive 1 x 2 5 SATA 3Gb s HDD SSD Bay I O Interfaces USB 3 0 1 x USB 3 ...

Страница 13: ...perating Shock Half sine wave shock 5G 11ms 3 shocks per axis Operating Vibration MIL STD 810F 514 5 1 HDD MIL STD 810F 514 5 C 2 SSD Weight Net Gros s 470 g 1 4 kg Safety EMC CE FCC OS Supported OS Microsoft Windows 8 Microsoft Windows Embedded Standard 7 E Table 1 2 Technical Specifications 1 5 Front Panel The front panel of the uIBX 230 BT has the following features Figure 1 2 1 x HDD LED 1 x L...

Страница 14: ...230 BT Front Panel 1 6 Rear Panel The rear panel of the uIBX 230 BT has the following features Figure 1 3 1 x AT ATX Switch 1 x RJ 45 LAN connector 1 x USB 3 0 connector 1 x USB 2 0 connector 1 x 12 V DC IN 1 x VGA port Figure 1 3 uIBX 230 BT Rear Panel ...

Страница 15: ...uIBX 230 BT Embedded Sys tem Page 6 1 7 Dimens ions The physical dimensions are shown below Figure 1 4 Physical Dimensions mm ...

Страница 16: ...uIBX 230 BT Embedded Sys tem Page 7 Chapter 2 2 Unpacking ...

Страница 17: ...ic wristband Wearing a simple anti static wristband can help to prevent ESD from damaging the board Self grounding Before handling the board touch any grounded conducting material During the time the board is handled frequently touch any conducting materials that are connected to the ground Use an anti static pad When configuring the uIBX 230 BT place it on an antic static pad This reduces the pos...

Страница 18: ... the uIBX 230 BT from or contact an IEI sales representative directly To contact an IEI sales representative please send an email to sales iei com tw The uIBX 230 BT is shipped with the following components Quantity Item and Part Number Image 1 uIBX 230 BT 1 1 x Power Adapter P N 63000 FSP036RAB608 RS 1 1 x Power Cord P N 32702 000401 100 RS 1 1 x Mounting Bracket P N 41020 0403C2 00 RS Table 2 1 ...

Страница 19: ...uIBX 230 BT Embedded Sys tem Page 10 Chapter 3 3 Ins tallation ...

Страница 20: ...led and operated only by trained and qualified personnel Maintenance upgrades or repairs may only be carried out by qualified personnel who are familiar with the associated dangers Grounding The uIBX 230 BT should be properly grounded The voltage feeds must not be overloaded Adjust the cabling and provide external overcharge protection per the electrical values indicated on the label attached to t...

Страница 21: ...uIBX 230 BT Embedded Sys tem Page 12 Figure 3 1 Retention Screws Removal Step 2 Open the HDD cover and locate the HDD bracket Figure 3 2 Figure 3 2 HDD Bracket ...

Страница 22: ...13 Step 3 Attach the HDD to the HDD bracket and then slide the HDD to connect the HDD to the SATA connector Figure 3 3 Figure 3 3 HDD Retention Screws Step 4 Secure the HDD with the HDD bracket by four retention screws on the HDD cover ...

Страница 23: ... removed retention screws 3 4 AT ATX Mode Selection AT or ATX power mode can be used on the uIBX 230 BT The selection is made through an AT ATX switch located on the rear panel Figure 3 5 To select AT mode or ATX mode follow the steps below Step 1 Locate the AT ATX switch on the rear panel Figure 3 5 Figure 3 5 AT ATX Switch Location ...

Страница 24: ...atform Manufacturing shop flow 3 4 2 ATX Power Mode With the ATX mode selected the uIBX 230 BT panel PC goes in a standby mode when it is turned off The panel PC can be easily turned on via network or a power switch in standby mode Remote power control is perfect for advertising applications since the broadcasting time for each panel PC can be set individually and controlled remotely Other possibl...

Страница 25: ...e power button on the front panel Figure 3 7 Figure 3 7 Power Button Location 3 7 Mount the Sys tem To mount the embedded system onto a wall or some other surface using the two mounting brackets please follow the steps below Step 2 Turn the embedded system over Step 3 Align the two retention screw holes in each bracket with the corresponding retention screw holes on the left side and right side ...

Страница 26: ...p 6 Align the mounting holes in the sides of the mounting brackets with the predrilled holes in the mounting surface Step 7 Insert four retention screws two in each bracket to secure the system to the wall Step 0 3 8 External Peripheral Interface Connectors The following external peripheral devices can be connected to the external peripheral interface connectors Audio devices RJ 45 Ethernet cable ...

Страница 27: ... panel If audio plugs are plugged into the wrong jacks sound quality will be very bad Step 2 Plug the audio plugs into the audio jacks Plug the audio plugs into the audio jacks If the plugs on your speakers are different an adapter will need to be used to plug them into the audio jacks Line Out port Connects to a headphone or a speaker Microphone Connects to a microphone Figure 3 9 Audio Connector...

Страница 28: ...shown in Chapter 1 Step 2 Align the connectors Align the RJ 45 connector on the LAN cable with the RJ 45 connector on the uIBX 230 BT See Figure 3 10 Figure 3 10 LAN Connection Step 3 Insert the LAN cable RJ 45 connector Once aligned gently insert the LAN cable RJ 45 connector into the RJ 45 connector Step 0 3 8 3 RS 232Serial Port Connection There are one RS 232 DB 9 connectors of the uIBX 230 BT...

Страница 29: ... connector on the uIBX 230 BT See Figure 3 11 Figure 3 11 DB 9 Serial Port Connector Step 3 Secure the connector Secure the serial device connector to the external interface by tightening the two retention screws on either side of the connector Step 0 3 8 4 USB Device Connection NOTE User must install the USB 3 0 driver before connecting a USB device to the system or else the system may not recogn...

Страница 30: ...gure 3 12 Figure 3 12 USB Device Connection Step 3 Insert the device connector Once aligned gently insert the USB device connector into the onboard connector Step 0 3 8 5 VGA Monitor Connection The uIBX 230 BT has a single female DB 15 connector on the rear panel The DB 15 connector is connected to a CRT or VGA monitor To connect a monitor to the uIBX 230 BT please follow the instructions below St...

Страница 31: ...ors are properly aligned with the insert the male connector from the VGA screen into the female connector on the uIBX 230 BT See Figure 3 13 Figure 3 13 VGA Connector Step 4 Secure the connector Secure the DB 15 VGA connector from the VGA monitor to the external interface by tightening the two retention screws on either side of the connector ...

Страница 32: ...uIBX 230 BT Embedded Sys tem Page 23 4 Sys tem Motherboard Chapter 4 ...

Страница 33: ...The Pin 1 locations of the on board connectors are also indicated in the diagram below Figure 4 1 System Motherboard 4 2 Internal Peripheral Connectors The table below shows a list of the internal peripheral interface connectors on the system motherboard Pinouts of these connectors can be found in the following sections Connector Type Label AT ATX mode select switch switch J_ATX_AT1 Audio connecto...

Страница 34: ...in wafer JP3 Front panel connector 6 pin wafer CN5 LAN LED connector 2 pin header JP2 Power button connector 2 pin wafer PWR_BTN1 Reset button connector 2 pin wafer RST_BTN1 RS 232 serial port connector 10 pin header COM1 SATA 3Gb s drive connector 7 pin SATA connector SATA1 SATA power connector 2 pin wafer SATA_PWR1 USB 2 0 connector 8 pin header USB_CAM1 Table 4 1 Peripheral Interface Connectors...

Страница 35: ...le 4 2 AT ATX Mode Select Switch Settings The location of the AT ATX mode select switch is shown in Figure 4 2 below Figure 4 2 AT ATX Mode Select Switch Location 4 2 2 Audio Connector CN Label AUDIO1 CN Type 10 pin header CN Location See Figure 4 3 CN Pinouts See Table 4 3 The audio connector is connected to external audio devices including speakers and microphones for the input and output of aud...

Страница 36: ...INE_OUTL 6 LINEIN_L 7 Analog_GND 8 Analog_GND 9 LMIC1 R 10 LMIC1 L Table 4 3 Audio Connector Pinouts 4 2 3 Battery Connector CN Label BAT1 CN Type 2 pin wafer CN Location See Figure 4 4 CN Pinouts See Table 4 4 The battery connector is connected to the system battery The battery provides power to the system clock to retain the time when power is turned off ...

Страница 37: ...escription Pin Description 1 VBATT 2 GND Table 4 4 Battery Connector Pinouts 4 2 4 BIOS FW Connector CN Label J SPI1 CN Type 6 pin wafer CN Location See Figure 4 5 CN Pinouts See Table 4 5 The BIOS FW connector is used for programming the BIOS Figure 4 5 BIOS FW Connector Location ...

Страница 38: ...5 BIOS FW Connector Pinouts 4 2 5 Buzzer Connector CN Label SP1 CN Type 2 pin wafer CN Location See Figure 3 7 CN Pinouts See Table 4 6 The buzzer connector is connected to the buzzer Figure 4 6 Buzzer Connector Location Pin Description Pin Description 1 Buzzer 2 Buzzer Table 4 6 Buzzer Connector Pinouts 4 2 6 Clear CMOS Button CN Label J _CMOS1 ...

Страница 39: ... information The clear CMOS button settings are shown in Table 4 7 Setting Description Open Normal Operation Default Push Clear CMOS Setup Table 4 7 Clear CMOS Button Settings The location of the clear CMOS button is shown in Figure 3 6 Figure 4 7 Clear CMOS Button Location 4 2 7 CPU Fan Connector CN Label CPU_FAN1 CN Type 4 pin wafer CN Location See Figure 4 8 CN Pinouts See Table 4 8 The fan con...

Страница 40: ...ocation Pin Description Pin Description 1 GND 2 V12_FAN 3 FANIO1_EC 4 FANOUT1_EC Table 4 8 CPU Fan Connector Pinouts 4 2 8 DDR3L SO DIMM Slot CN Label DIMM1 CN Type DDR3L SO DIMM slot CN Location See Figure 4 9 The DDR3L SO DIMM slot is for DDR3L SO DIMM memory module ...

Страница 41: ...ort Connector CN Label DP1 CN Type 20 pin box header CN Location See Figure 4 10 CN Pinouts See Table 4 9 The disport port connector provides flexible display function that supports VGA DVI LVDS HDMI and DisplayPort via the disport port convert board Figure 4 10 Display Port Connector Location ...

Страница 42: ..._LANE3_N 12 GND 13 GND 14 DPD_OB_LANE0_P 15 DPD_OB_LANE1_P 16 DPD_OB_LANE0_N 17 DPD_OB_LANE1_N 18 GND 19 VCC 20 NC Table 4 9 Display Port Connector Pinouts 4 2 10 EC FW Connector CN Label J P3 CN Type 2 pin header CN Location See Figure 4 11 CN Pinouts See Table 4 10 The EC FW connector is used for programming the EC Figure 4 11 EC FW Connector Location Pin Description Pin Description 1 SMB_CLK_FW...

Страница 43: ...r CN Location See Figure 4 12 CN Pinouts See Table 4 11 The front panel connector connects to the indicator LEDs on the system front panel Figure 4 12 Front Panel Connector Location Pin Description Pin Description 1 V5S 2 GND 3 PWR_LED 4 PWR_LED 5 HDD_LED 6 HDD_LED Table 4 11 Front Panel Connector Pinouts 4 2 12 LAN LED Connector CN Label J P2 CN Type 2 pin header ...

Страница 44: ... 13 LAN LED Connector Location Pin Description Pin Description 1 VCC 2 L1_LINK_ACT Table 4 12 LAN LED Connector Pinouts 4 2 13 Power Button Connector CN Label PWR_BTN1 CN Type 2 pin wafer CN Location See Figure 4 14 CN Pinouts See Table 4 13 The power button connector is connected to a power switch on the system chassis to enable users to turn the system on and off ...

Страница 45: ...ND Table 4 13 Power Button Connector Pinouts 4 2 14 Res et Button Connector CN Label RST_BTN1 CN Type 2 pin wafer CN Location See Figure 4 15 CN Pinouts See Table 4 14 The reset button connector is connected to a reset switch on the system chassis to enable users to reboot the system when the system is turned on ...

Страница 46: ...nector Location Pin Description 1 PM_SYSRST_R 2 GND Table 4 14 Reset Button Connector Pinouts 4 2 15 RS 232 Serial Port Connector CN Label COM1 CN Type 10 pin header CN Location See Figure 4 16 CN Pinouts See Table 4 15 The serial connector provides RS 232 connection ...

Страница 47: ...SIN1 4 NRTS1 5 NSOUT1 6 NCTS1 7 NDTR1 8 XRI1 9 GND 10 GND Table 4 15 RS 232 Serial Port Connector Pinouts 4 2 16 SATA 3Gb s Drive Connector CN Label SATA1 CN Type 7 pin SATA connector CN Location See Figure 4 17 The SATA 3Gb s drive connector is connected to a SATA 3Gb s drive The SATA 3Gb s drive transfers data at speeds as high as 3Gb s ...

Страница 48: ...SATA Power Connector CN Label SATA_PWR1 CN Type 2 pin wafer CN Location See Figure 4 18 CN Pinouts See Table 4 16 The SATA power connector provides 5V power output to the SATA connector Figure 4 18 SATA Power Connector Location Pin Description 1 5V 2 GND Table 4 16 SATA Power Connector Pinouts ...

Страница 49: ...gure 4 19 USB Connector Location Pin Description Pin Description 1 VCC 2 GND 3 DATA2_N 4 DATA3_P 5 DATA2_P 6 DATA3_N 7 GND 8 VCC Table 4 17 USB Connector Pinouts 4 3 External Interface Panel Connectors The table below shows a list of the external interface panel connectors on the system motherboard Pinouts of these connectors can be found in the following sections Connector Type Label 12V DC IN Co...

Страница 50: ...RJ 45 CN Location See Figure 4 1 CN Pinouts See Figure 3 11 and Table 4 19 The LAN connector connects to a local network Figure 4 20 LAN Connector Pin Description Pin Description 1 MDIA3 5 MDIA2 2 MDIA3 6 MDIA1 3 MDIA1 7 MDIA0 4 MDIA2 8 MDIA0 Table 4 19 LAN Pinouts LED Description LED Description A on linked blinking data is being sent received B off 10 Mb s green 100 Mb s orange 1000 Mb s Table 4...

Страница 51: ...CN2 CN Type USB 2 0 USB 3 0 ports CN Location See Figure 4 1 CN Pinouts See Table 4 21 The uIBX 230 BT has one external USB 2 0 port and one external USB 3 0 port The USB connector can be connected to a USB device The pinouts of USB 2 0 port USB 3 0 connectors are shown below Pin Description Pin Description 1 VCC_USB3_01 8 USB3P0_TXDN1 2 USB2P0_DM1_L 9 USB3P0_TXDP1 3 USB2P0_DP1_L 10 VCC_USB3_01 4 ...

Страница 52: ... 4 1 CN Pinouts See Figure 4 21 and Table 4 23 The VGA port connects to a monitor that accepts a standard VGA input Figure 4 21 VGA Connector Pin Description Pin Description 1 Red 2 Green 3 Blue 4 NC 5 GND 6 GND 7 GND 8 GND 9 VGAVCC 10 HOTPLUG 11 NC 12 DDCDAT 13 HSYNC 14 VSYNC 15 DDCCLK Table 4 23 VGA Connector Pinouts ...

Страница 53: ...uIBX 230 BT Embedded Sys tem Page 44 Chapter 5 5 BIOS ...

Страница 54: ... Press the DELETE or F2 key as soon as the system is turned on or 2 Press the DELETE or F2 key when the Press Del to enter SETUP message appears on the screen 0 If the message disappears before the DELETE or F2 key is pressed restart the computer and try again 5 1 2 Us ing Setup Use the arrow keys to highlight items press ENTER to select use the PageUp and PageDown keys to change entries press F1 ...

Страница 55: ...dow describing the appropriate keys to use and the possible selections for the highlighted item appears To exit the Help Window press ESC or the F1 key again 5 1 4 Unable to Reboot after Configuration Changes If the computer cannot boot after changes to the system configuration is made CMOS defaults Use the jumper described in Chapter 3 5 1 5 BIOS Menu Bar The menu bar on top of the BIOS screen ha...

Страница 56: ...t Version SEH0AR10 ROM Build Date and Time 09 18 2014 09 34 25 iWDD Vendor iEi iWDD Version SEH0ER10 bin Memory Information Total Memory 2048 MB LPDDR3 TXE Information Sec RC Version 00 05 00 00 TXE FW Version 01 00 02 1060 System Date Fri 11 07 2014 System Time 19 43 27 Access Level Administrator Set the Date Use Tab to switch between Data elements Select Screen Select Item EnterSelect Change Opt...

Страница 57: ...alues in the sections below may cause the system to malfunction Make sure that the settings made are compatible with the hardware Aptio Setup Utility Copyright C 2013 American Megatrends Inc Main Advanced Chipset Security Boot Save Exit ACPI Settings IT8528 Super IO Configuration Hardware Monitor RTC Wake Settings Serial Port Console Redirection CPU Configuration IDE Configuration USB Configuratio...

Страница 58: ...nterSelect Change Opt F1 General Help F2 Previous Values F3 Optimized Defaults F4 Save Exit ESC Exit Version 2 16 1242 Copyright C 2013 American Megatrends Inc BIOS Menu 3 ACPI Configuration ACPI Sleep State S3 only Sus pend to RAM The fields in ACPI Sleep State option cannot be changed Suspend Disabled Disable the suspend function S3 Suspend to RAM DEFAULT The caches are flushed and the CPU is po...

Страница 59: ...Defaults F4 Save ESC Exit Version 2 16 1242 Copyright C 2013 American Megatrends Inc BIOS Menu 4 Super IO Configuration 5 3 2 1 Serial Port 1 Configuration Use the Serial Port 1 Configuration menu BIOS Menu 5 to configure the serial port 1 Aptio Setup Utility Copyright C 2013 American Megatrends Inc Advanced Serial Port 1 Configuration Serial Port Enabled Device Settings IO 3F8h IRQ 4 Change Setti...

Страница 60: ...address is IRQ4 IO 3F8h IRQ 3 4 5 6 7 9 10 11 12 Serial Port I O port address is 3F8h and the interrupt address is IRQ3 4 5 6 7 9 10 11 12 IO 2F8h IRQ 3 4 5 6 7 9 10 11 12 Serial Port I O port address is 2F8h and the interrupt address is IRQ3 4 5 6 7 9 10 11 12 IO 3E8h IRQ 3 4 5 6 7 9 10 11 12 Serial Port I O port address is 3E8h and the interrupt address is IRQ3 4 5 6 7 9 10 11 12 IO 2E8h IRQ 3 4...

Страница 61: ...eral Help F2 Previous Values F3 Optimized Defaults F4 Save Exit ESC Exit Version 2 16 1242 Copyright C 2013 American Megatrends Inc BIOS Menu 6 Hardware Monitor PC Health Status The following system parameters and values are shown The system parameters that are monitored are System Temperatures o CPU Temperature Fan Speed o CPU Fan Speed Voltages o SOC_VCC o V1 0S o V1 35S o V1 35_DDR3 5 3 3 1 Sma...

Страница 62: ...Defaults F4 Save Exit ESC Exit Version 2 16 1242 Copyright C 2013 American Megatrends Inc BIOS Menu 7 Smart Fan Mode Configuration CPU Smart Fan control Auto PWM Mode Use the CPU Smart Fan control BIOS option to configure the CPU Smart Fan Full Mode Fan is on all the time Manual PWM Mode The fan spins at the speed set in the manual PWM setting Auto PWM Mode DEFAULT The fan adjusts its speed using ...

Страница 63: ...l speed only when the CPU is at a very high temperature and therefore cause the system to be damaged The Temperature of Start option can only be set if the CPU Smart Fan control option is set to Auto Mode If the CPU temperature is between Temperature of Off and Temperature of Start the fan speed change to be Start PWM To set a value select the Temperature of Start option and enter a decimal number...

Страница 64: ...e options is shown below 0 1 2 4 8 16 5 3 4 RTC Wake Settings The RTC Wake Settings menu BIOS Menu 8 configures RTC wake event Aptio Setup Utility Copyright C 2013 American Megatrends Inc Advanced Wake system with Fixed Time Disabled Enable or disable System wake on alarm event When enabled System will wake on the date hr min sec specified Select Screen Select Item EnterSelect F1 General Help F2 P...

Страница 65: ...to wake every day at the specified time Besides the following options appear with values that can be selected Wake up date Wake up hour Wake up minute Wake up second After setting the alarm the computer turns itself on from a suspend state when the alarm goes off 5 3 5 Serial Port Cons ole Redirection The Serial Port Console Redirection menu BIOS Menu 9 allows the console redirection options to be...

Страница 66: ... 2 16 1242 Copyright C 2013 American Megatrends Inc BIOS Menu 9 Serial Port Console Redirection Cons ole Redirection Dis abled Use Console Redirection option to enable or disable the console redirection function Disabled DEFAULT Disabled the console redirection function Enabled Enabled the console redirection function 5 3 5 1 Cons ole Redirection Settings The Console Redirection Settings menu BIOS...

Страница 67: ...Optimized Defaults F4 Save ESC Exit Version 2 16 1242 Copyright C 2013 American Megatrends Inc BIOS Menu 10 Console Redirection Settings Terminal Type ANSI Use the Terminal Type option to specify the remote terminal type VT100 The target terminal type is VT100 VT100 The target terminal type is VT100 VT UTF8 The target terminal type is VT UTF8 ANSI DEFAULT The target terminal type is ANSI Bits per ...

Страница 68: ...tecting the transmission errors None DEFAULT No parity bit is sent with the data bits Even The parity bit is 0 if the number of ones in the data bits is even Odd The parity bit is 0 if the number of ones in the data bits is odd Mark The parity bit is always 1 This option does not provide error detection Space The parity bit is always 0 This option does not provide error detection Stop Bits 1 Use t...

Страница 69: ...n Technology Enabled EIST Enabled When enabled a VMM can utilize the additional hardware capabilities provided by Vanderpool Technology Select Screen Select Item EnterSelect F1 General Help F2 Previous Values F3 Optimized Defaults F4 Save ESC Exit Version 2 16 1242 Copyright C 2013 American Megatrends Inc BIOS Menu 11 CPU Configuration Intel Virtualization Technology Dis abled Use the Intel Virtua...

Страница 70: ...rt 0 HotPlug Disabled SATA Port0 Not Present Select IDE AHCI Select Screen Select Item EnterSelect F1 General Help F2 Previous Values F3 Optimized Defaults F4 Save ESC Exit Version 2 16 1242 Copyright C 2013 American Megatrends Inc BIOS Menu 12 IDE Configuration SATA Mode ACHI Mode Use the SATA Mode option to configure SATA devices as normal IDE devices IDE Mode Configures SATA devices as normal I...

Страница 71: ...eyboard Legacy USB Support Enabled Enables Legacy USB support AUTO option disables legacy support if no USB devices are connected DISABLE option will keep USB devices available only for EFI applications Select Screen Select Item EnterSelect F1 General Help F2 Previous Values F3 Optimized Defaults F4 Save ESC Exit Version 2 16 1242 Copyright C 2013 American Megatrends Inc BIOS Menu 13 USB Configura...

Страница 72: ...vices are connected 5 4 Chips et Use the Chipset menu BIOS Menu 14 to access the Northbridge and Southbridge configuration menus WARNING Setting the wrong values for the Chipset BIOS selections in the Chipset BIOS menu may cause the system to malfunction Aptio Setup Utility Copyright C 2013 American Megatrends Inc Main Advanced Chipset Security Boot Save Exit North Bridge South Bridge North Bridge...

Страница 73: ...igure Intel IGD Settings Select Screen Select Item EnterSelect Change Opt F1 General Help F2 Previous Values F3 Optimized Defaults F4 Save Exit ESC Exit Version 2 16 1242 Copyright C 2013 American Megatrends Inc BIOS Menu 15 Northbridge Chipset Configuration Memory Information The Memory Information lists a brief summary of the on board memory The fields in Memory Information cannot be changed 5 4...

Страница 74: ... Copyright C 2013 American Megatrends Inc BIOS Menu 16 Integrated Graphics DVMT Pre Allocated 256MB Use the DVMT Pre Allocated option to set the amount of system memory allocated to the integrated graphics processor when the system boots The system memory allocated can then only be used as graphics memory and is no longer available to applications or the operating system Configuration options are ...

Страница 75: ...rends Inc Chipset Auto Power Button Status Disabled ATX Restore AC Power Loss Last State Power Saving EUP Disabled Audio Configuration Audio Controller Enabled Select AC power state when power is re applied after a power failure Select Screen Select Item EnterSelect Change Opt F1 General Help F2 Previous Values F3 Optimized Defaults F4 Save Exit ESC Exit Version 2 16 1242 Copyright C 2013 American...

Страница 76: ...disable the power saving function Disabled DEFAULT Power saving function is disabled Enabled Power saving function is enabled It will reduce power consumption when the system is off Audio Controller Enabled Use the Audio Controller option to enable or disable the High Definition Audio controller Disabled The onboard High Definition Audio controller is disabled Enabled DEFAULT The onboard High Defi...

Страница 77: ...is is a power on password and must be entered to boot or enter Setup In Setup the User will have Administrator rights The password length must be Minimum length 3 Maximum length 20 Administrator Password User Password Set Setup Administrator Password Select Screen Select Item EnterSelect F1 General Help F2 Previous Values F3 Optimized Defaults F4 Save ESC Exit Version 2 16 1242 Copyright C 2013 Am...

Страница 78: ... 16 1242 Copyright C 2013 American Megatrends Inc BIOS Menu 19 Boot Bootup NumLock State On Use the Bootup NumLock State BIOS option to specify if the number lock setting must be modified during boot up On DEFAULT Allows the Number Lock on the keyboard to be enabled automatically when the computer system boots up This allows the immediate use of the 10 key numeric keypad located on the right side ...

Страница 79: ... display mode to current UEFI Boot Dis abled Use the UEFI Boot option to enable or disable to boot from the UEFI devices Enabled Boot from UEFI devices is enabled Disabled DEFAULT Boot from UEFI devices is disabled Launch PXE OpROM Dis abled Use the Launch PXE OpROM option to enable or disable boot option for legacy network devices Disabled DEFAULT Ignore all PXE Option ROMs Enabled Load PXE Optio...

Страница 80: ... EnterSelect F1 General Help F2 Previous Values F3 Optimized Defaults F4 Save ESC Exit Version 2 16 1242 Copyright C 2013 American Megatrends Inc BIOS Menu 20 Exit Save Changes and Res et Use the Save Changes and Reset option to save the changes made to the BIOS options and to exit the BIOS configuration setup program Dis card Changes and Res et Use the Discard Changes and Reset option to exit the...

Страница 81: ...Page 72 Save as Us er Defaults Use the Save as User Defaults option to save the changes done so far as user defaults Res tore Us er Defaults Use the Restore User Defaults option to restore the user defaults to all the setup options ...

Страница 82: ...uIBX 230 BT Embedded Sys tem Page 73 A Safety Precautions Appendix A ...

Страница 83: ...system Do not apply voltage levels that exceed the specified voltage range Doing so may cause fire and or an electrical shock Electric shocks can occur if opened while still powered on Do not drop or insert any objects into the ventilation openings If considerable amounts of dust water or fluids enter the system turn off the power supply immediately unplug the power cord and contact the system ven...

Страница 84: ... pad When configuring or working with an electrical component place it on an antic static pad This reduces the possibility of ESD damage Only handle the edges of the electrical component When handling the electrical component hold the electrical component by its edges A 1 3 Product Dis pos al CAUTION Risk of explosion if battery is replaced by and incorrect type Only certified engineers should rep...

Страница 85: ...utious of all small removable components when vacuuming the uIBX 230 BT Turn the uIBX 230 BT off before cleaning the uIBX 230 BT Never drop any objects or liquids through the openings of the uIBX 230 BT Be cautious of any possible allergic reactions to solvents or chemicals used when cleaning the uIBX 230 BT Avoid eating drinking and smoking within vicinity of the uIBX 230 BT A 2 2 Cleaning Tools ...

Страница 86: ...of cleaning the uIBX 230 BT Dust and dirt can restrict the airflow in the uIBX 230 BT and cause its circuitry to corrode Cotton swabs Cotton swaps moistened with rubbing alcohol or water are excellent tools for wiping hard to reach areas Foam swabs Whenever possible it is best to use lint free swabs such as foam swabs for cleaning ...

Страница 87: ...uIBX 230 BT Embedded Sys tem Page 78 B BIOS Menu Options Appendix B ...

Страница 88: ...onsole Redirection Disabled 57 Terminal Type ANSI 58 Bits per second 115200 58 Data Bits 8 59 Parity None 59 Stop Bits 1 59 Intel Virtualization Technology Disabled 60 EIST Enabled 60 SATA Mode ACHI Mode 61 Serial ATA Port 0 Enabled 61 SATA Port 0 HotPlug Disabled 62 USB Devices 62 Legacy USB Support Enabled 62 Memory Information 64 DVMT Pre Allocated 256MB 65 DVMT Total Gfx Mem Max 65 Primary IGF...

Страница 89: ...n 69 Quiet Boot Enabled 70 Option ROM Messages Force BIOS 70 UEFI Boot Disabled 70 Launch PXE OpROM Disabled 70 Boot Option Priority 70 Save Changes and Reset 71 Discard Changes and Reset 71 Restore Defaults 71 Save as User Defaults 72 Restore User Defaults 72 ...

Страница 90: ...uIBX 230 BT Embedded Sys tem Page 81 C Watchdog Timer Appendix D ...

Страница 91: ...A BIOS function call INT 15H is used to control the Watchdog Timer INT 15H AH 6FH Sub function AL 2 Sets the Watchdog Timer s period BL Time out value Its unit second is dependent on the item Watchdog Timer unit select in CMOS setup Table C 1 AH 6FH Sub function Call sub function 2 to set the time out period of Watchdog Timer first If the time out value is not zero the Watchdog Timer starts counti...

Страница 92: ...the system resets Example program INITIAL TIMER PERIOD COUNTER W_LOOP MOV AX 6F02H setting the time out value MOV BL 05 time out value is 5 seconds INT 15H ADD THE APPLICATION PROGRAM HERE CMP EXIT_AP 1 is the application over JNE W_LOOP No restart the application MOV AX 6F02H disable Watchdog Timer MOV BL 0 INT 15H EXIT ...

Страница 93: ...uIBX 230 BT Embedded Sys tem Page 84 Appendix E D Hazardous Materials Dis clos ure ...

Страница 94: ... the presences of small quantities of certain materials in the product and is applicable to China RoHS only A label will be placed on each product to indicate the estimated Environmentally Friendly Use Period EFUP This is an estimate of the number of years that these substances would not leak out or undergo abrupt change This product may contain replaceable sub assemblies components which have a s...

Страница 95: ...uit Board O O O O O O Metal Fas teners O O O O O O Cable As s embly O O O O O O Fan As s embly O O O O O O Power Supply As s emblies O O O O O O Battery O O O O O O O This toxic or hazardous substance is contained in all of the homogeneous materials for the part is below the limit requirement in SJ T11363 2006 X This toxic or hazardous substance is contained in at least one of the homogeneous mate...

Страница 96: ...可能包含有较短的环境友好使用期限的可替换元件 像是电池或灯管 这些元 件将会单独标示出来 部件名称 有毒有害物质或元素 铅 Pb 汞 Hg 镉 Cd 六价铬 CR VI 多溴联苯 PBB 多溴二苯 醚 PBDE 壳体 O O O O O O 显示 O O O O O O 印刷电路板 O O O O O O 金属螺帽 O O O O O O 电缆组装 O O O O O O 风扇组装 O O O O O O 电力供应组装 O O O O O O 电池 O O O O O O O 表示该有毒有害物质在该部件所有物质材料中的含量均在 SJ T11363 2006 标准规定的限量要求以下 X 表示该有毒有害物质至少在该部件的某一均质材料中的含量超出 SJ T11363 2006 标准规定的限量要求 ...

Отзывы: