PCIE-Q57A PICMG 1.3 CPU Card
Page 40
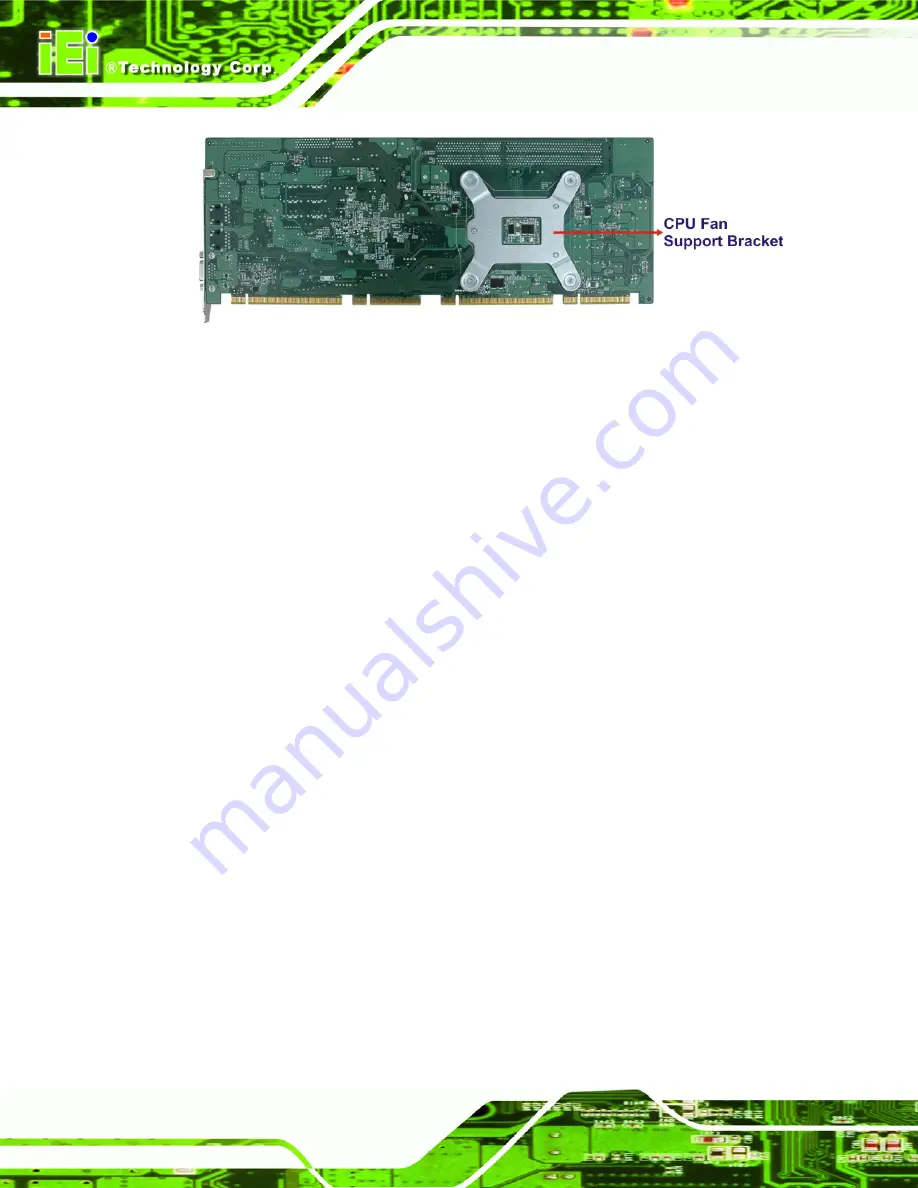
Figure 4-5: Cooling Kit Support Bracket
Step 2:
Place the cooling kit onto the socket LGA1156 CPU
. Make sure the CPU
cable can be properly routed when the cooling kit is installed.
Step 3:
Mount the cooling kit
. Gently place the cooling kit on top of the CPU. Make
sure the four threaded screws on the corners of the cooling kit properly pass
through the holes of the cooling kit bracket.
Step 4:
Secure the cooling kit
by fastening the four retention screws of the cooling kit.
Step 5:
Connect the fan cable
. Connect the cooling kit fan cable to the fan connector
on the PCIE-Q57A. Carefully route the cable and avoid heat generating chips
and fan blades.
Step 0:
Содержание PCIE-Q57A
Страница 13: ...PCIE Q57A PICMG 1 3 CPU Card Page 1 1 Introduction Chapter 1 ...
Страница 21: ...PCIE Q57A PICMG 1 3 CPU Card Page 9 2 Unpacking Chapter 2 ...
Страница 25: ...PCIE Q57A PICMG 1 3 CPU Card Page 13 3 Connectors Chapter 3 ...
Страница 44: ...PCIE Q57A PICMG 1 3 CPU Card Page 32 4 Installation Chapter 4 ...
Страница 66: ...PCIE Q57A PICMG 1 3 CPU Card Page 54 5 BIOS Screens Chapter 5 ...
Страница 111: ...PCIE Q57A PICMG 1 3 CPU Card Page 99 Appendix A A Intel AMT Configuration ...
Страница 116: ...PCIE Q57A PICMG 1 3 CPU Card Page 104 Appendix B B BIOS Menu Options ...
Страница 120: ...PCIE Q57A PICMG 1 3 CPU Card Page 108 Appendix C C One Key Recovery ...
Страница 148: ...PCIE Q57A PICMG 1 3 CPU Card Page 136 Appendix D D Terminology ...
Страница 153: ...PCIE Q57A PICMG 1 3 CPU Card Page 141 Appendix E E Watchdog Timer ...
Страница 156: ...PCIE Q57A PICMG 1 3 CPU Card Page 144 Appendix F F Hazardous Materials Disclosure ...


