


ITG-100-AL Embedded System
Page 18
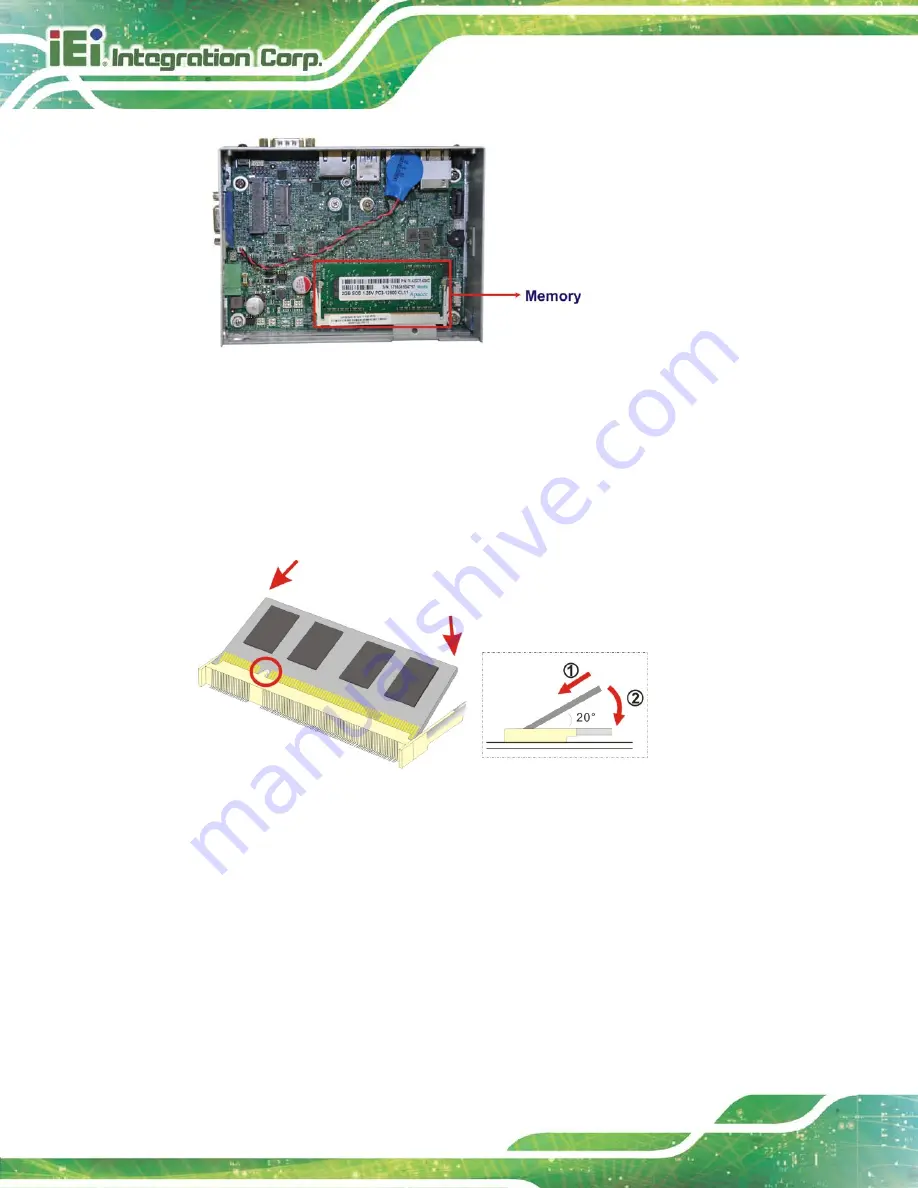
Figure 3-4: SO-DIMM Socket
Step 3:
Align the SO-DIMM with the socket. The SO-DIMM must be oriented in such a
way that the notch in the middle of the SO-DIMM must be aligned with the
plastic bridge in the socket (
Step 4:
Push the SO-DIMM into the socket at an angle (
Figure 3-5: SO-DIMM Installation
Step 5:
Gently pull the arms of the SO-DIMM socket out and push the rear of the
SO-DIMM down (
Step 6:
Release the arms on the SO-DIMM socket. They clip into place and secure the
SO-DIMM in the socket.
Step 7:
Install the bracket that was previously removed in the same position it was
before.
Step 8:
Reinstall the bottom panel to the ITG-100-AL.
Содержание ITG-100-AL
Страница 14: ...ITG 100 AL Embedded System Page 2 Chapter 1 1 Introduction ...
Страница 19: ...ITG 100 AL Embedded System Page 7 Figure 1 3 ITG 100 AL Front Panel ...
Страница 22: ...ITG 100 AL Embedded System Page 10 Chapter 2 2 Unpacking ...
Страница 25: ...ITG 100 AL Embedded System Page 13 Chapter 3 3 Installation ...
Страница 44: ...ITG 100 AL Embedded System Page 32 4 System Motherboard Chapter 4 ...
Страница 54: ...ITG 100 AL Embedded System Page 42 Chapter 5 5 BIOS ...
Страница 83: ...ITG 100 AL Embedded System Page 71 Chapter 6 6 Software Installation ...
Страница 86: ...ITG 100 AL Embedded System Page 74 Appendix A A Regulatory Compliance ...
Страница 92: ...ITG 100 AL Embedded System Page 80 B Safety Precautions Appendix B ...
Страница 98: ...ITG 100 AL Embedded System Page 86 Appendix C C BIOS Menu Options ...
Страница 101: ...ITG 100 AL Embedded System Page 89 Appendix D D Terminology ...
Страница 105: ...ITG 100 AL Embedded System Page 93 Appendix E E Hazardous Materials Disclosure ...


