IOVU-210AD-RK39 Panel PC
Page 25
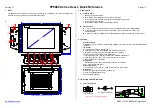
Figure 3-11: Stand Mounting
3.5 Power-On/Off Procedure
WARNING:
Make sure a power supply with the correct input voltage is being fed into
the system. Incorrect voltages applied to the system may cause damage to
the internal electronic components and may also cause injury to the user.
To power-on, connect the IOVU-210AD-RK39 to a power source either through the power
jack or the power input terminal block. Once connected, the system will automatically turn
on and the power LED on the front panel will light up in blue.
Содержание IOVU-210AD-RK39
Страница 2: ...IOVU 210AD RK39 Panel PC Page ii Revision Date Version Changes October 8 2018 1 00 Initial release ...
Страница 9: ...IOVU 210AD RK39 Panel PC Page 1 Chapter 1 1 Introduction ...
Страница 16: ...IOVU 210AD RK39 Panel PC Page 8 1 8 Dimensions The dimensions are shown below Figure 1 7 Dimensions unit mm ...
Страница 17: ...IOVU 210AD RK39 Panel PC Page 9 Chapter 2 2 Unpacking ...
Страница 20: ...IOVU 210AD RK39 Panel PC Page 12 Chapter 3 3 Installation ...
Страница 37: ...IOVU 210AD RK39 Panel PC Page 29 Chapter 4 4 Android OS ...
Страница 45: ...IOVU 210AD RK39 Panel PC Page 37 Figure 4 8 Notification List and System Status ...
Страница 46: ...IOVU 210AD RK39 Panel PC Page 38 Appendix A A Regulatory Compliance ...
Страница 51: ...IOVU 210AD RK39 Panel PC Page 43 Appendix B B Safety Precautions ...
Страница 56: ...IOVU 210AD RK39 Panel PC Page 48 Appendix C C Hazardous Materials Disclosure ...


