


AFL2-17A/AB-H61
P a g e 118
Figure 7-1: Back Cover Retention Screws
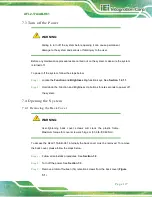
S te p 4:
Carefully separate the back cover from the chassis and lift the cover clear of the
device
S te p 0:
7.4.2
Re m o vin g th e In te rn a l Alu m in u m Co ve r
To remove the internal aluminum cover, follow the steps below.
S te p 1:
Remove the seven (7) retention screws securing the internal aluminum cover to
the chassis.
Figure 7-2: Internal Cover Retention Screws
Содержание AFL2-17A-H61 Series
Страница 21: ...AFL2 17A AB H61 Page 1 1 Introduction Chapter 1...
Страница 34: ...AFL2 17A AB H61 Page 14 2 LED Light Bar Optional Chapter 2...
Страница 57: ...AFL2 17A AB H61 Page 37 3 Detailed Specifications Chapter 3...
Страница 63: ...AFL2 17A AB H61 Page 43 4 Unpacking Chapter 4...
Страница 68: ...AFL2 17A AB H61 Page 48 5 Ins tallation Chapter 5...
Страница 98: ...AFL2 17A AB H61 Page 78 Chapter 6 6 Sys tem Motherboard...
Страница 134: ...AFL2 17A AB H61 Page 114 Figure 6 36 LCD panel Selection Jumper Location...
Страница 135: ...AFL2 17A AB H61 Page 115 7 Sys tem Maintenance Chapter 7...
Страница 144: ...AFL2 17A AB H61 Page 124 8 BIOS Setup Chapter 8...
Страница 181: ...AFL2 17A AB H61 Page 161 9 Software Drivers Chapter 9...
Страница 217: ...AFL2 17A AB H61 Panel PC Page 197 10 Cooling Management Cons ole iCMC Chapter 7...
Страница 226: ...AFL2 17A AB H61 Panel PC Page 206 A Safety Precautions Appendix A...
Страница 231: ...AFL2 17A AB H61 Panel PC Page 211 B BIOS Menu Options Appendix B...
Страница 234: ...AFL2 17A AB H61 Panel PC Page 214 Appendix C C One Key Recovery...
Страница 242: ...AFL2 17A AB H61 Panel PC Page 222 Figure C 5 Partition Creation Commands...
Страница 275: ...AFL2 17A AB H61 Panel PC Page 255 D Hazardous Materials Dis clos ure Appendix D...