Idis DR-6308P-SA Скачать руководство пользователя страница 9

9

Apply/Cancel Buttons

While in Camera Registration mode, select 

Apply

 to register 

all changes. When selecting 

Apply

, the message will be 

displayed. You can activate or deactivate Self-diagnosis.
Select 

Cancel

 to exit Camera Registration mode without 

applying the changes.

It is not possible to register a camera that has already 
been registered to a different NVR.

Diagnosis Process

When the camera is registered to the NVR, 

Self-diagnosis

runs automatically for the new registered and changed 
cameras. If Self-diagnosis is processing, 

Diagnosis 

Processing

 message will be displayed.

If 

Self-diagnosis

 is failed, 

Diagnosis Requirement

message will be displayed. In this case, you can run 
Selfdiagnosis manually.
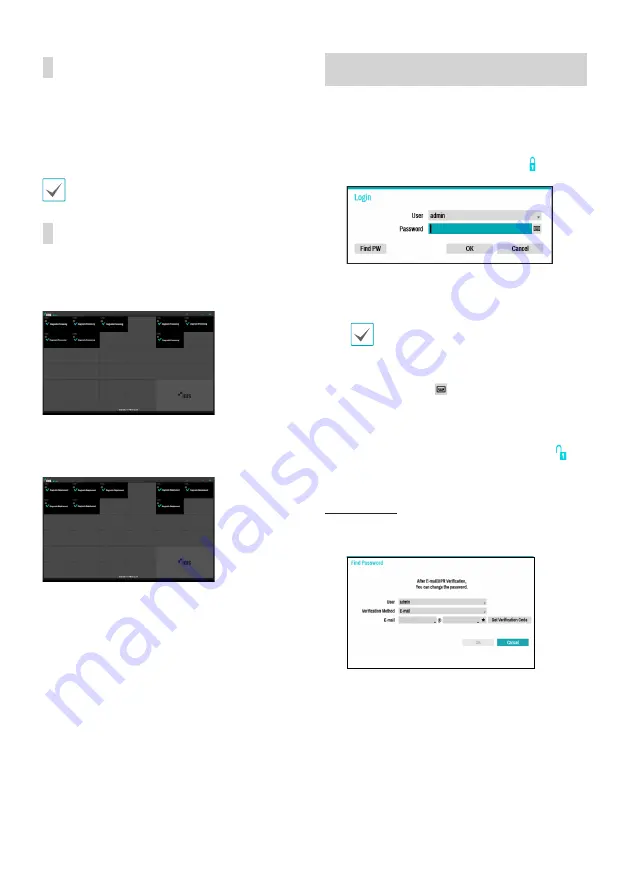
Login

Configuring the NVR’s settings and accessing its searching 
and other functions require an authorized user login.

Bring up the Live menu and either press the 

Setup


button on the remote control or click on   icon using 
the mouse to log in.

Select a user, enter the password, and then select 

OK

.

• 

Leaving the admin account unassigned with 
a password poses a security risk. Please assign 
a password at your earliest convenience. A 
warning message will continue to be displayed 
until a password is assigned.

• 

Click on the 

 button next to the password 

field using the mouse. This will bring up a 
virtual keyboard you can use to assign a 
password.

To log out, bring up the Live menu and click on   

icon using the mouse.

Find Password

Enter a user, registered email and then select 

Get 

Verification Code

.

Содержание DR-6308P-SA

Страница 1: ...DR 6308P S DR 6308P SA DR 6316PS S DR 6316PS SA DR 6332PS S DR 6332PS SA Network Video Recorder Quick Guide Powered by...

Страница 2: ...bjects have fallen into the equipment C If the equipment has been exposed to rain or water D If the equipment does not operate normally by following the operating instructions adjust only those contro...

Страница 3: ...systems Thismarkingshownontheproductoritsliterature indicatesthatitshouldnotbedisposedwithotherhouseholdwastesattheendofits workinglife Topreventpossibleharmtotheenvironmentorhumanhealthfromuncontroll...

Страница 4: ...Video Recorder Power Cable Quick Guide SATA2 Cables Optical USB Mouse IR Remote Control Assembly Screws for Adding Hard Disk Drives Rack mount Kit Please download IDIS Center software and product manu...

Страница 5: ...e connected and the number of cameras that can be displayed For simplicity the illustrations and descriptions in this document refer to the 32 channel model Rear Panel 1 3 5 7 9 11 13 15 10 12 14 16 2...

Страница 6: ...abit PoE Switch eSATA Storage Device Network Camera IDIS Center Remote Monitoring Remote Control b a c d e f 3 1 2 4 5 6 7 8 9 0 1 ID Button 2 Panic Button 3 Camera Buttons 4 Status Button 5 Layout Bu...

Страница 7: ...d Date Time Setup The new date and time settings will only be applied after clicking Next Record Method Setup Record Video Quality Setup Higher recording quality uses up more disk space H 265 Camera C...

Страница 8: ...on by the NVR For more information about supported network devices and models contact your retailer Mode Select the scan mode Advanced Setup If the camera is networked but not scanned use this setup T...

Страница 9: ...layed In this case you can run Selfdiagnosis manually Login Configuring the NVR s settings and accessing its searching and other functions require an authorized user login 1 Bring up the Live menu and...

Страница 10: ...n Press MENU once more to hide the menu Use the Arrow buttons on the front panel of the NVR or the remote control to select the menu options Video Recording Records the live video Refer to the manual...

Страница 11: ...ral Default Value 12088 Or http fen idisglobal com FEN Name FEN Name NVR name configured on the FEN server Or http web idisglobal com will be prompted to enter NVR s IP address or FEN name registered...

Страница 12: ...he system this step will be skipped automatically 6 When the Installation Completed window appears click Close and finish the installation Start Program When IDIS Center software is installed IDIS Cen...

Страница 13: ...t OK for remote access 6 Click Device Group on the Sites panel and click E at the bottom Add Device Group window will appear Name Enter a name for the device group Location Select an location for the...

Страница 14: ...E may result in excessive data charges Android OS device 1 Open the Play Store Google Play on your Android device 2 In Play Store Google Play enter IDIS Mobile in the search field 3 Install IDIS Mobil...

Страница 15: ...may change without prior notice VIDEO Video Inputs 8 16 32IPchannels DR 6308P S DR 6308P SA DR 6316PS S DR 6316PS SA DR 6332PS S DR 6332PS SA Video Outputs 1HDMI 1VGA Display Resolution 3840x2160 1920...

Страница 16: ...SMobile INTERFACE Audio In Out Local NVR 1RCA 1RCA 1HDMI IPCamera 32 32 DependingonIPCamera DR 6332PS S DR 6332PS SA Local NVR 1RCA 1RCA 1HDMI IPCamera 16 16 DependingonIPCamera DR 6316PS S DR 6316PS...

Страница 17: ...IDIS Co Ltd For more information please visit at www idisglobal com...

Отзывы: