background image

WWW.IDEA-FLY.COM

Hero‑550 User Manual

IDF 1.01

2014.10.28 version


Thanks


for


purchasing


Hero-550.Please


regularly


visit


Hero-550


web


page


at


www.idea-fly.com


which


is


updated


regularly.


product


information,technical


updates


and


manual


corrections


will


be


available


on


this


web


page.


Due


to


unforeseen


changes


or


product


upgrades,


the


information


contained


in


the


manual


is


subject


to


change


without


notice.


Read


this


disclaimer


carefully


before


using


this


product.


By


using


this


product


,you


here


by


agree


to


this


disclaimer


and


signify


that


you


have


ready


them


fully.please


strictly


follow


the


manual


to


assemble


and


use


the


product.


The


manufacturer


and


seller


assume

Содержание Hero-550

Страница 1: ...ual corrections will be available on this web page Due to unforeseen changes orproduct upgrades the information contained in the manual is subject to change withoutnotice Read this disclaimer carefully before using this product By using this product you here by agree to this disclaimer and signify that you have ready them fully please strictly follow the manual to assemble and use the product The ...

Страница 2: ...e can fly in rain and dust Flight Cautions 1 Keep flying the multi rotor a distance from people building high voltage lines tall trees water etc 2 Do not get close to or touch the working motors and propellers which will cause serious injury 3 Do not over load the multi rotor 4 Make sure the propellers and the motors are installed correctly and firmly before flying 5 Make sure all parts of product...

Страница 3: ...uct name QTY picture 1 Center Frame 1set 2 arms 4PCS 2red 2white 3 Land Gear Support Tube Base Pipe Distribution board 2sets 2sets 2sets 4 Carbon propellers 2sets 5 Screws kits M3 6 8PCS M3 5 12PCS M3 8 8PCS Pad for propellers 4PCS ...

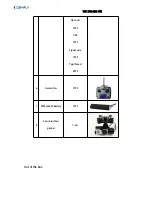
Страница 4: ...WWW IDEA FLY COM Hex nuts 4PCS USB 1PCS Signal wire 1PCS Top thread 8PCS 6 transmitter 1PCS 7 9500mah 4Sbattery 1PCS 8 2 axis brushless gimbal 1 sets Out of the box ...

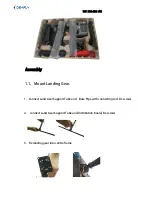
Страница 5: ...OM Assembly 1 1 Mount Landing Gear 1 Connect Land Gear Support Tube and Base Pipe with connecting rod Fix screws 2 connect Land Gear Support Tube and Distribution board Fix screws 3 Fix landing gear into centre frame ...

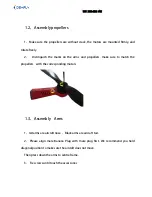
Страница 6: ... and propellers make sure to match the propellers with the corresponding motors 1 3 Assembly Arms 1 red arms are aircraft nose Black arms are aircraft tail 2 Please align male Banana Plug with male plug first We recommend you hold diagonal position to make sure the aircraft does not move Then press down the arms to centre frame 3 Fix screws until touch the accessories ...

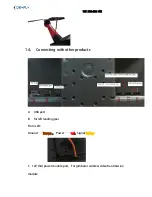
Страница 7: ...IDEA FLY COM 1 4 Connecting with other products A USB port B for left landing gear From Left Ground Brown Power Red Signal Yellow C 12V 3A power module port For gimbal or wireless video transmission module ...

Страница 8: ...fi module or OSD From left Tx Ground Rx E 50HZ 1mS 2ms PWM Signal From left match with VRA VRB VRC dials for controlling the pitch roll yaw of the gimbal F for right landing gear From left Ground Brown Power Red Signal Yellow Remote controller ...

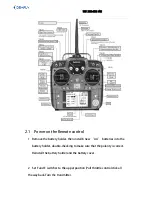
Страница 9: ...r then install 8 new AA batteries into the battery holder double checking to make sure that the polarity is correct Reinstall the battery holder and the battery cover 2 Set F and E switches to the upper position Pull throttle control stick all the way back Turn the transmitter ...

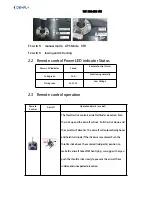
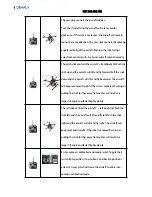
Страница 10: ...trol Aircraft Operation details mode2 The throttle stick controls aircraft altitude elevation Push the stick up and the aircraft will rise Pull the stick down and the aircraft will decend The aircraft will automatically hover and hold its altitude if the stickers are centered Push the throttle stick above the centered mid point position to make the aircraft take off When flying we suggest that you...

Страница 11: ...The aircraft will keep level and straight if the stick is centered Pushing or pulling the stick further away from center will result in a larger tilt angle and faster flight velocity The roll stick controls the aircraft s left right tilt Push the stick left and the aircraft will tilt and fly left Push the stick right and the aircraft will tilt and fly right The aircraft will keep level and straigh...

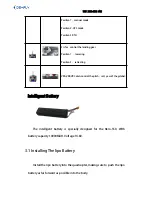
Страница 12: ...ting VRA VRB VRC dials control the pitch roll yaw of the gimbal Intelligent Battery The intelligent battery is specially designed for the Hero 550 With battery capacity 10000MAH Voltage 14 8V 3 1 Installing The lipo Battery Install the lipo battery into the quadcopter making sure to push the lipo battery as far forward as possible into the body ...

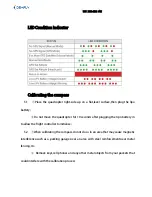
Страница 13: ...0 seconds after plugging the lipo battery in to allow the flight controller to initialize 5 2 When calibrating the compass do not do so in an area that may cause magnetic interference such as a parking garage near an area with steel reinforcement near metal fencing rtc Remove keys cell phones and any other metal objects from your pockets that could interfere with the calibration process ...

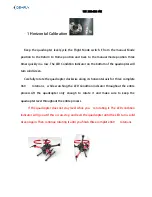
Страница 14: ... quadcopter clockwise along its horizontal axis for three complete 360 rotations while watching the LED Condition indicator throughout the entire process Lift the quadcopter only enough to rotate it and make sure to keep the quadcopter level throughout the entire process If the quadcopter does not stay level while you re rotating it The LED condition Indicator will go out If this occurs stop and l...

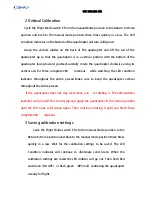
Страница 15: ...tire process Make sure to keep the quadcopter vertical throughout the entire process If the quadcopter does not stay level while you re rotating it The LEDcondition Indicator will go out If this occurs stop and jiggle the quadcopter in the vertical position until the LED turns solid Green Again Then continue rotating it until you finish three complete 360 rotations 3 Saving calibration settings Cy...

Страница 16: ... seconds push the throttle control stick forward to turn the motors ON 1 Before you flight make sure LED indicator blink green 3 times Keep E switch at GPS hover position 2 During the flight Never pull the throttle stick to the lowest position If you don t push the throttle control stick forward within 5 seconds or if you re flying and pull the throttle control stick all the way back to turn the m...

Страница 17: ...ill desend then land Pull the throttle stick to the bottom switch CH5 to manual mode motors will stop 1 distance over home point 20M Height 20M Elevate to 20M Then fly back to home point Height 20M fly back to home directly 2 distance over home point 20M fly back to home ...

Отзывы: